Sign in and create your account
This page helps you access WiLine Edge Cloud (WEC) by signing in, resetting your password, or creating a new account. If you're new, start with Create Your Account; otherwise, go to Sign In.
Sign In
Sign in to access your dashboard and start managing your cloud resources.
- Navigate to WiLine Edge Cloud
- Enter your Email
- Enter your Password
- Click Sign In
If you don't have your credentials, contact WiLine Support.
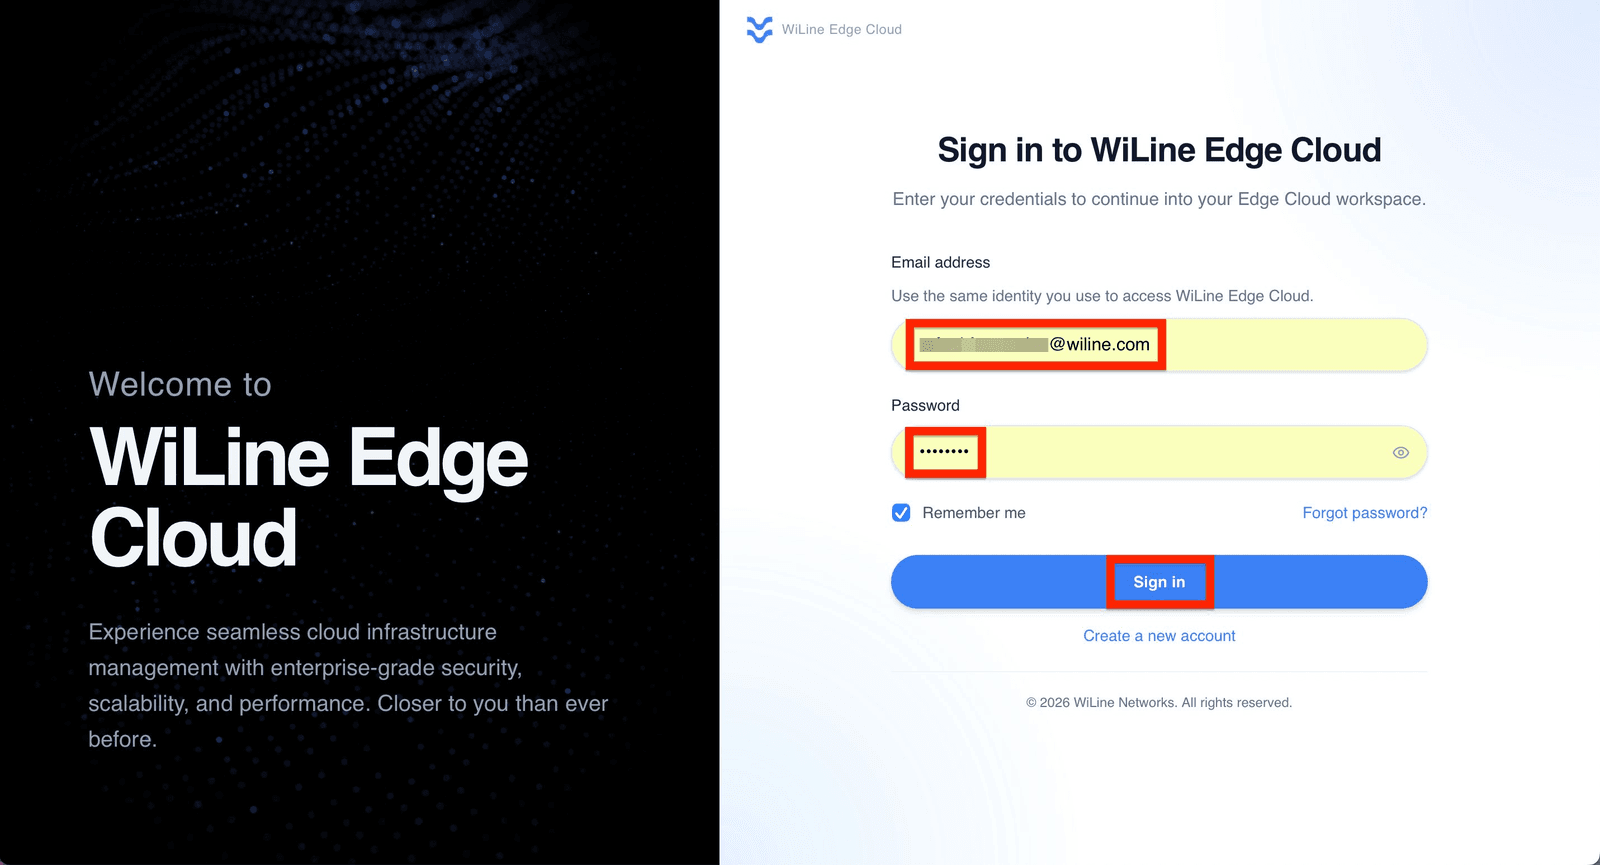
Figure 1. WEC sign-in page.
The sign-in process may include a silent reCAPTCHA check for security purposes.
Reset Your Password
Reset your password if you no longer have access to your current one.
Step 1: Request a password reset
- Click Forgot Password on the sign-in page (see Figure 1).
- Enter the Email address associated with your account.
- Click Send Reset Link.
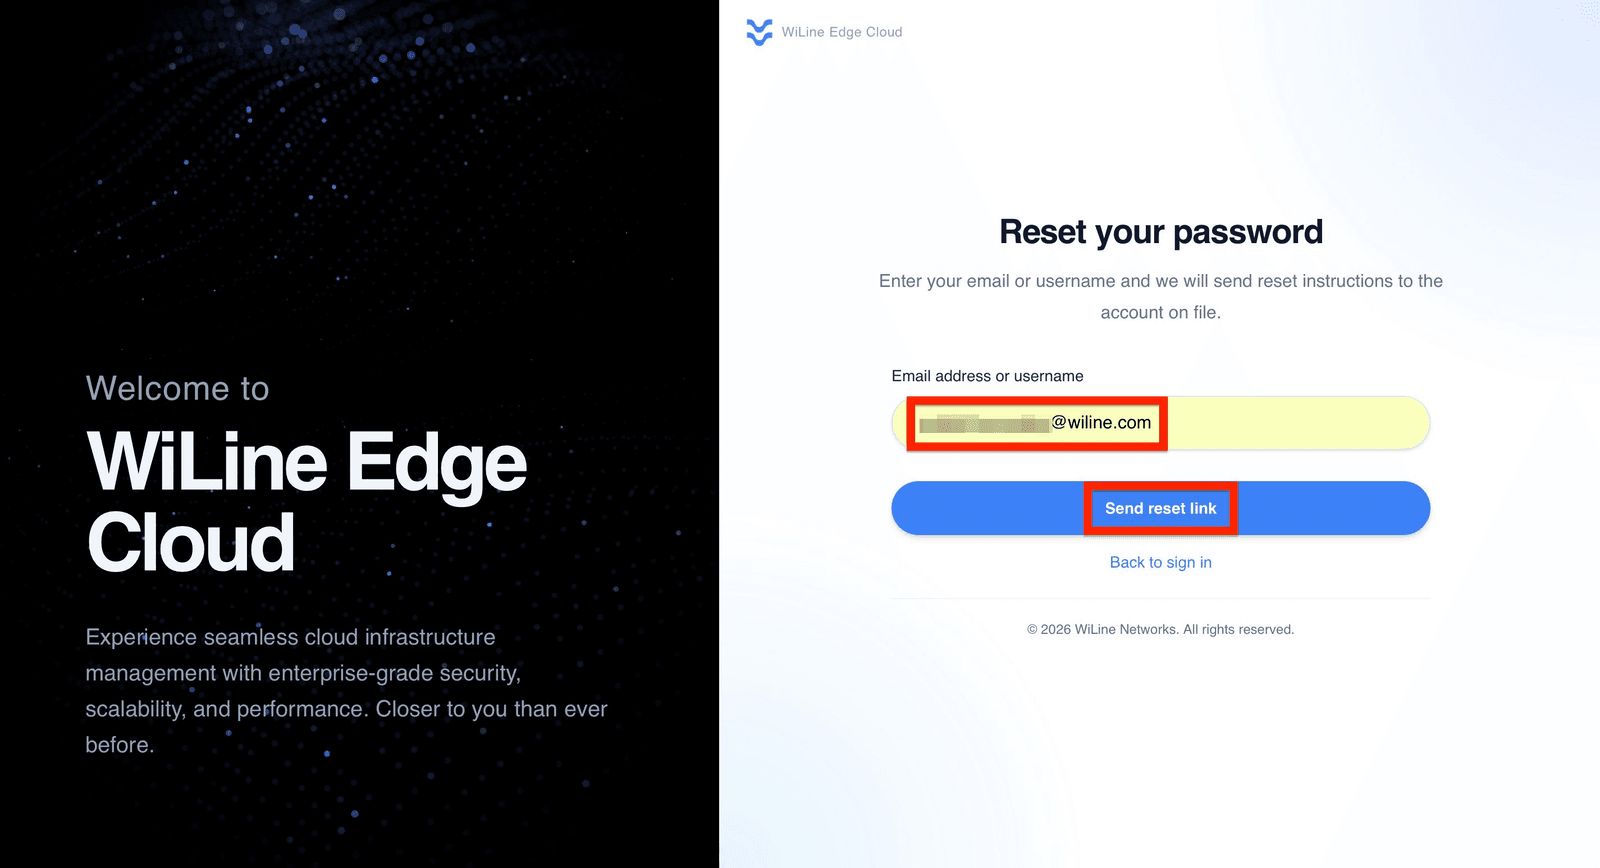
Figure 2. Request a password reset.
A password reset link is sent to your email.
Step 2: Verify your email
- Open the password reset email from WiLine.
- Click the password reset link.
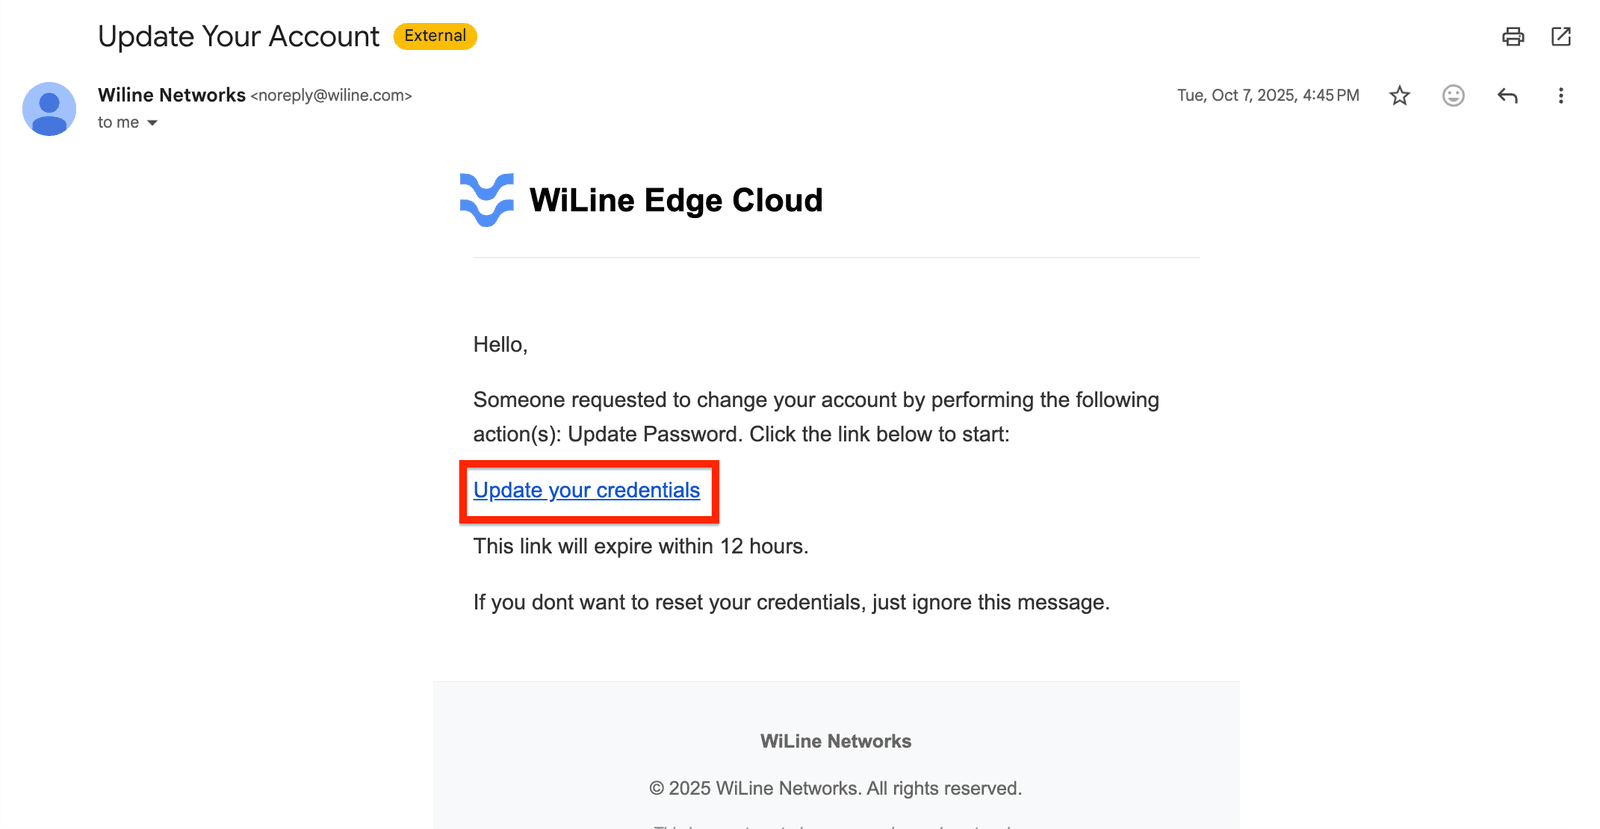
Figure 3. Password reset email.
The password setup page opens automatically.
Step 3: Create a new password
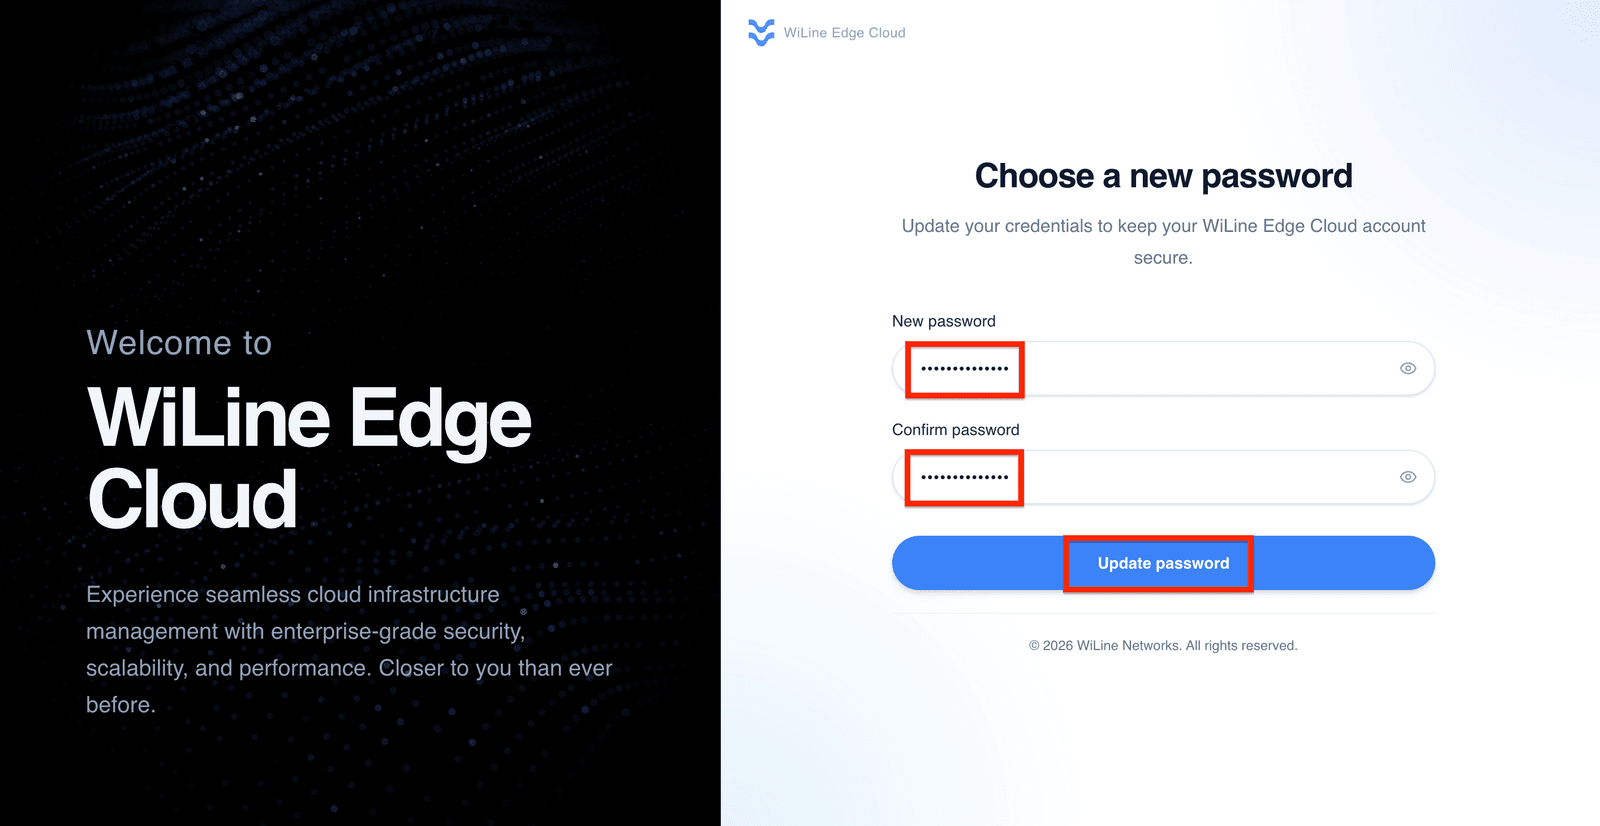
Figure 4. Create a new password.
- Enter a New password.
- Confirm your password.
- Click Update Password.
Sign in using your new password.
Your password must:
- Be at least 8 characters long
- Include at least one uppercase letter (A–Z)
- Include at least one lowercase letter (a–z)
- Include at least one number (0–9)
- Include at least one special character (!@#$%^&*)
- Not contain an asterisk (
*)
Example:
Cloud@1234
Avoid using common or easily guessable passwords.
Create Your Account
Create your WiLine Edge Cloud account in five steps:
- Verify your email
- Set up the root administrator
- Create a password
- Add billing information
- Access your dashboard
Begin by navigating to WiLine Edge Cloud, then click Create an account on the sign-in page (see Figure 1).
Step 1: Enter your email and account name
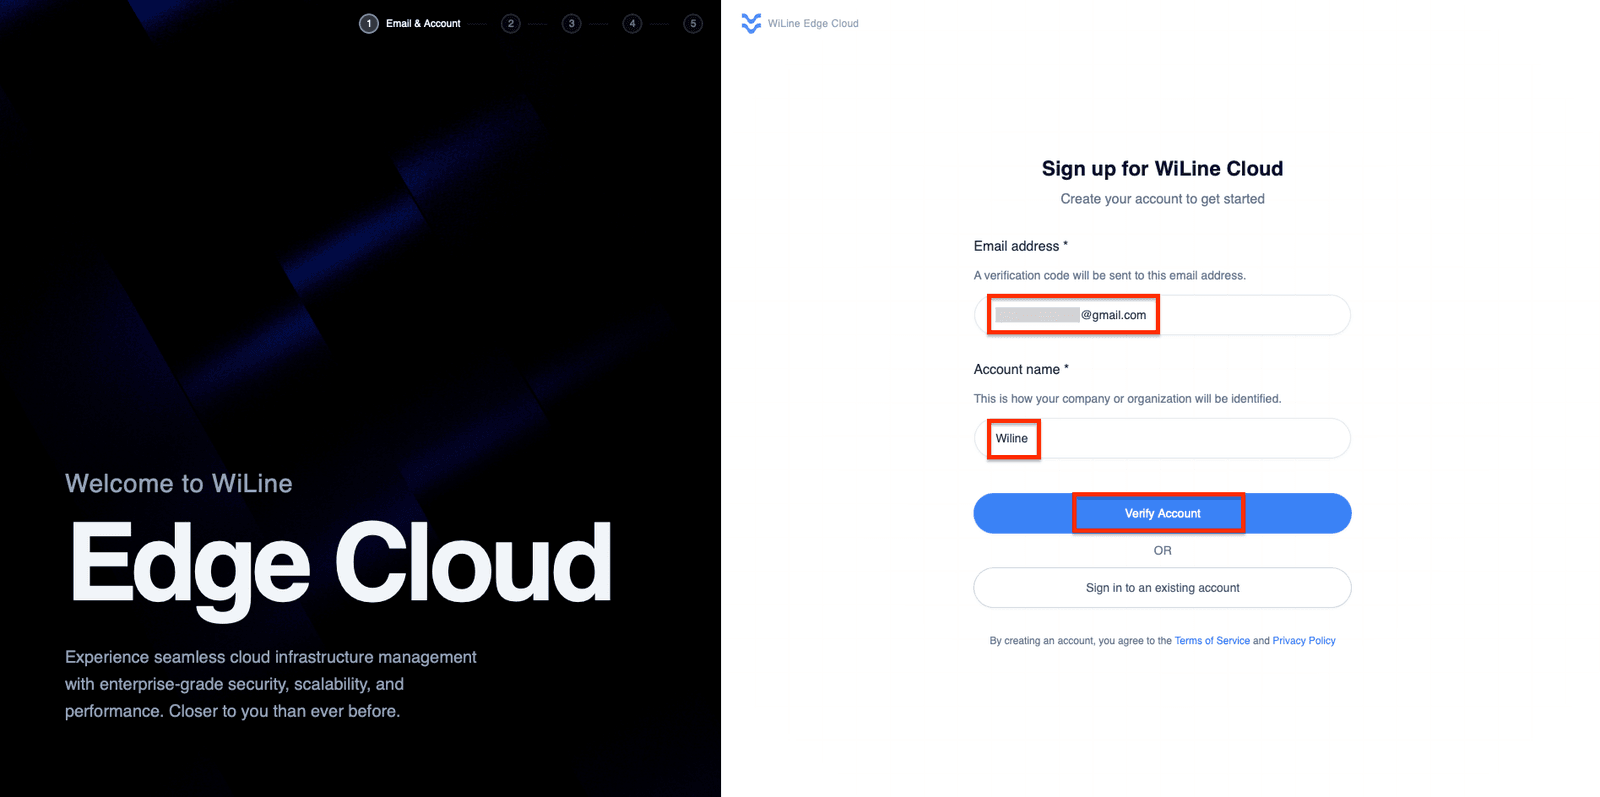
Figure 5. Enter your email address and account name.
Provide:
- Email address — Used to send your verification code.
- Account name — Your company or organization identifier (for example,
acme-corpormy_startup).
Click Verify Account to receive your verification code by email.
Step 2: Verify your email
Check your email
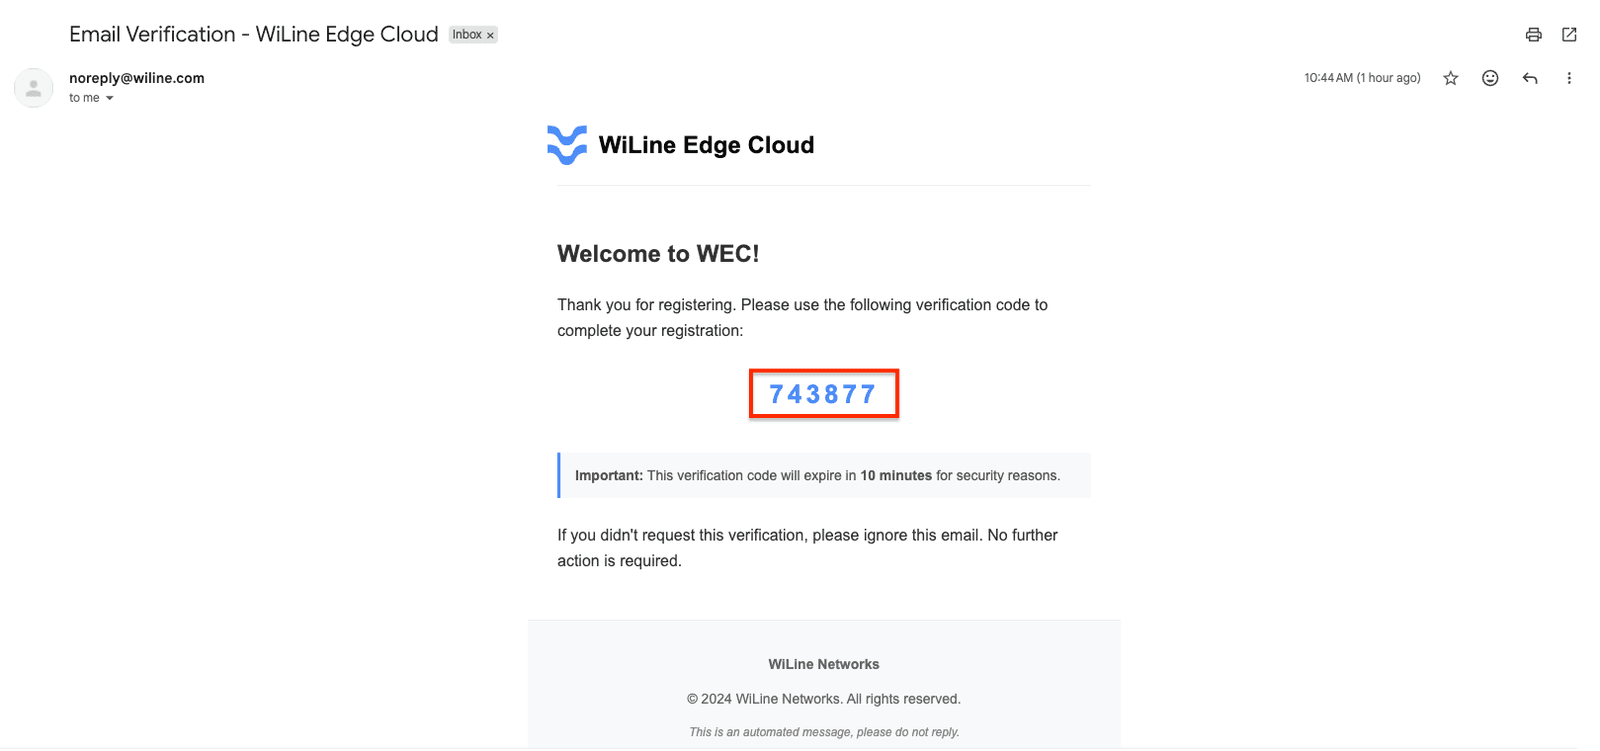
Figure 6. Verification email containing your 6-digit code.
- Open the verification email from WiLine.
- Copy the 6-digit verification code.
- Note that the code expires in 10 minutes.
If you didn't request this email, you can safely ignore it.
Enter the verification code
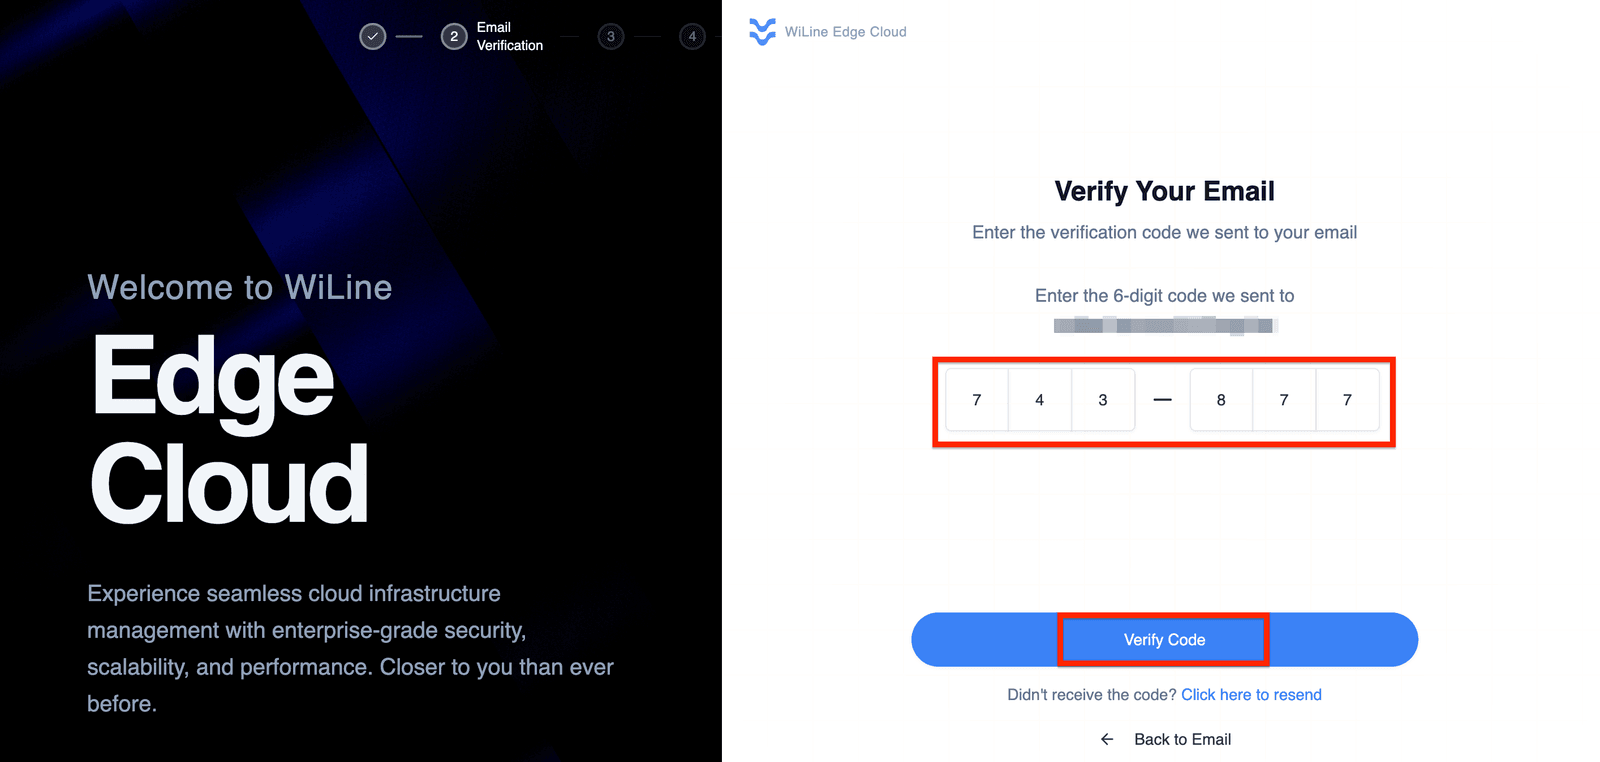
Figure 7. Verify your email address.
- Enter the 6-digit verification code.
- Click Verify Code.
If you don't receive the email
- Click Resend to generate a new code.
- Click Back to Email to correct your email address.
Check your spam or junk folder before requesting a new verification code.
After verification, the root account setup page opens automatically.
Step 3: Set up the root administrator
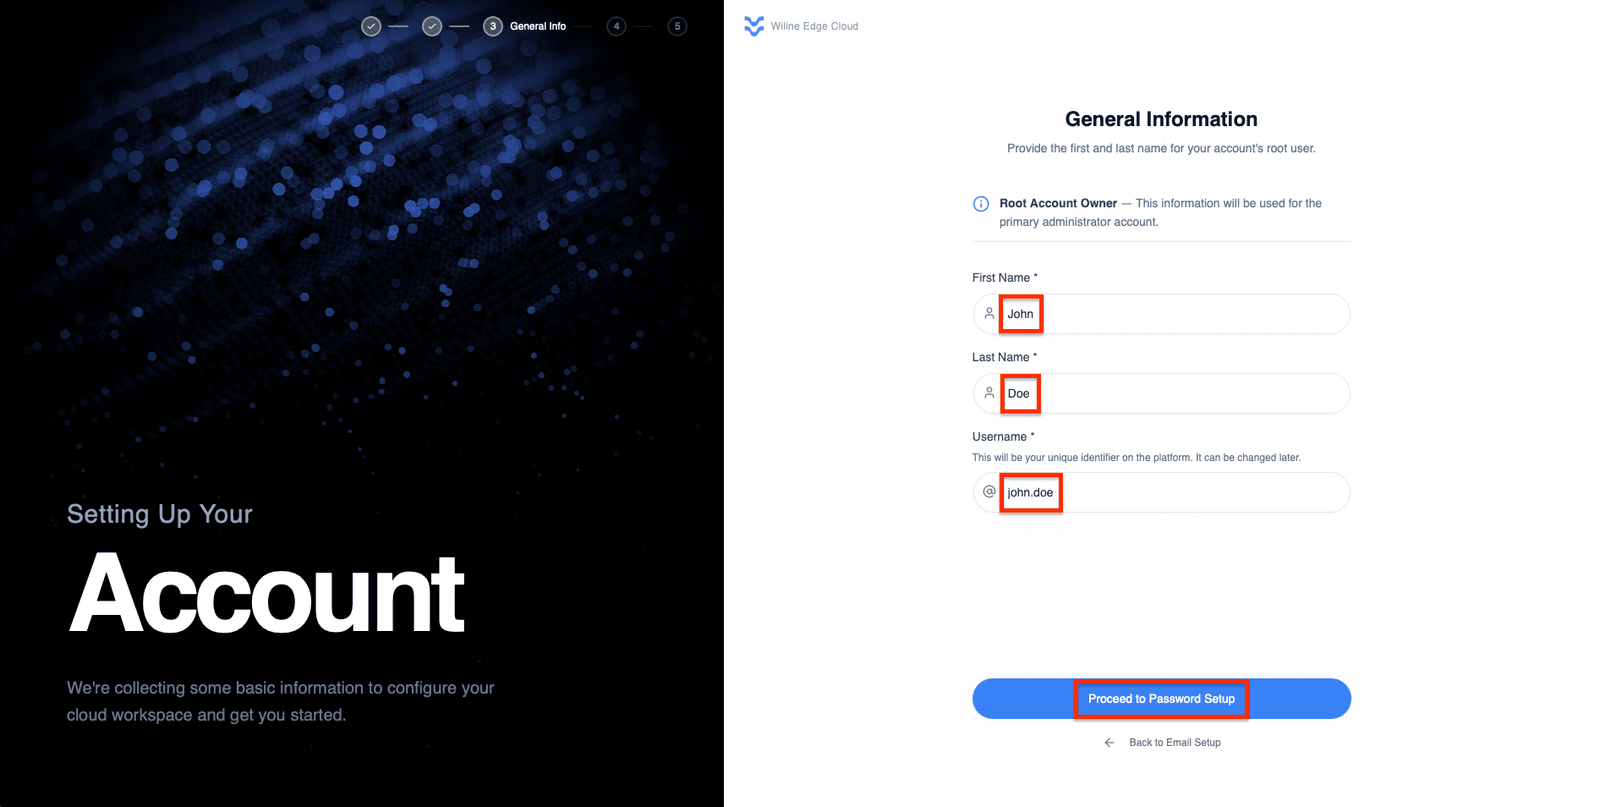
Figure 8. Configure the primary administrator account.
Enter the following information:
| Field | Description |
|---|---|
| First Name | Administrator's first name |
| Last Name | Administrator's last name |
| Username | Unique username (can be changed later) |
Click Proceed to Password Setup.
Step 4: Create your password
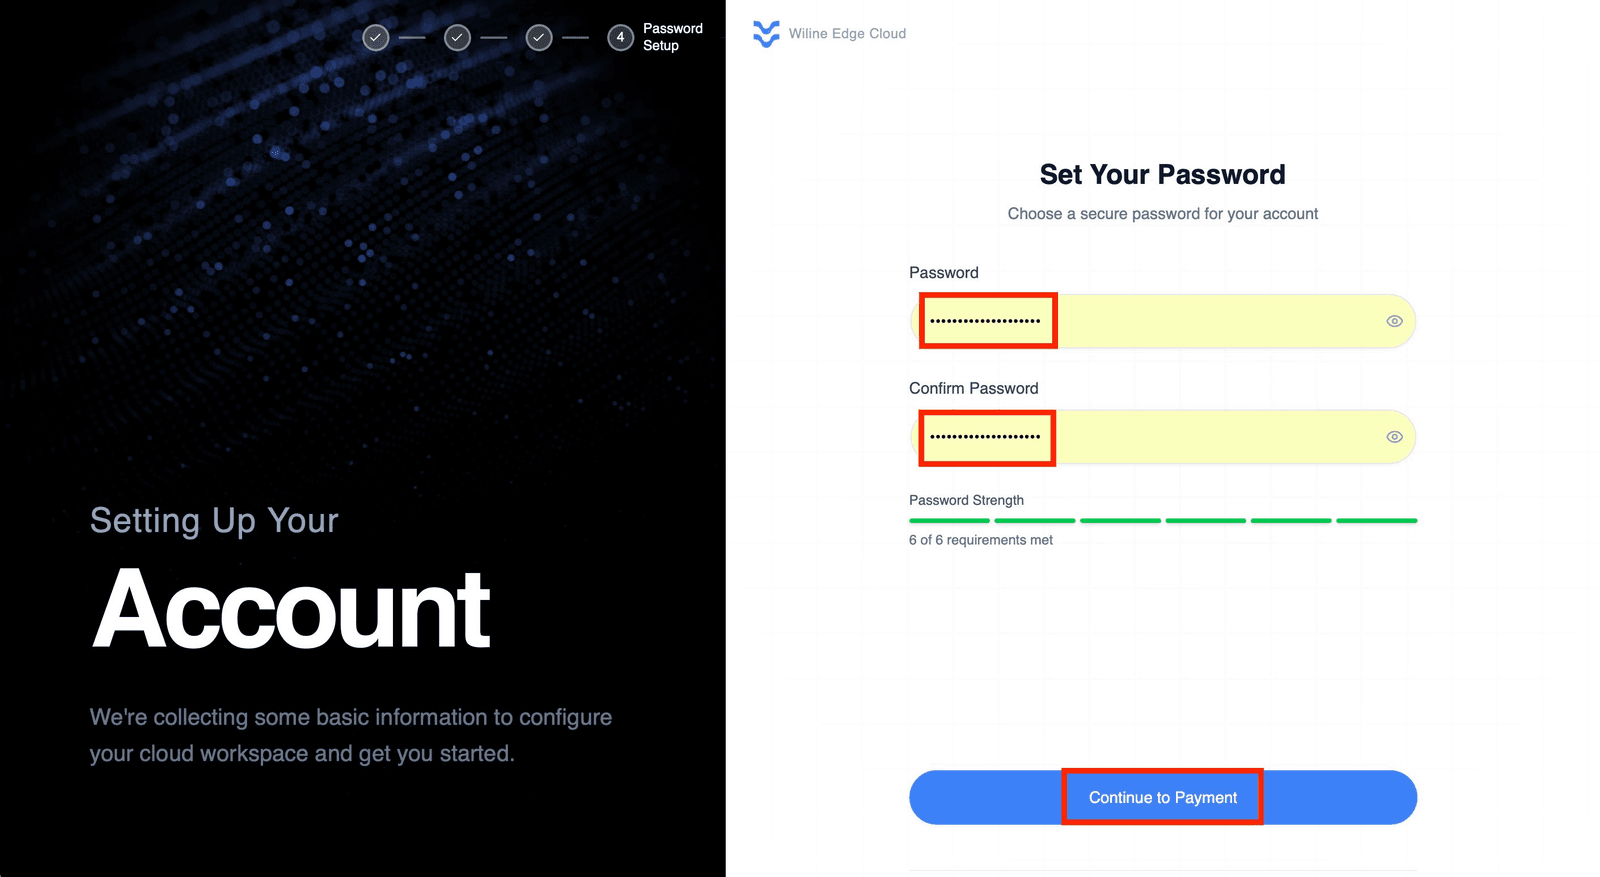
Figure 9. Create a secure password.
- Password — Create a strong password.
- Confirm Password — Re-enter the password.
The password strength indicator shows which requirements have been met.
Click Continue to Payment.
Step 5: Add payment information
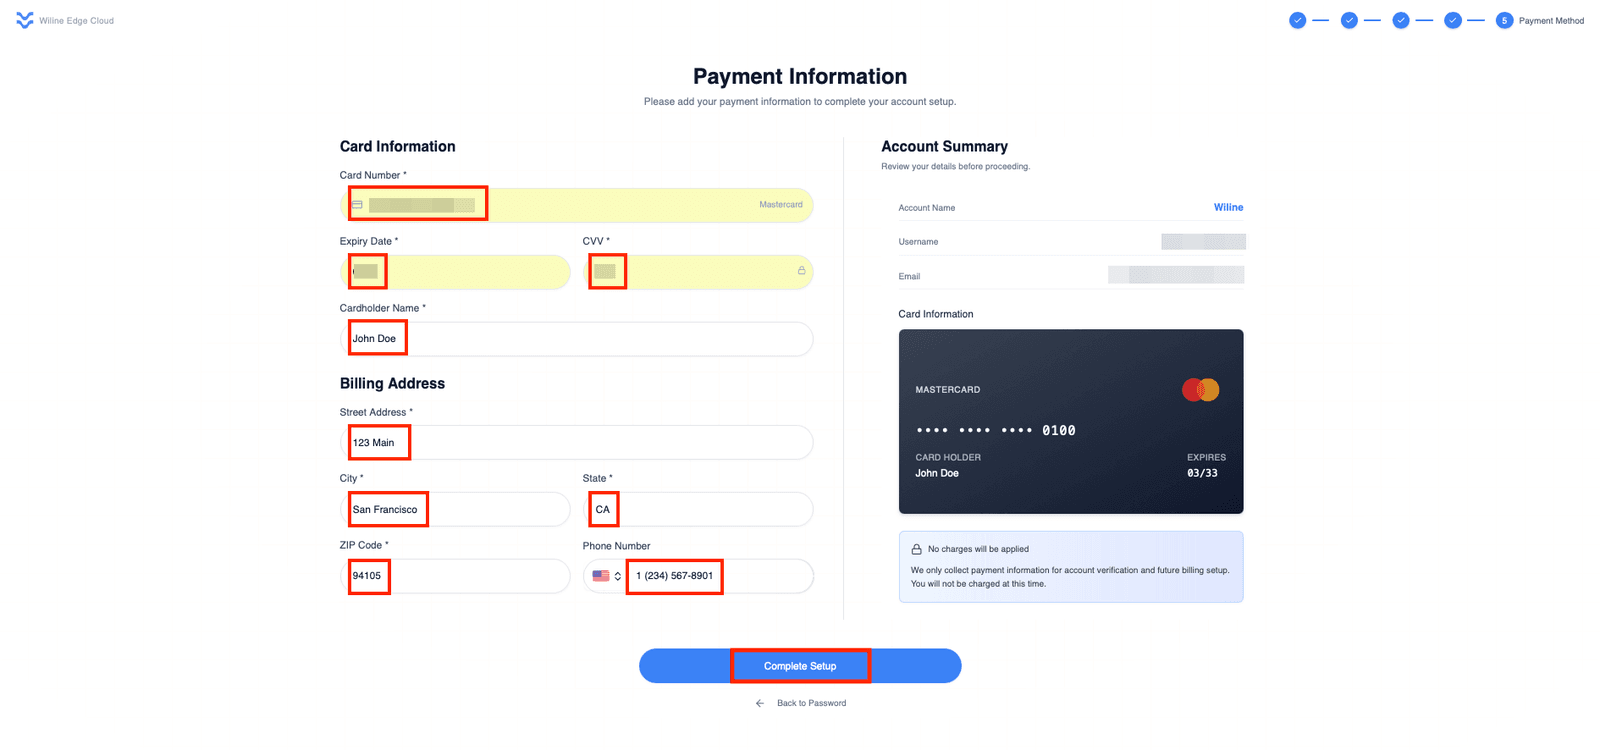
Figure 10. Enter your billing information.
Provide:
| Field | Description |
|---|---|
| Card Number | Credit or debit card number |
| Expiry Date | MM/YY |
| CVV | 3-digit security code |
| Cardholder Name | Name printed on the card |
| Billing Address | Street, city, state, ZIP code |
| Phone Number | Contact phone number |
Your payment method is collected for account verification and future billing only. You won't be charged during account creation.
Review your account summary, then click Complete Setup.
Your account is now ready to use.
What's Next?
With your account ready, you can:
- Explore the Dashboard overview
- Review your billing and account settings
- Deploy your first virtual machine