Manage Volumes
This guide provides detailed instructions on how to manage your storage volumes in WiLine Edge Cloud (WEC).
From the Volumes dashboard, you can:
- View all your volumes and their status
- Attach volumes to virtual machines
- Resize storage
- Monitor usage and events
How to Manage a Volume
Manage your storage volumes with these simple steps:
Step 1: Access the Volumes Dashboard
- Log in to the WiLine Edge Cloud.
- In the sidebar, click Storage.
- Select Volumes.
You will see a table listing all your volumes, including their name, size, type, status, and zone.
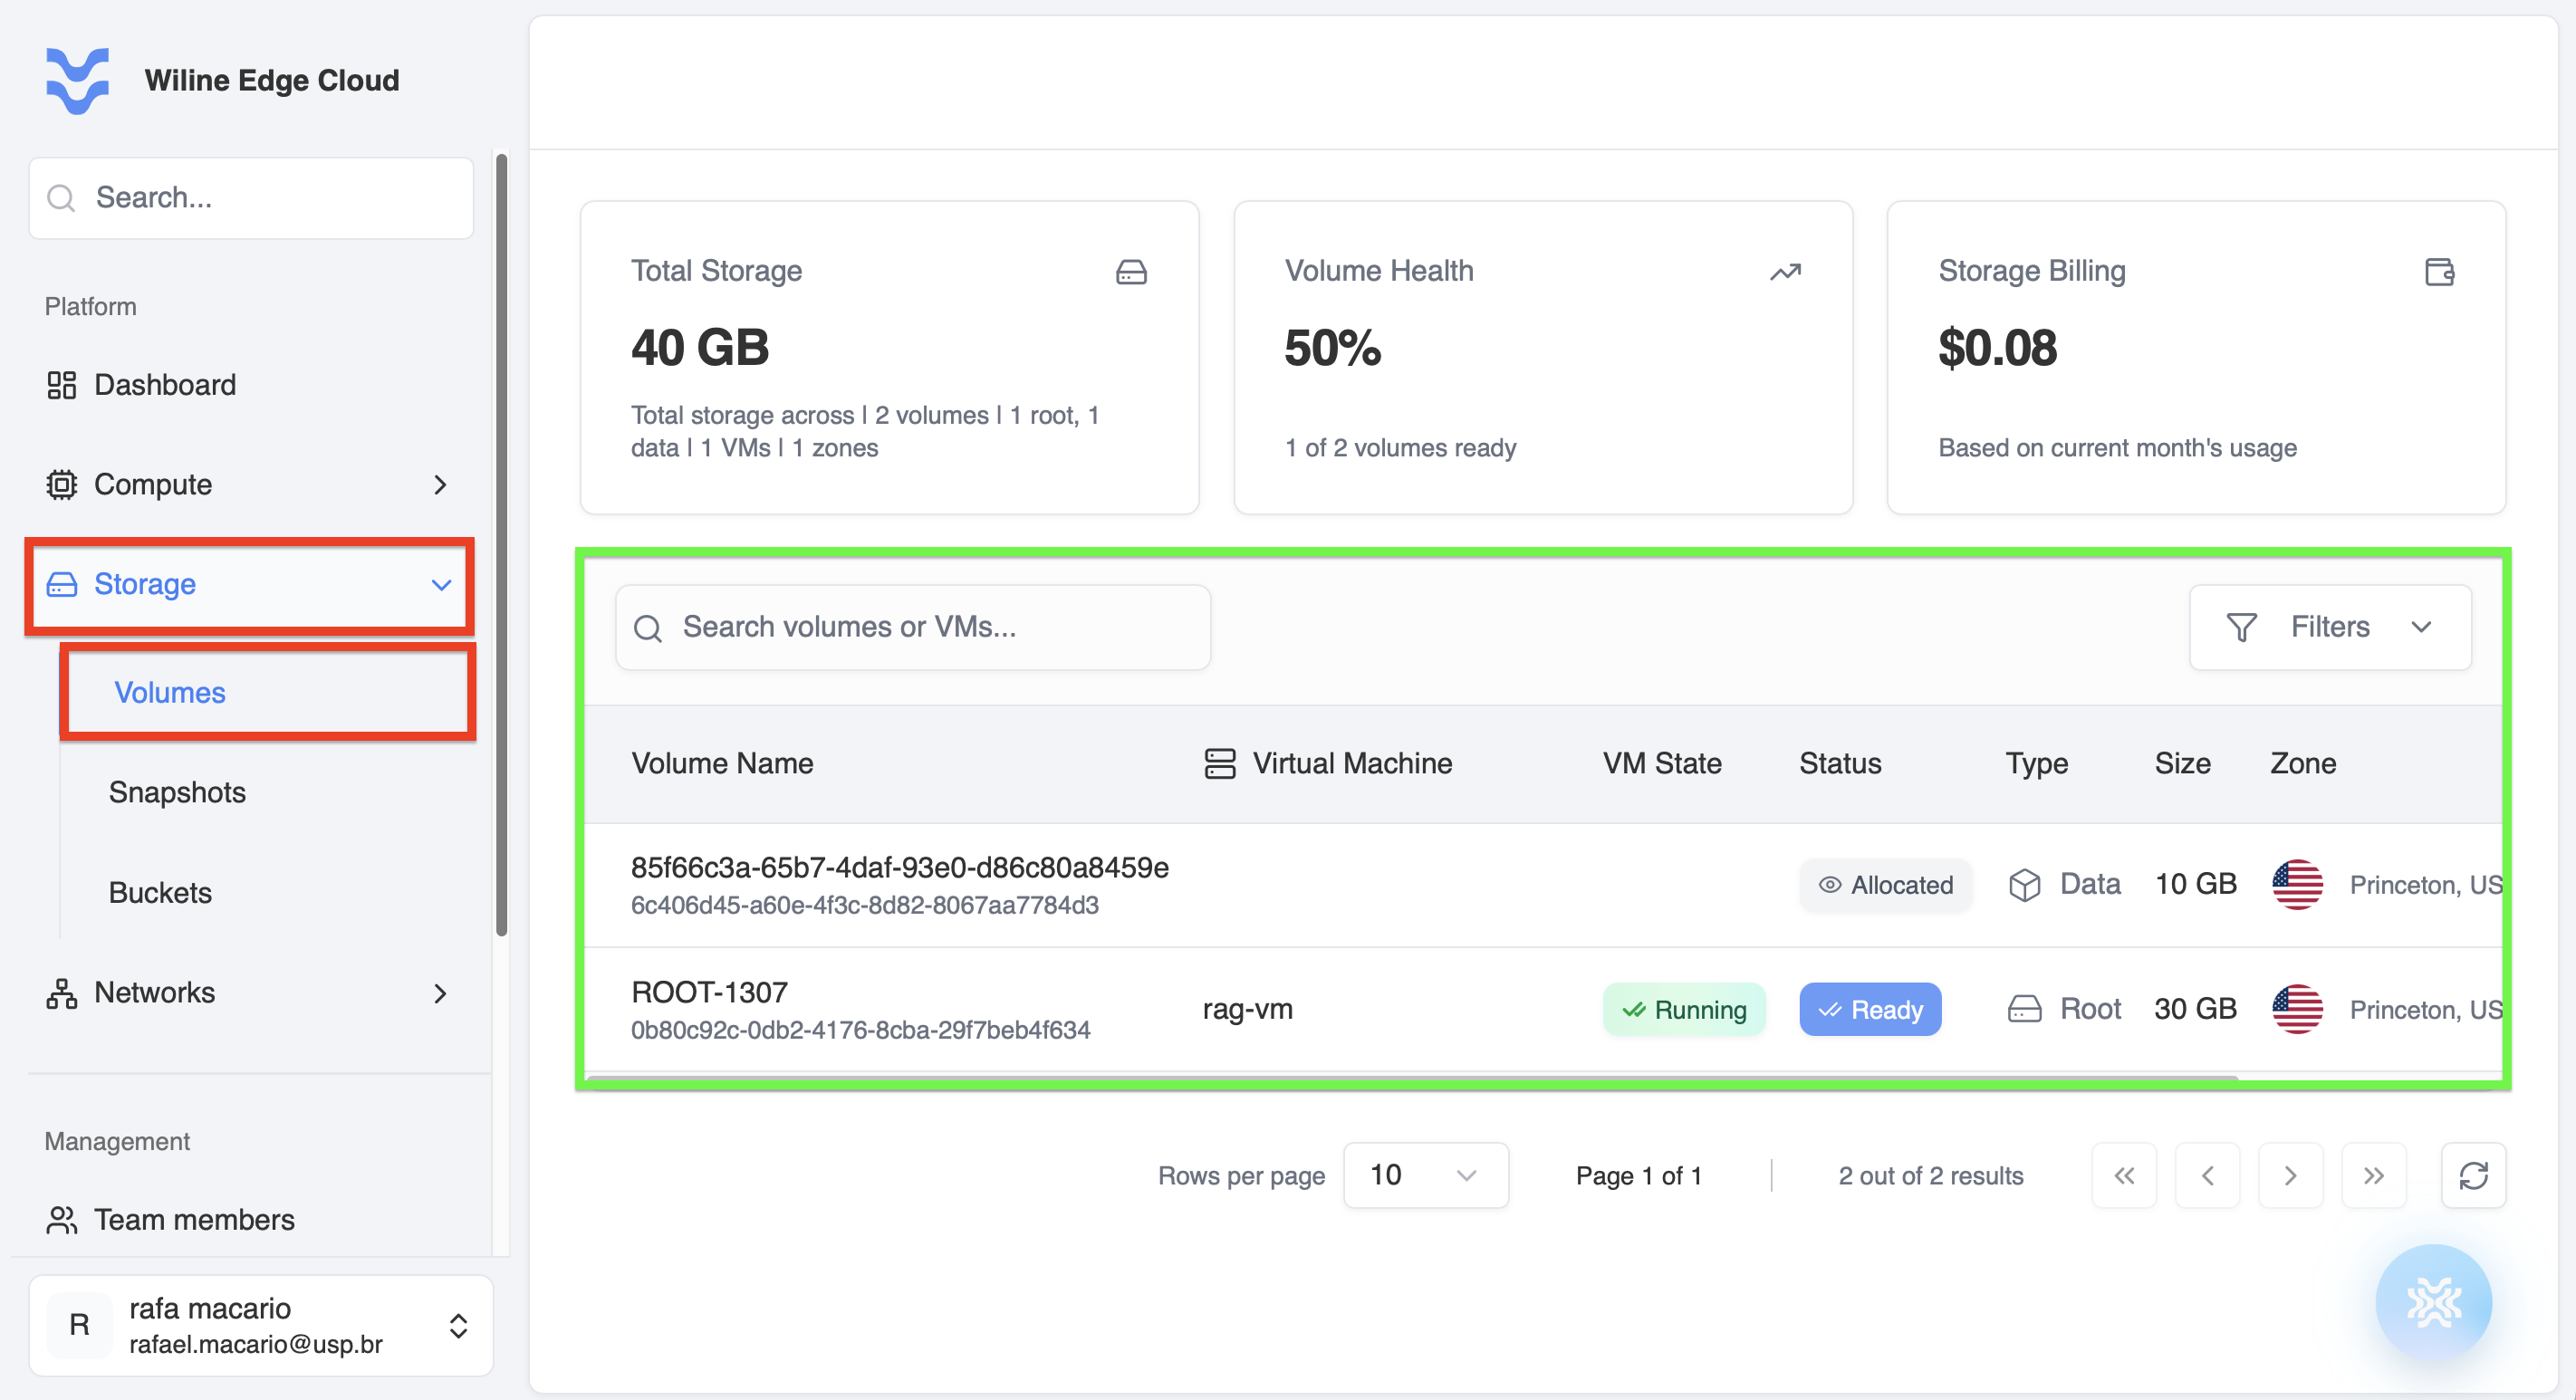 Figure 1 — Volumes dashboard with a list of volumes and their statuses.
Step 2: Manage a Volume
Click on a volume from the table to open its management page.
Control Panel
At the top of the page, you will see the control panel with the following actions:
-
Refresh Volume Data:
Updates the volume status and information. -
Attach Volume to VM:
Connects the volume to a virtual machine. -
Detach Volume:
Disconnects the volume from the currently attached virtual machine. -
Resize Volume:
Increases the storage capacity of the volume. -
Create Snapshot:
Captures the current state of the volume for backup or recovery. -
Delete Volume:
Permanently deletes the volume and all stored data.
 Figure 2 — Volume control panel with action icons.
:::important Action availability depends on volume state
Some actions in the control panel are only available depending on the current status of the volume:
- Attach (Link) is available when the volume is not attached
- Detach (Unlink) appears when the volume is already attached to a VM
- Resize may be restricted depending on the volume state or platform constraints
- Snapshot (camera icon) is available only if the volume supports snapshots
If a button appears disabled, check the volume’s status in the Overview tab.
:::
Step 3: Volume Management Tabs
Once you open a volume’s management page, you can use these tabs to monitor and manage it.
Overview
Provides a high-level summary of the volume’s configuration and status.
At the top, you’ll see key metrics:
-
Storage Size — e.g.
10 GB
Total disk capacity allocated to this volume. -
Disk I/O Activity — e.g.
NaN IOPS
Number of read/write operations per second (performance indicator). -
Current Charges — e.g.
$0.04
Estimated cost accrued for this volume so far.
You can also find detailed information:
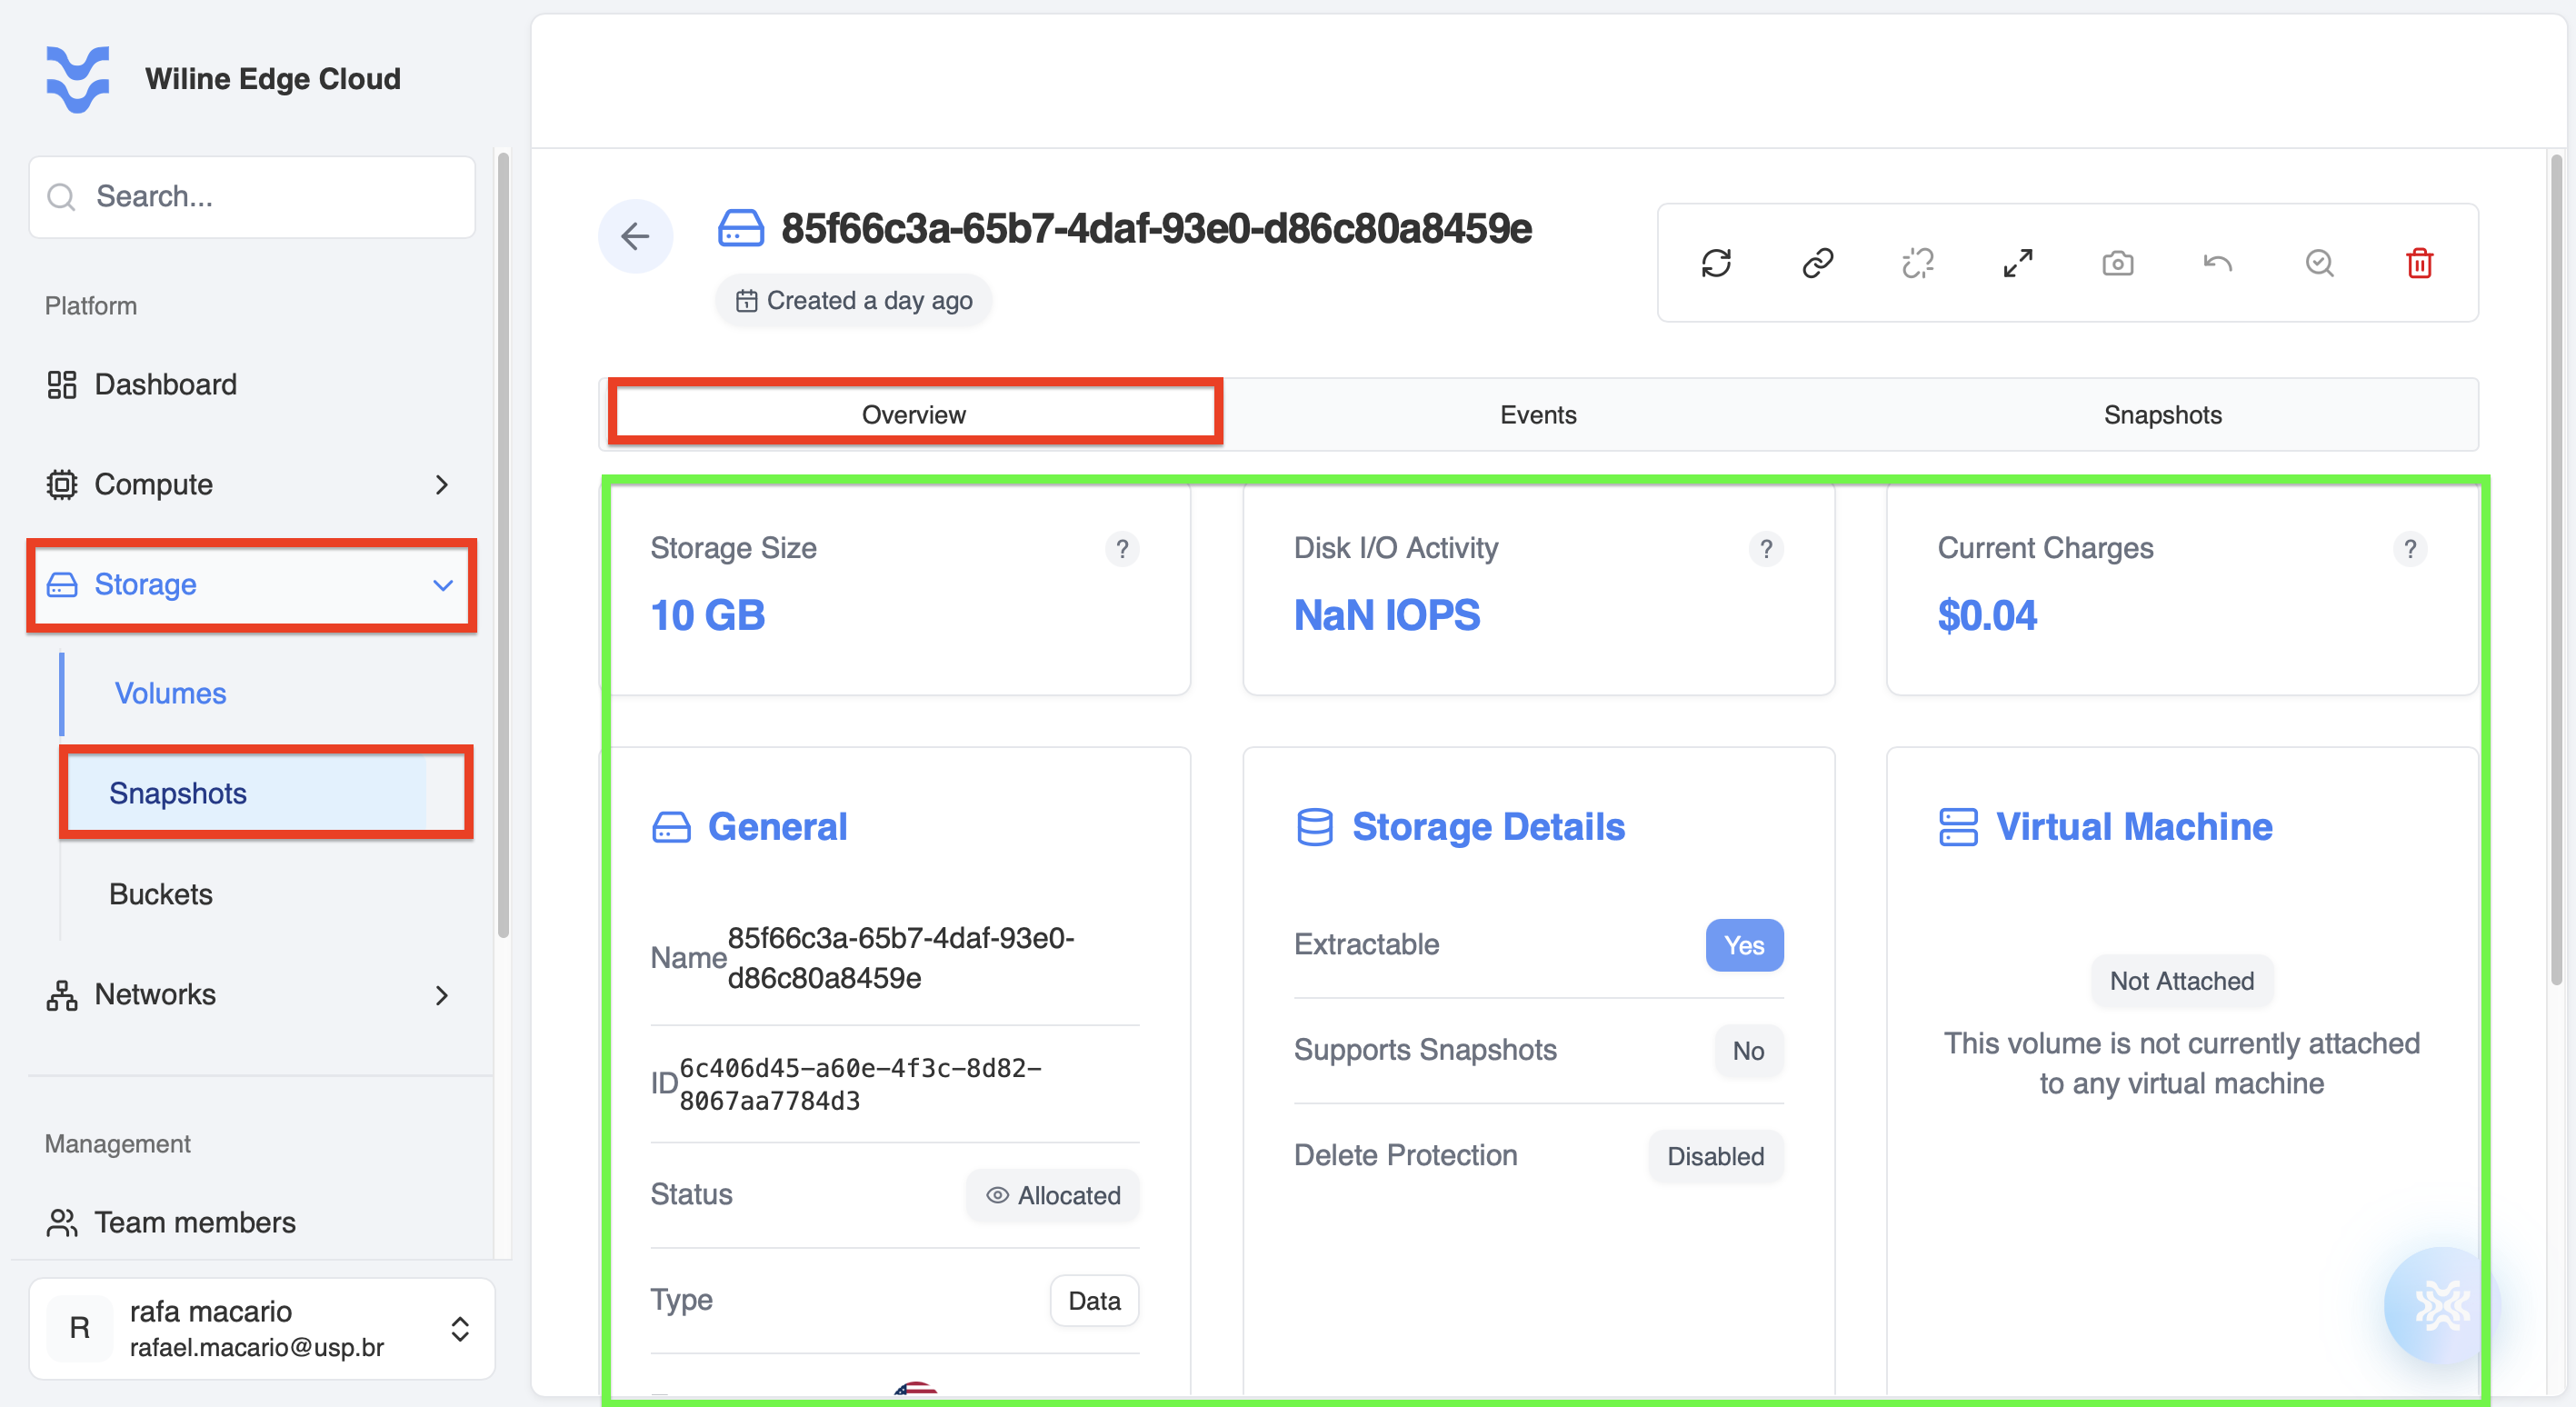 Figure 4 — Overview tab with volume details and metrics.
General
- Name:
85f66c3a-65b7-4daf-93e0-d86c80a8459e - ID:
6c406d45-a60e-4f3c-8d82-8067aa7784d3 - Status:
Allocated - Type:
Data - Zone:
Princeton, USA
These fields identify the volume and show its current lifecycle state and location.
Storage Details
- Extractable:
Yes - Supports Snapshots:
No - Delete Protection:
Disabled
These settings define what operations are allowed on the volume (e.g., backups or deletion protection).
Virtual Machine
- Status:
Not Attached
This indicates whether the volume is currently attached to a VM and actively in use.
Metrics
There are no metrics available
This typically happens when:
- The volume is not attached to a VM
- There is no active disk activity
Metrics help you understand how intensively the volume is being used.
Tags
Tags help organize your volumes.
Example:
environment: productionproject: storage-test
Events
Track all actions performed on the volume.
This tab provides a chronological log of operations.
Each entry represents an action performed on the volume, either by a user or the system.
Example:
- Event Type:
Volume Create - Description:
Successfully completed creating volume. Volume Id: 6c406d45-a60e-4f3c-8d82-8067aa7784d3 - State:
Completed - Resource:
85f66c3a-65b7-4daf-93e0-d86c80a8459e - User:
rafa.macario - Created:
Apr 8, 2026, 3:16 PM
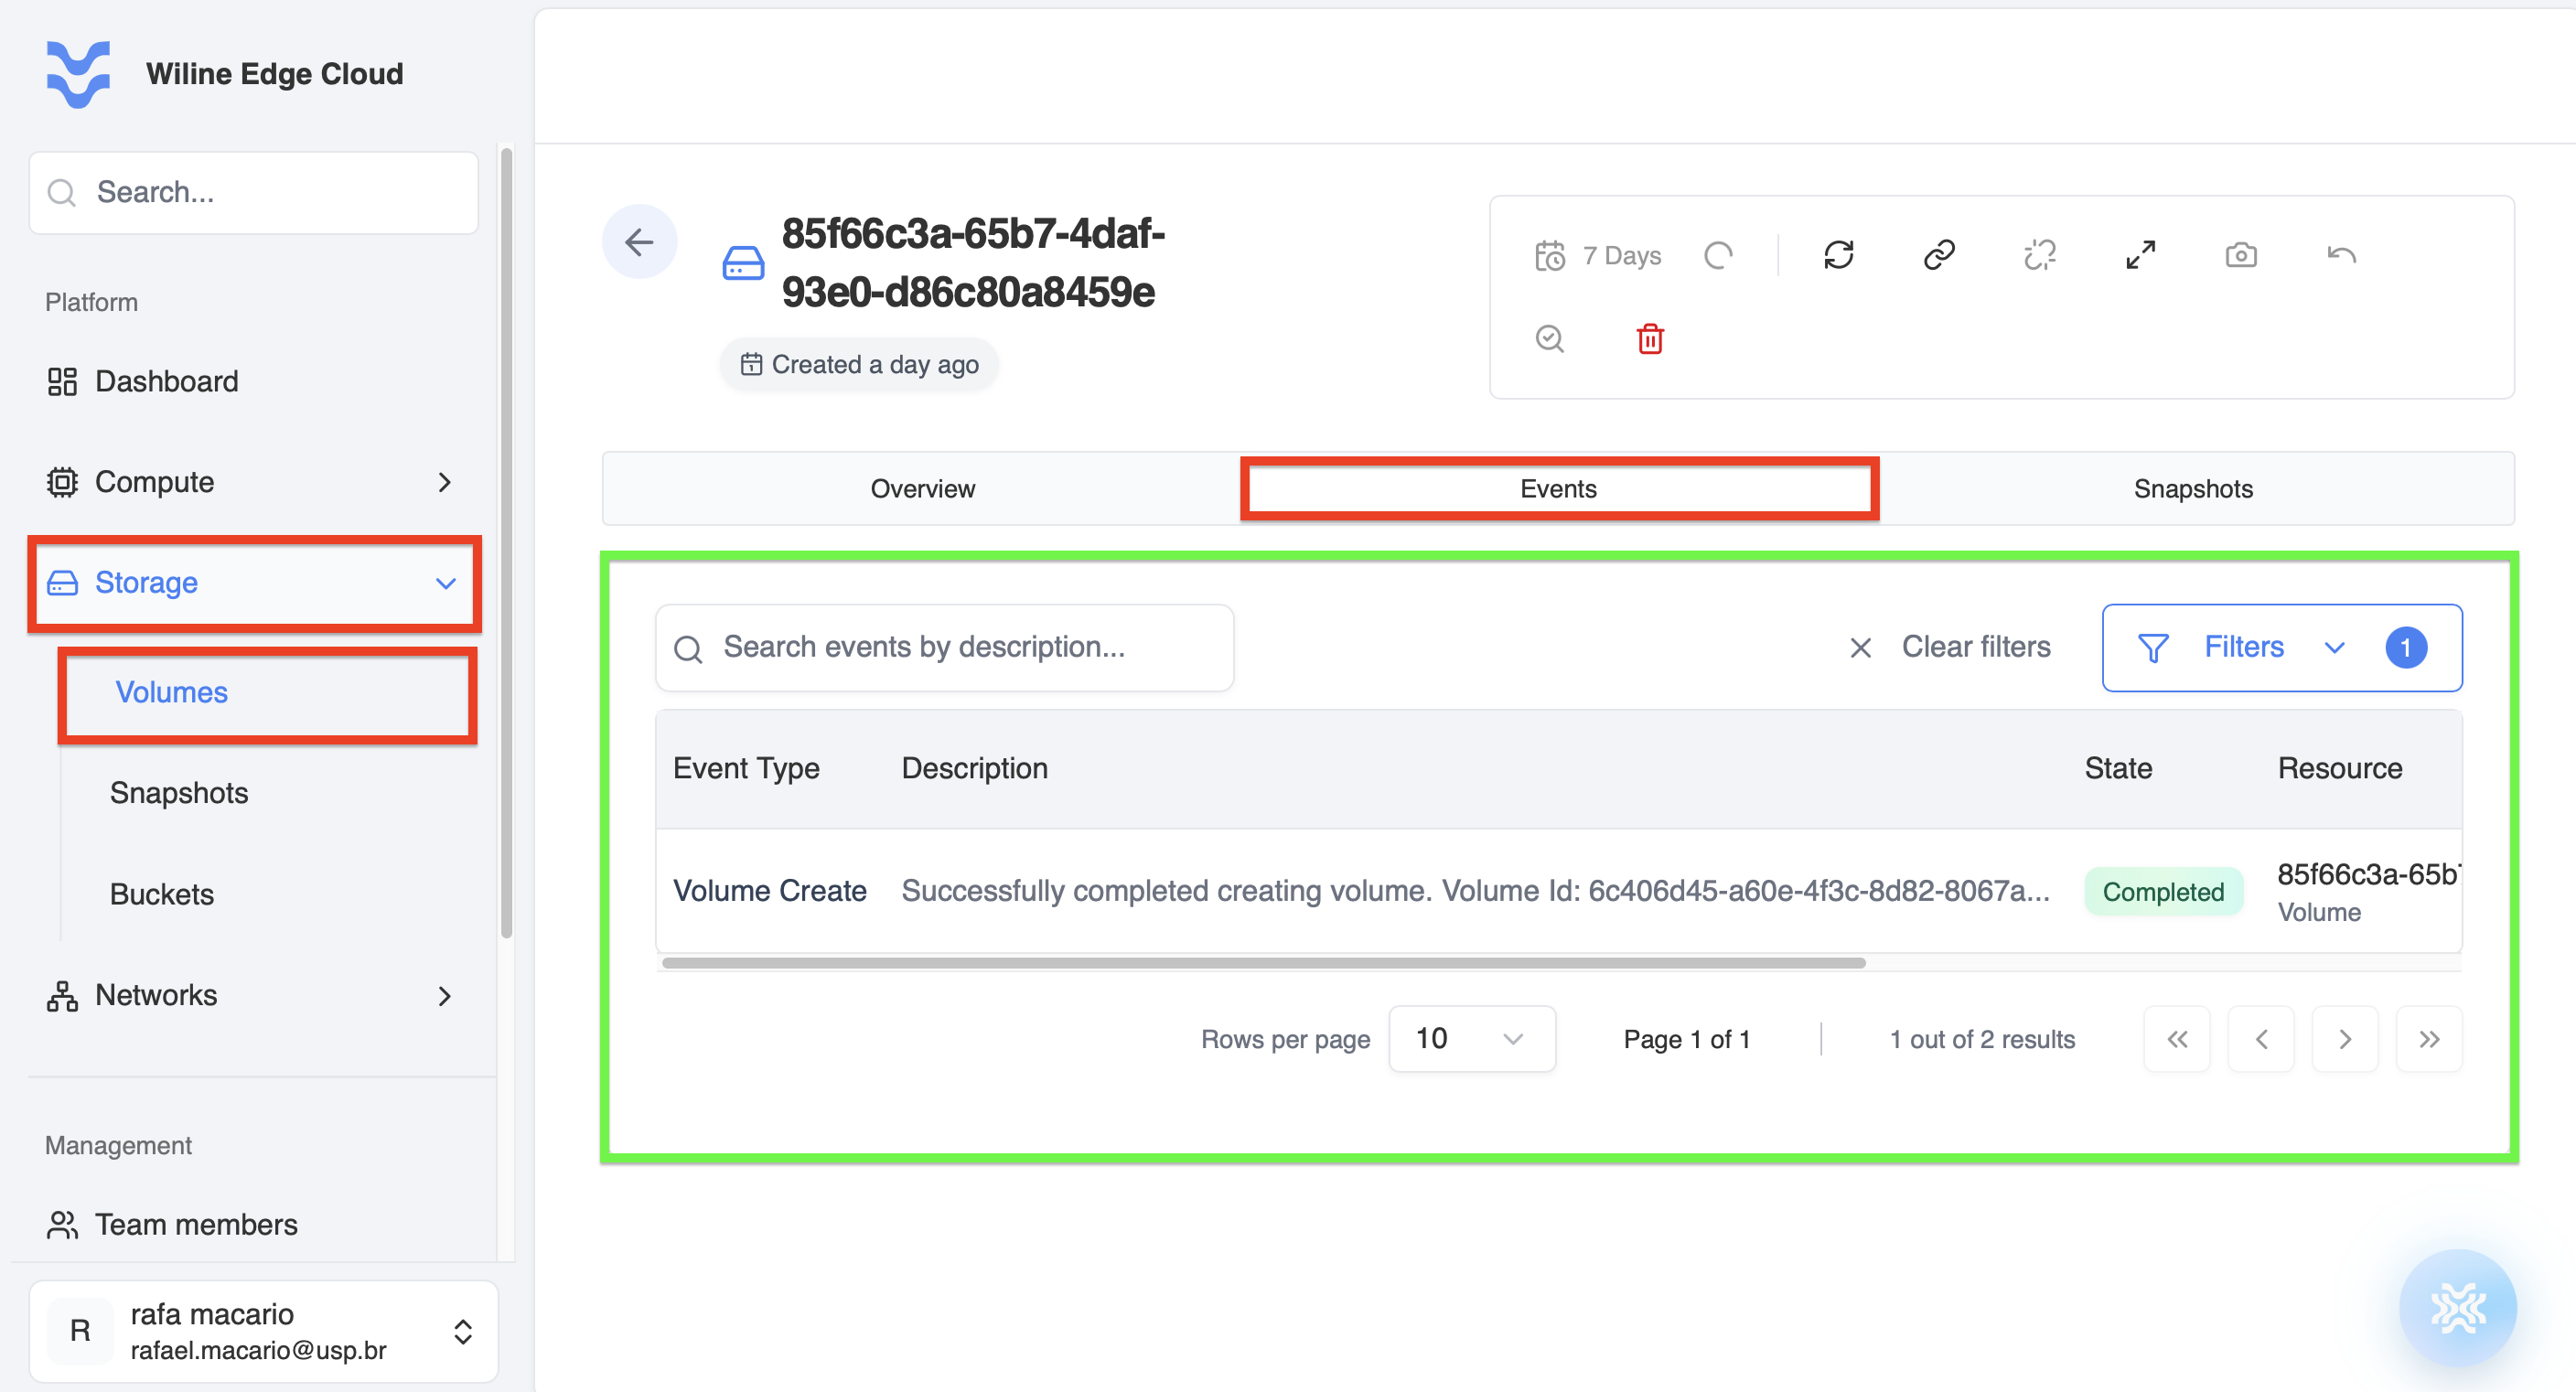 Figure 5 — Events tab showing volume activity logs.
What you can do here:
- Track volume lifecycle events
- Identify failures or issues
- Audit user actions
Common Event Types
Volume Create→ volume was createdVolume Delete→ volume was deletedVolume Attach→ attached to a VMVolume Detach→ detached from a VMVolume Resize→ storage capacity changed
Snapshots
Manage backups of your volume.
Snapshots allow you to capture the state of a volume at a specific point in time.
This is useful for backups, recovery, and cloning data.
Snapshot List
If no snapshots exist, you will see:
No snapshots foundThis volume doesn't have any snapshots yet.
What this means
- The volume has no backups created yet
- You should create snapshots before making major changes
:::tip No snapshots yet?
If you don’t see any snapshots listed, it means you haven’t created one yet.
To learn how to create and manage volume snapshots, follow the step-by-step guide in the Snapshots section of the documentation.
:::
What you can do here
- Create Snapshot — capture current volume state
- Restore Volume — recover data from a snapshot
- Track backups — view snapshot history and status
Snapshots are critical for preventing data loss and enabling rollback to previous states.
Example (when snapshots exist):
- Snapshot Name:
vol-snap-20260409 - Status:
Ready - Type:
Full - Created:
Apr 9, 2026, 10:57 AM
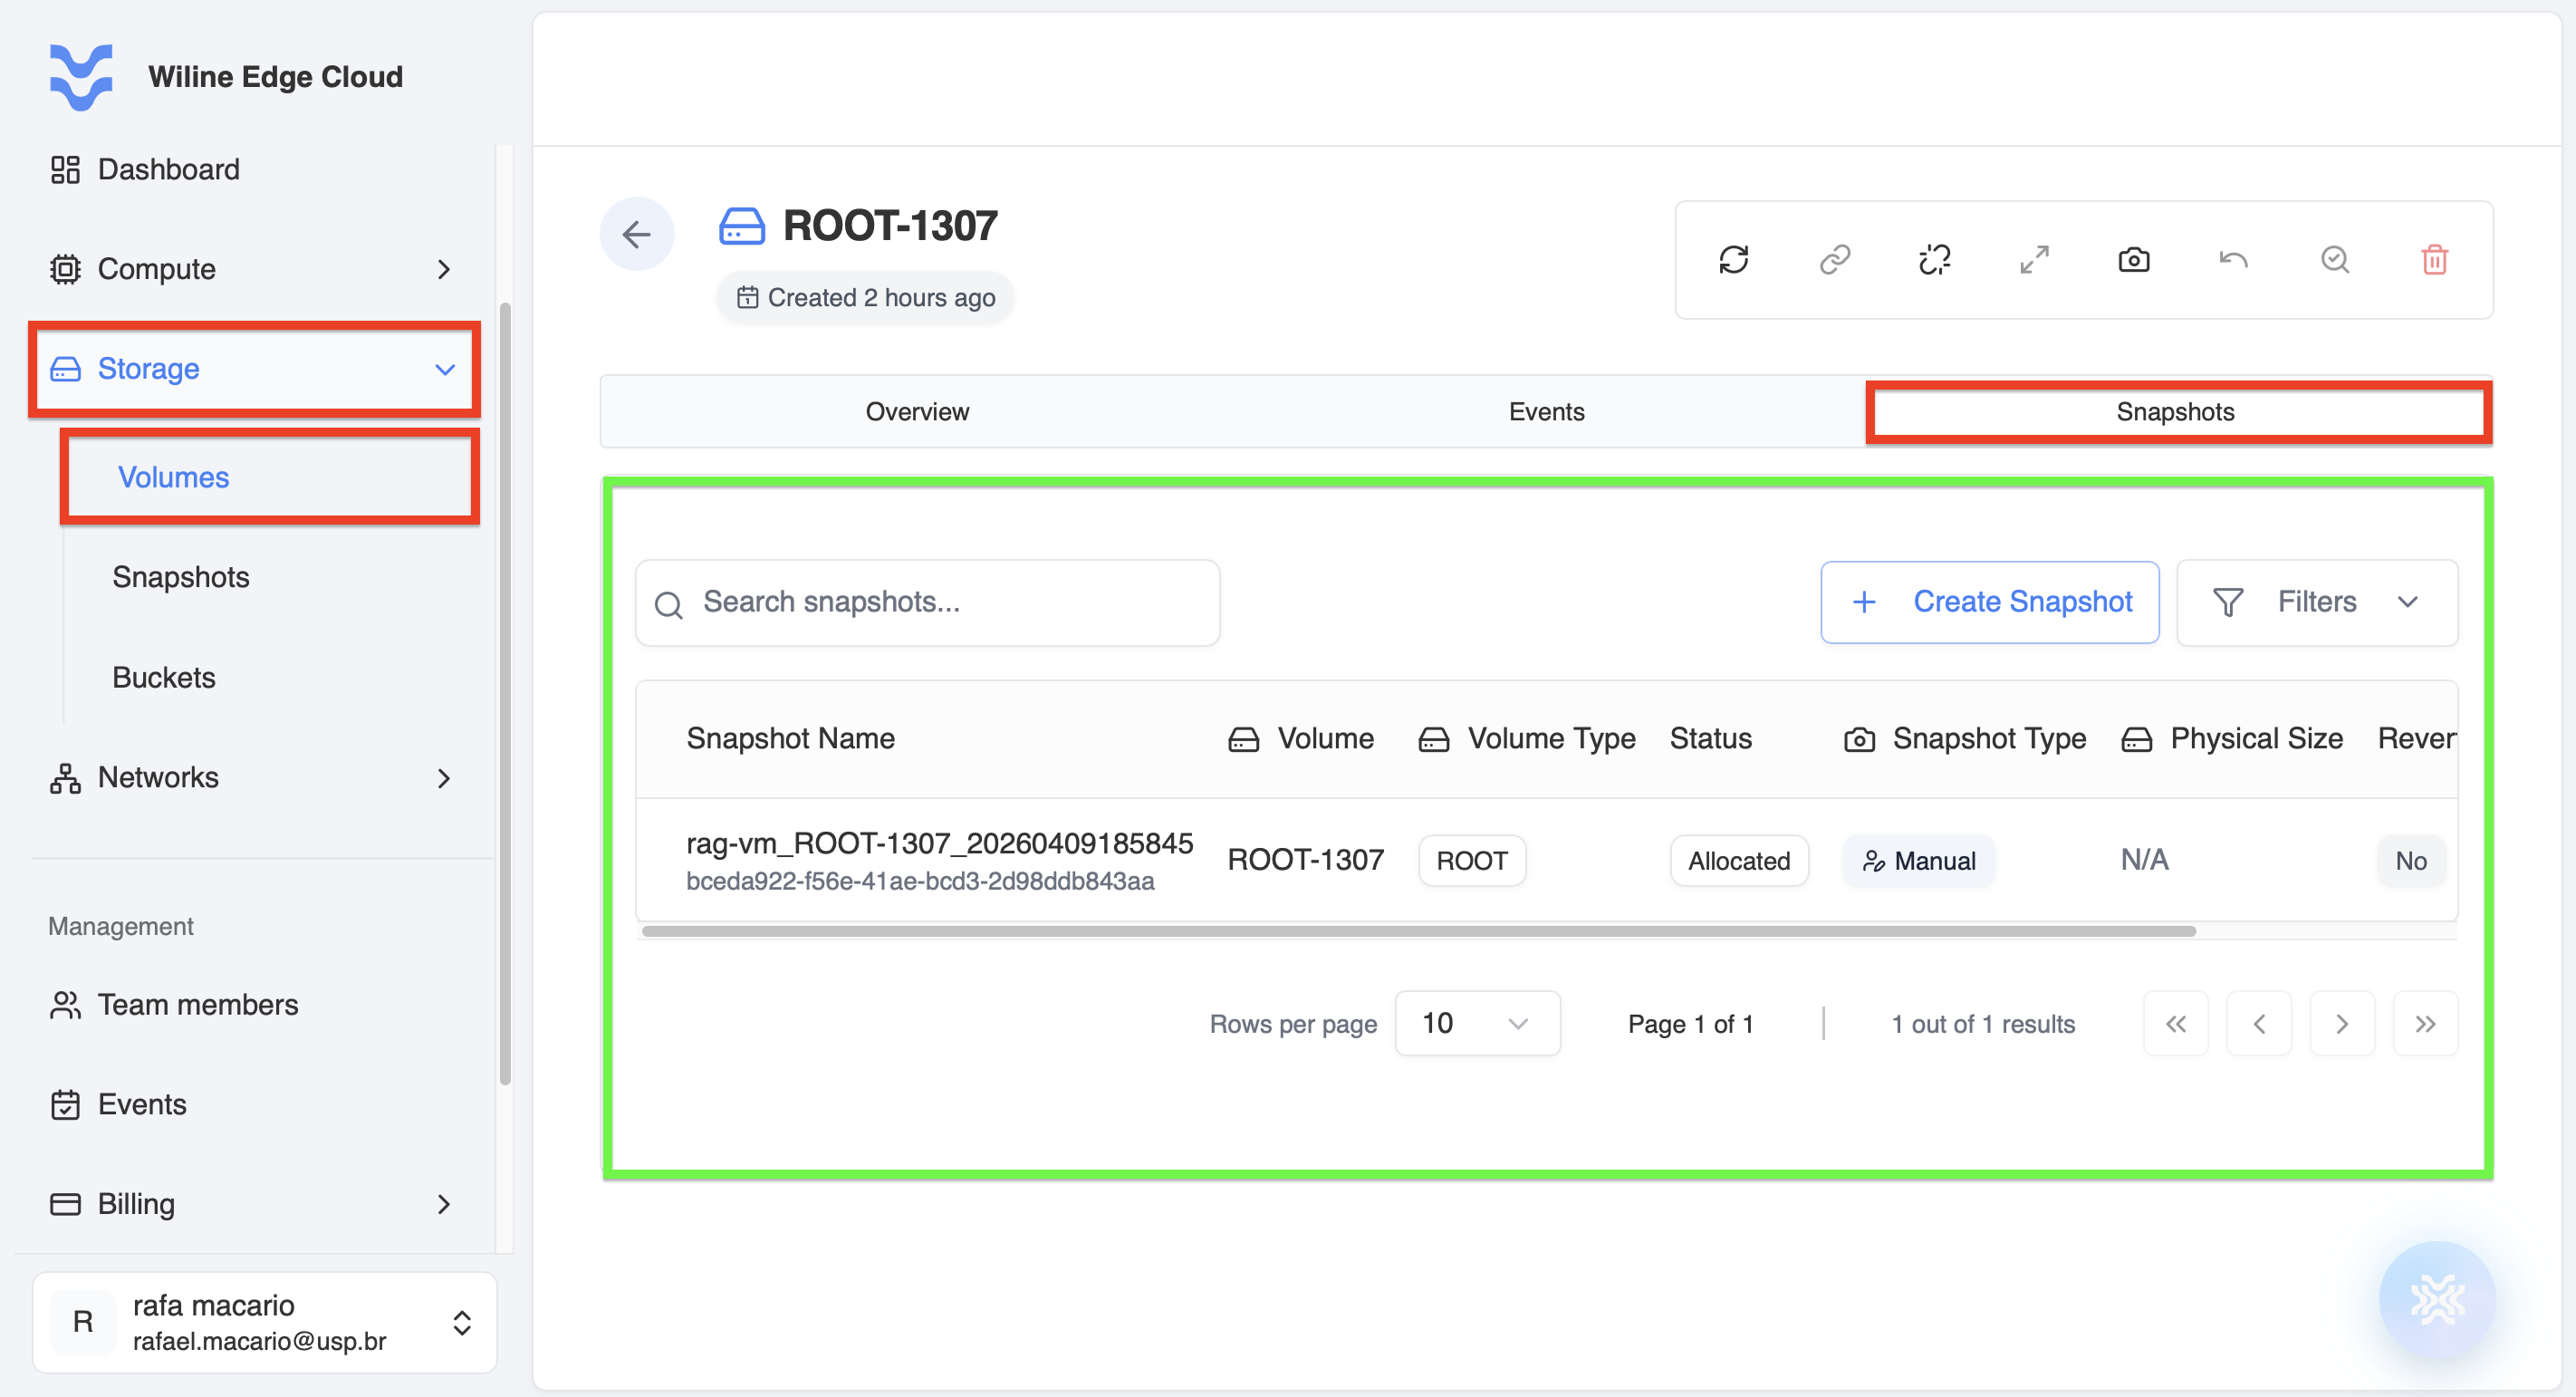 Figure 6 — Snapshots tab with backup management options.
Best Practices
- Attach volumes only when needed to avoid unnecessary costs
- Create snapshots regularly to prevent data loss
- Monitor events to track changes and troubleshoot issues
- Resize volumes proactively based on usage growth
- Use tags to organize volumes across environments