Deploy a Volume
This guide explains how to create and manage storage volumes in WiLine Edge Cloud (WEC).
Volumes provide persistent block storage that can be attached to virtual machines or used independently.
The Deploy Volume form is a single-page configuration. Scroll down to complete each section in order.
Deployment Steps
The form includes the following sections:
Step 1 — Open the Volume deployment form
After logging in to the WiLine Edge Cloud:
- In the sidebar, click Storage
- Select Volumes
- Click Deploy Volume
This opens the volume deployment form.
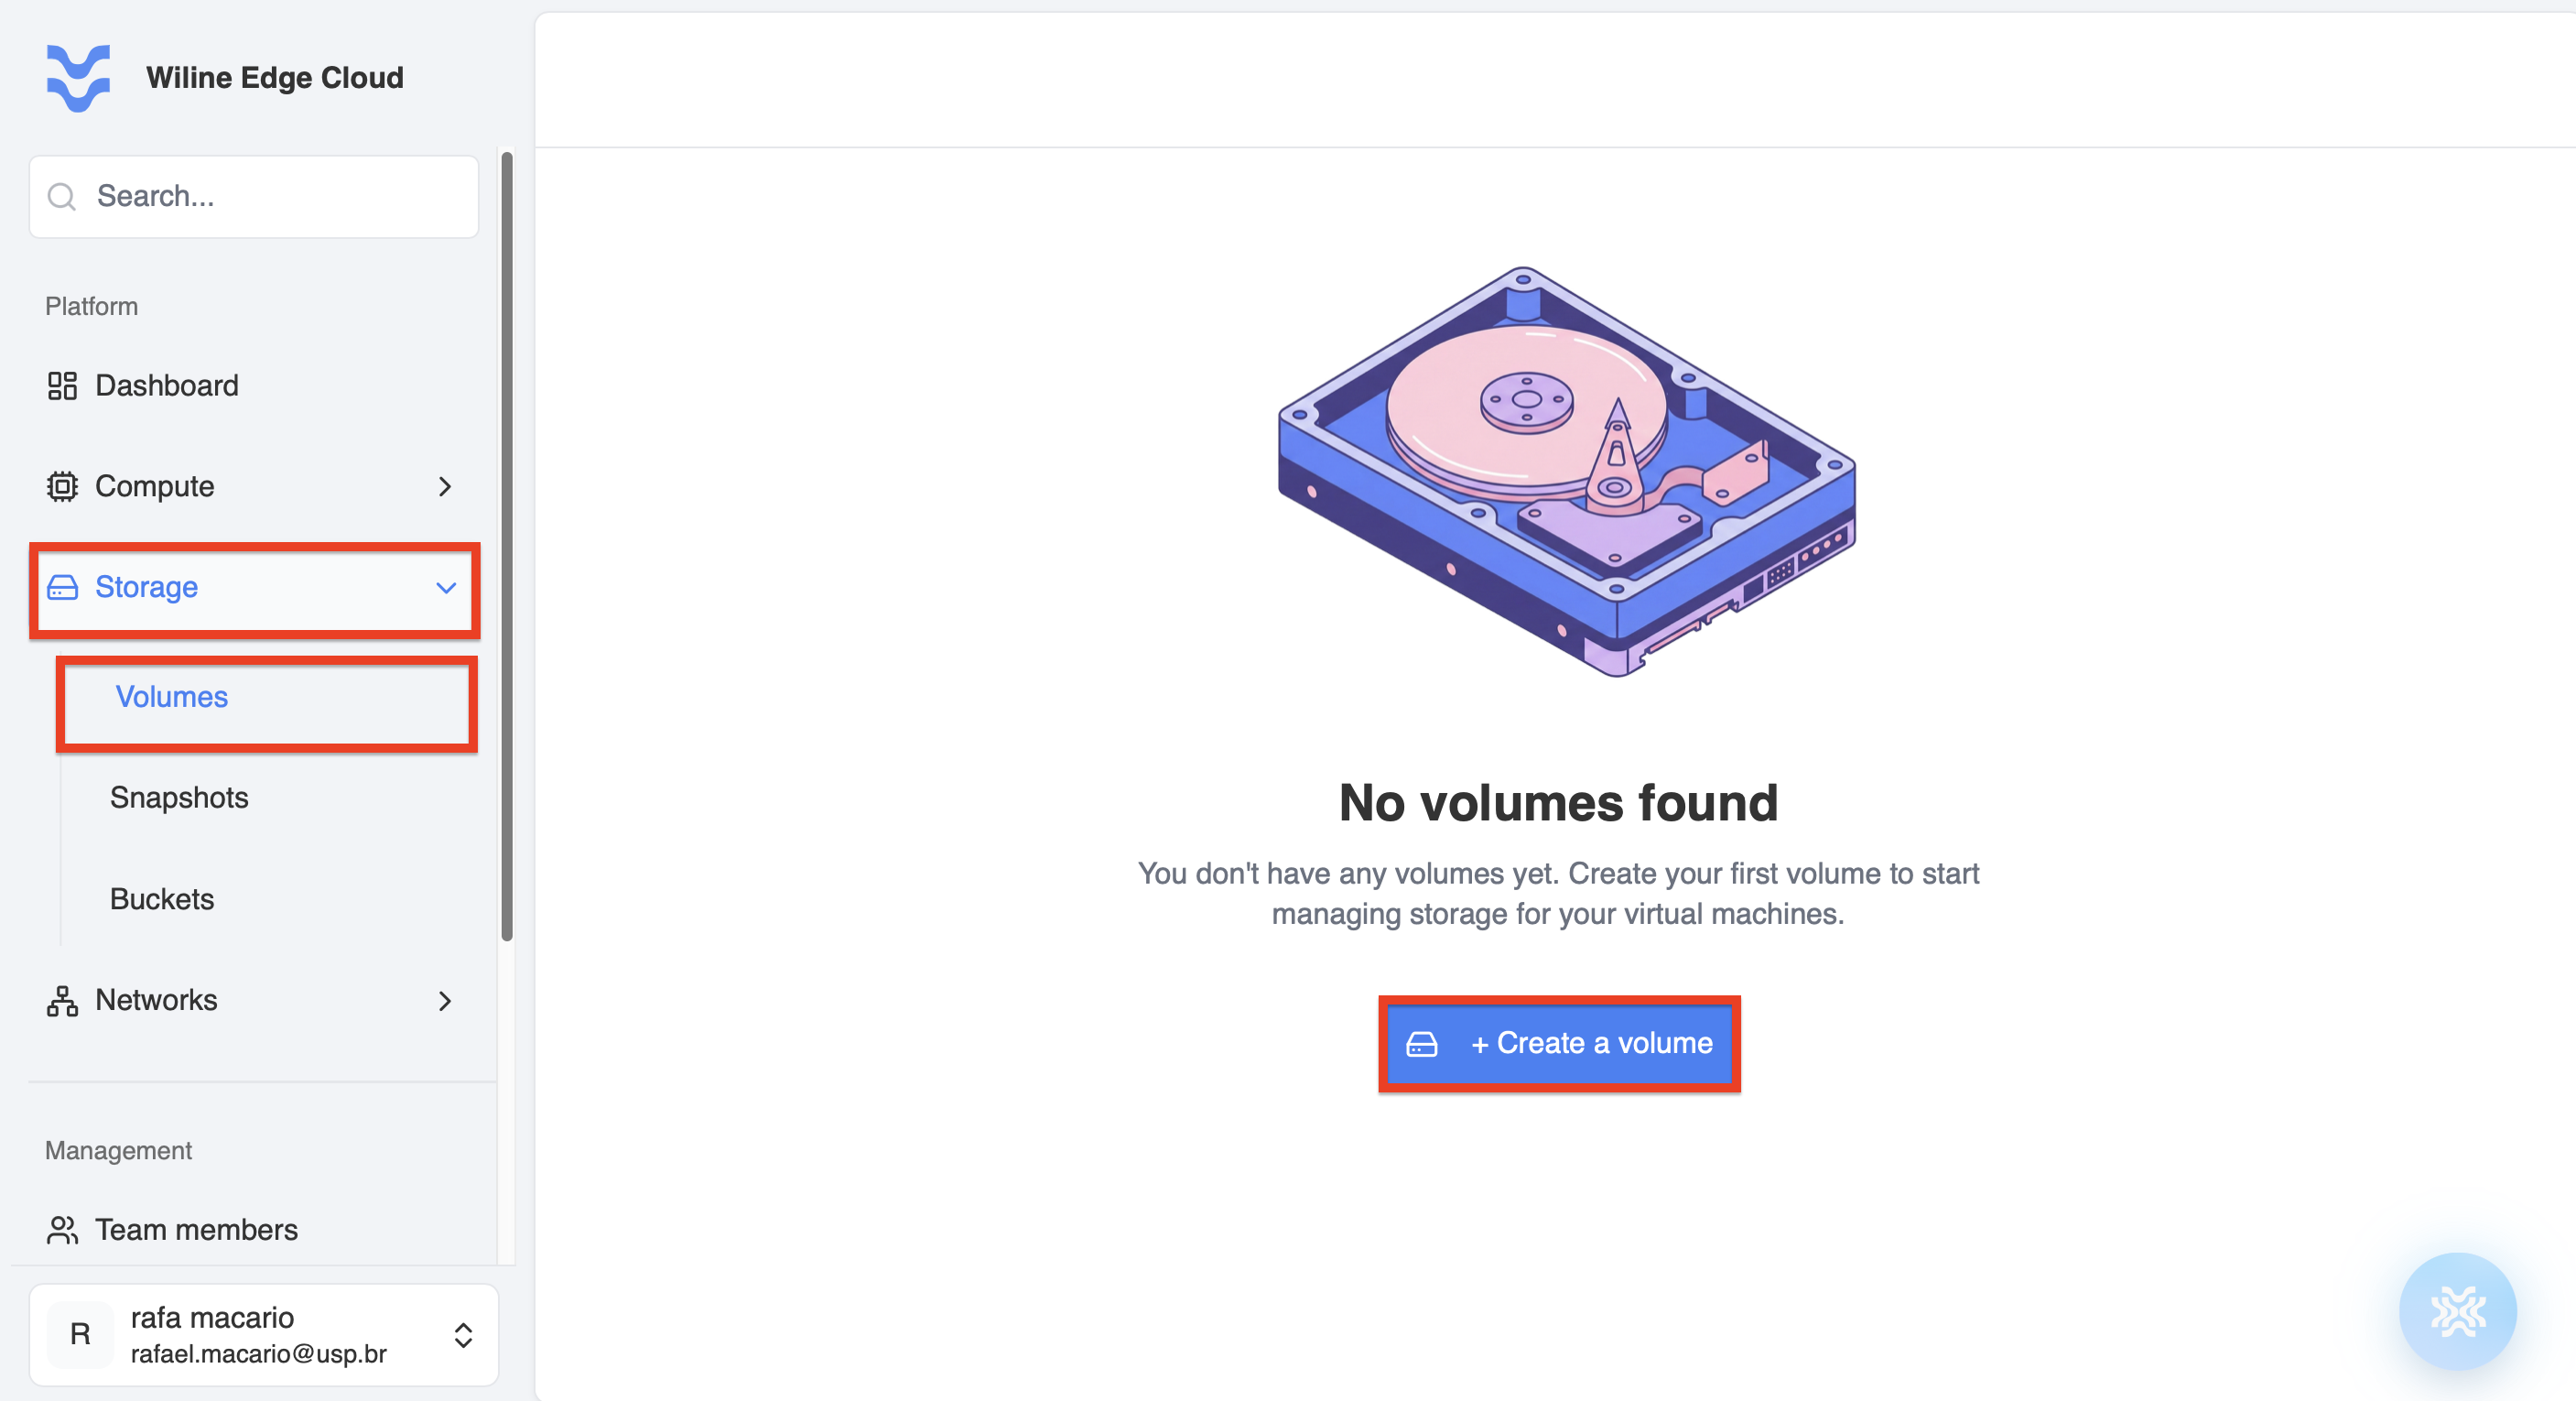
Figure 1 — Deploy Volume button in the Volumes panel.
Step 2 — General
In this step, define the basic configuration for your volume. This section appears at the top of the page and is the starting point of the configuration.
Volume Name
Enter a descriptive name to identify the volume.
Examples:
db-storage-volumebackup-disk-01logs-volume-prod
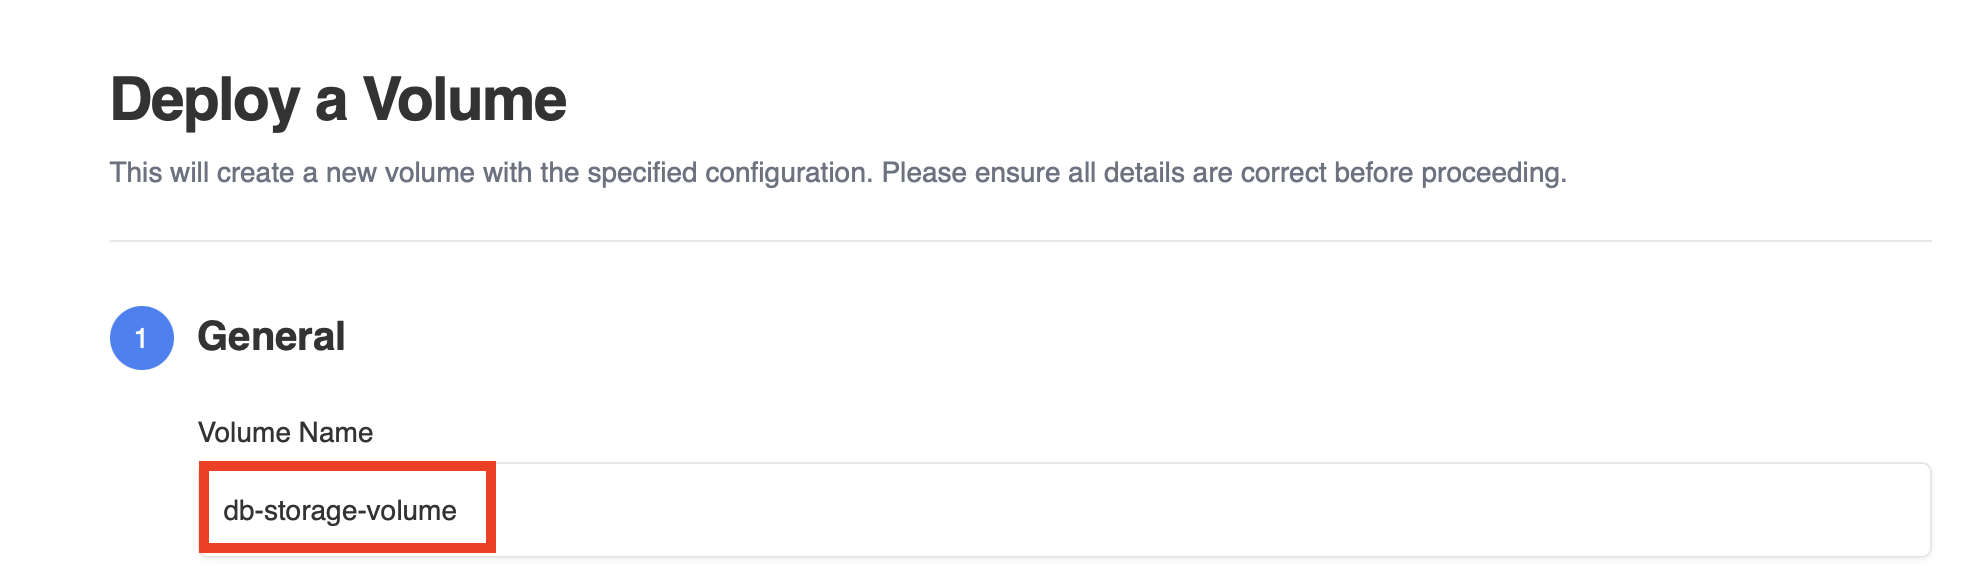
Figure 2 — Configuring volume name and description.
Step 3 — Location and Infrastructure
Select where your volume will be created. This section allows you to select the region using interactive cards displayed on the page.
A region represents a physical data center.
Region selection
Available filters include:
You can select a region by clicking directly on one of the available location cards.
- All Locations
- West
- Midwest
- South
- Northeast
You can:
- browse regions
- filter by location
- select a specific data center
Examples:
- Princeton (USA)
- Roseville (USA)
Why this matters
Choosing the correct region affects:
- latency to your applications
- data locality
- availability of resources
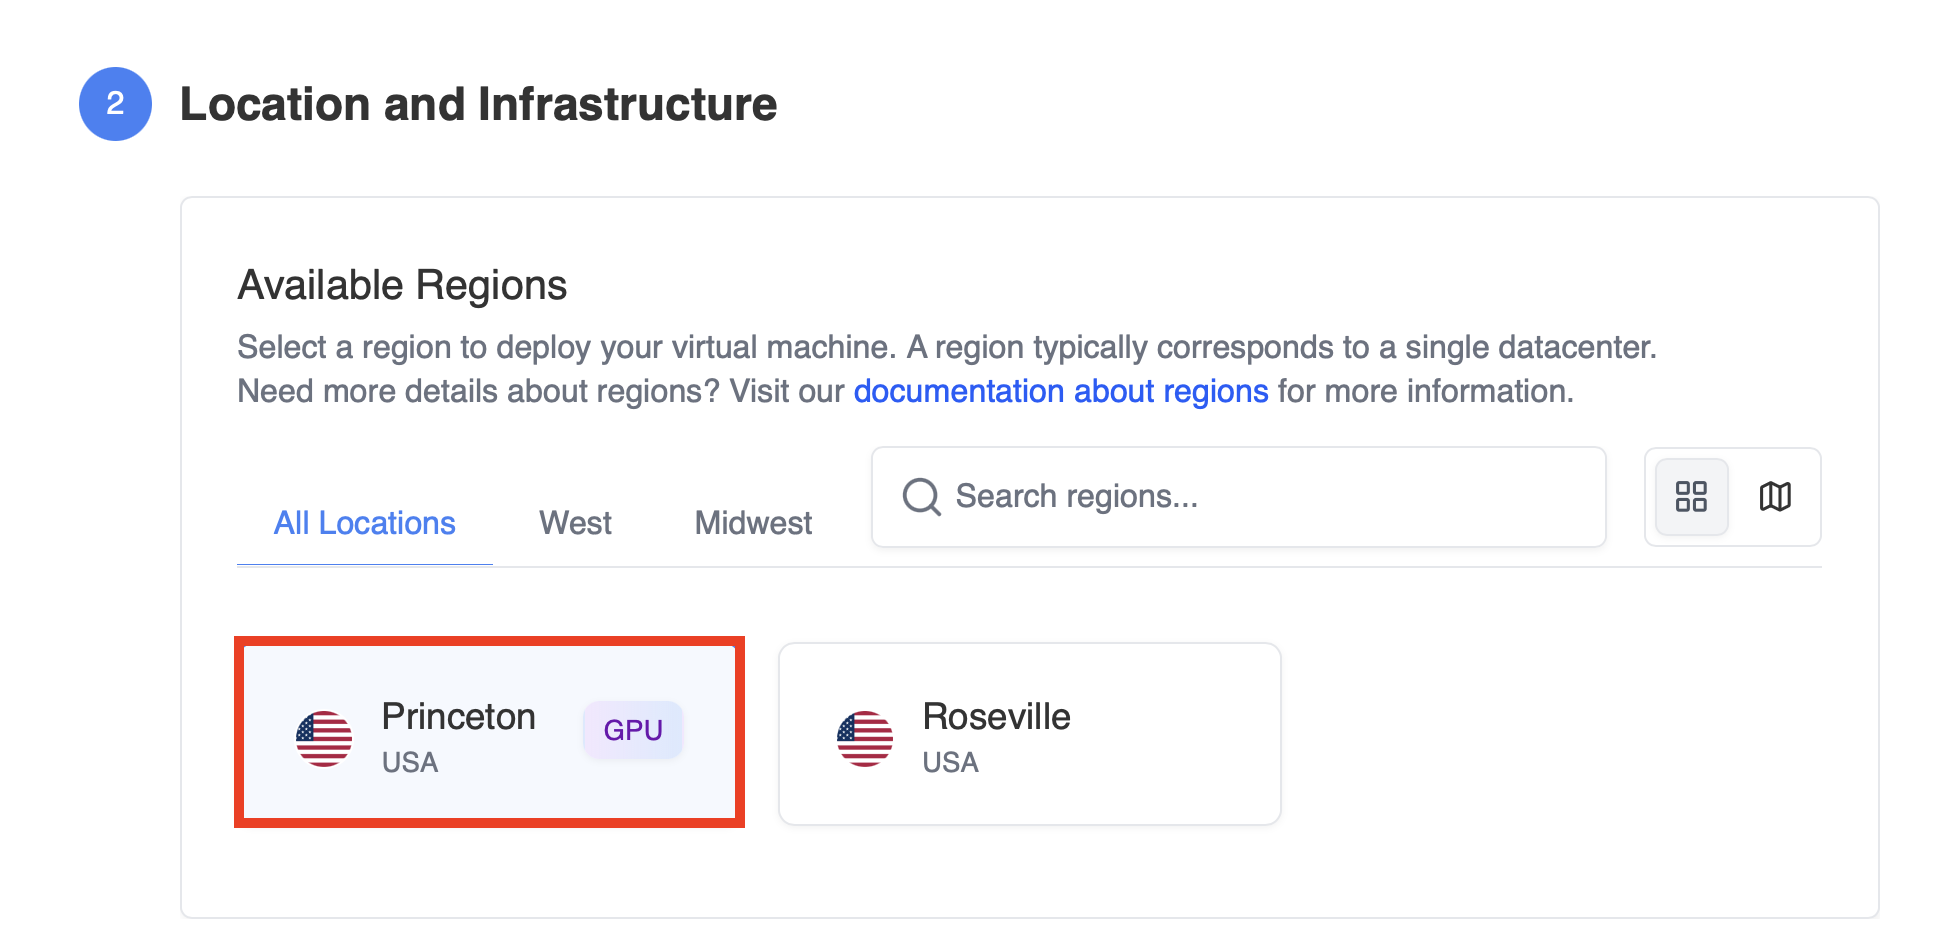
Figure 3 — Selecting the deployment region.
Step 4 — Storage Configuration
This step defines the size and performance of your volume.
Disk offerings
You can browse disk offerings using the tabs at the top of the table (e.g., All Storage, Custom Size, Fixed Size).
You can choose between:
Fixed Size volumes
Predefined storage options:
- 10 GB
- 30 GB
- 50 GB
- 80 GB
- 100 GB
Each option includes:
- hourly pricing
- monthly estimated cost
- availability status
Custom Size volumes
Allows flexible sizing based on your needs.
- Pricing is calculated per GB
- Ideal for dynamic workloads
When selecting a custom size, a slider will appear allowing you to define the exact disk size.
You can use the search bar in the top-right corner of the table to quickly find specific disk offerings.
Considerations
- Larger volumes increase cost
- Storage performance impacts application performance
- Choose based on workload requirements
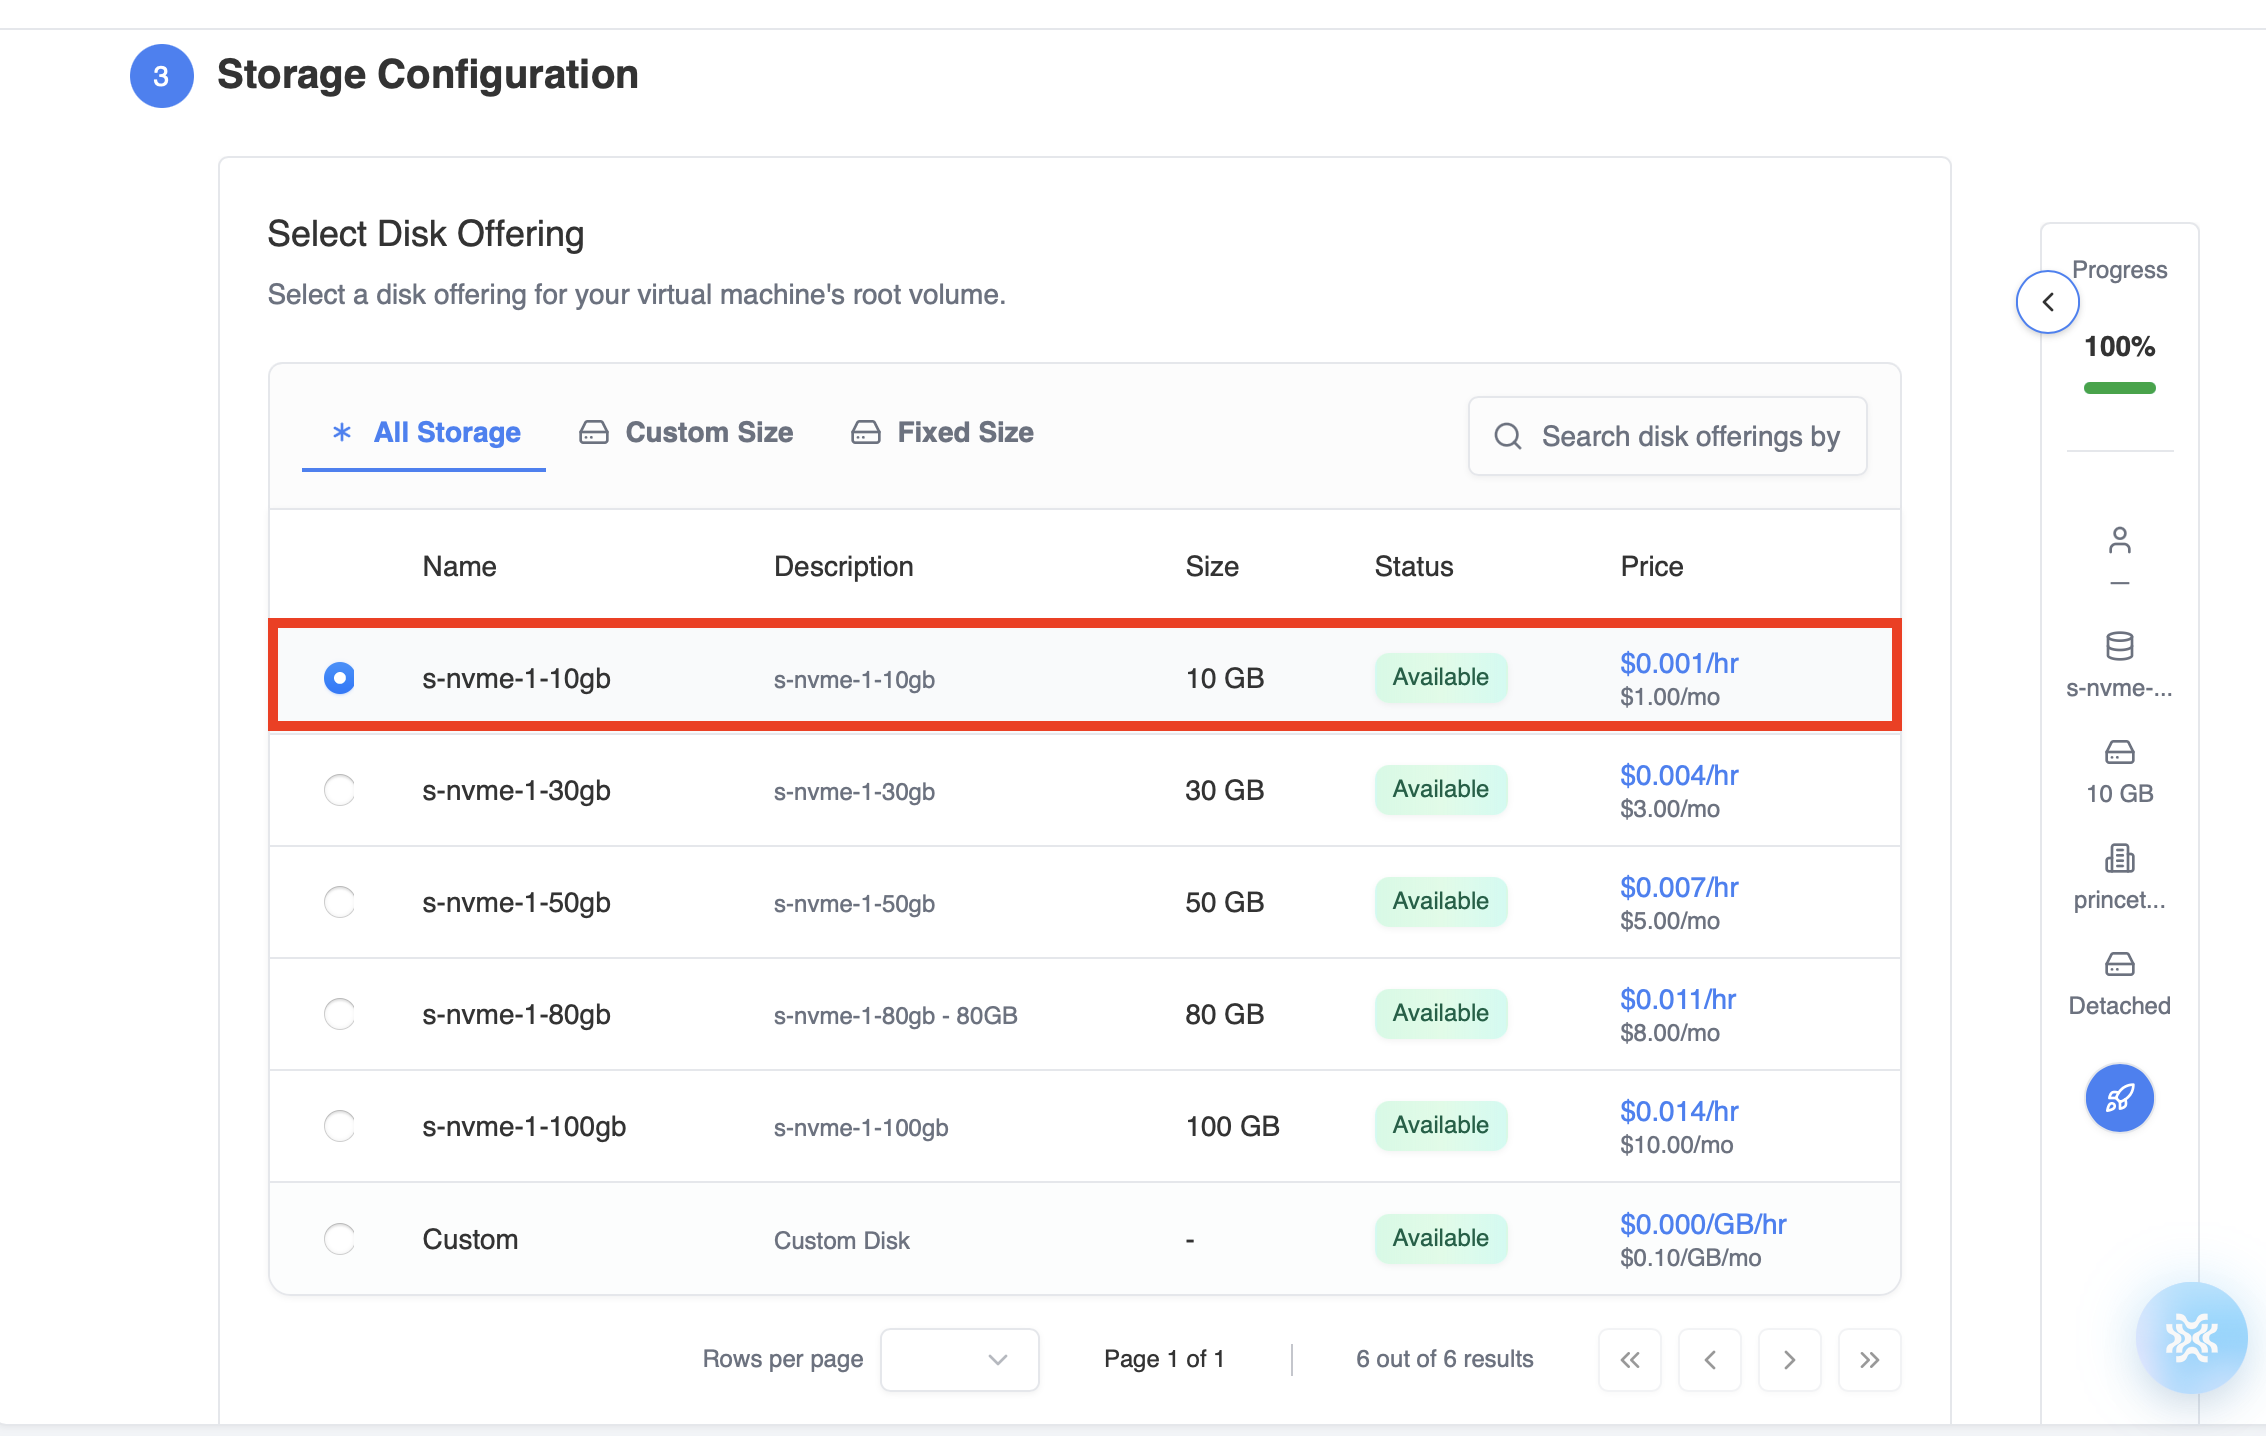
Figure 4 — Selecting a storage offering.
Step 5 — Virtual Machine Attachment (Optional)
Decide how the volume will be used.
Attachment types
This option is presented as a toggle selection between attached and detached modes.
Attached
If enabled, you will be prompted to select a virtual machine from the available list.
- Volume is created and immediately attached to a VM
- Ideal for:
- application storage
- database disks
- active workloads
Detached
- Volume is created as a standalone resource
- Can be attached later
- Useful for:
- backups
- future use
- reusable storage

Figure 5 — Choosing volume attachment type.
Step 6 — Tags (Optional)
Tags help you organize and manage your volumes.
Tag usage
You can add up to 20 tags per volume.
Common examples:
environment=productionproject=webappbackup=daily
Benefits
Tags help with:
- resource organization
- billing analysis
- automation workflows
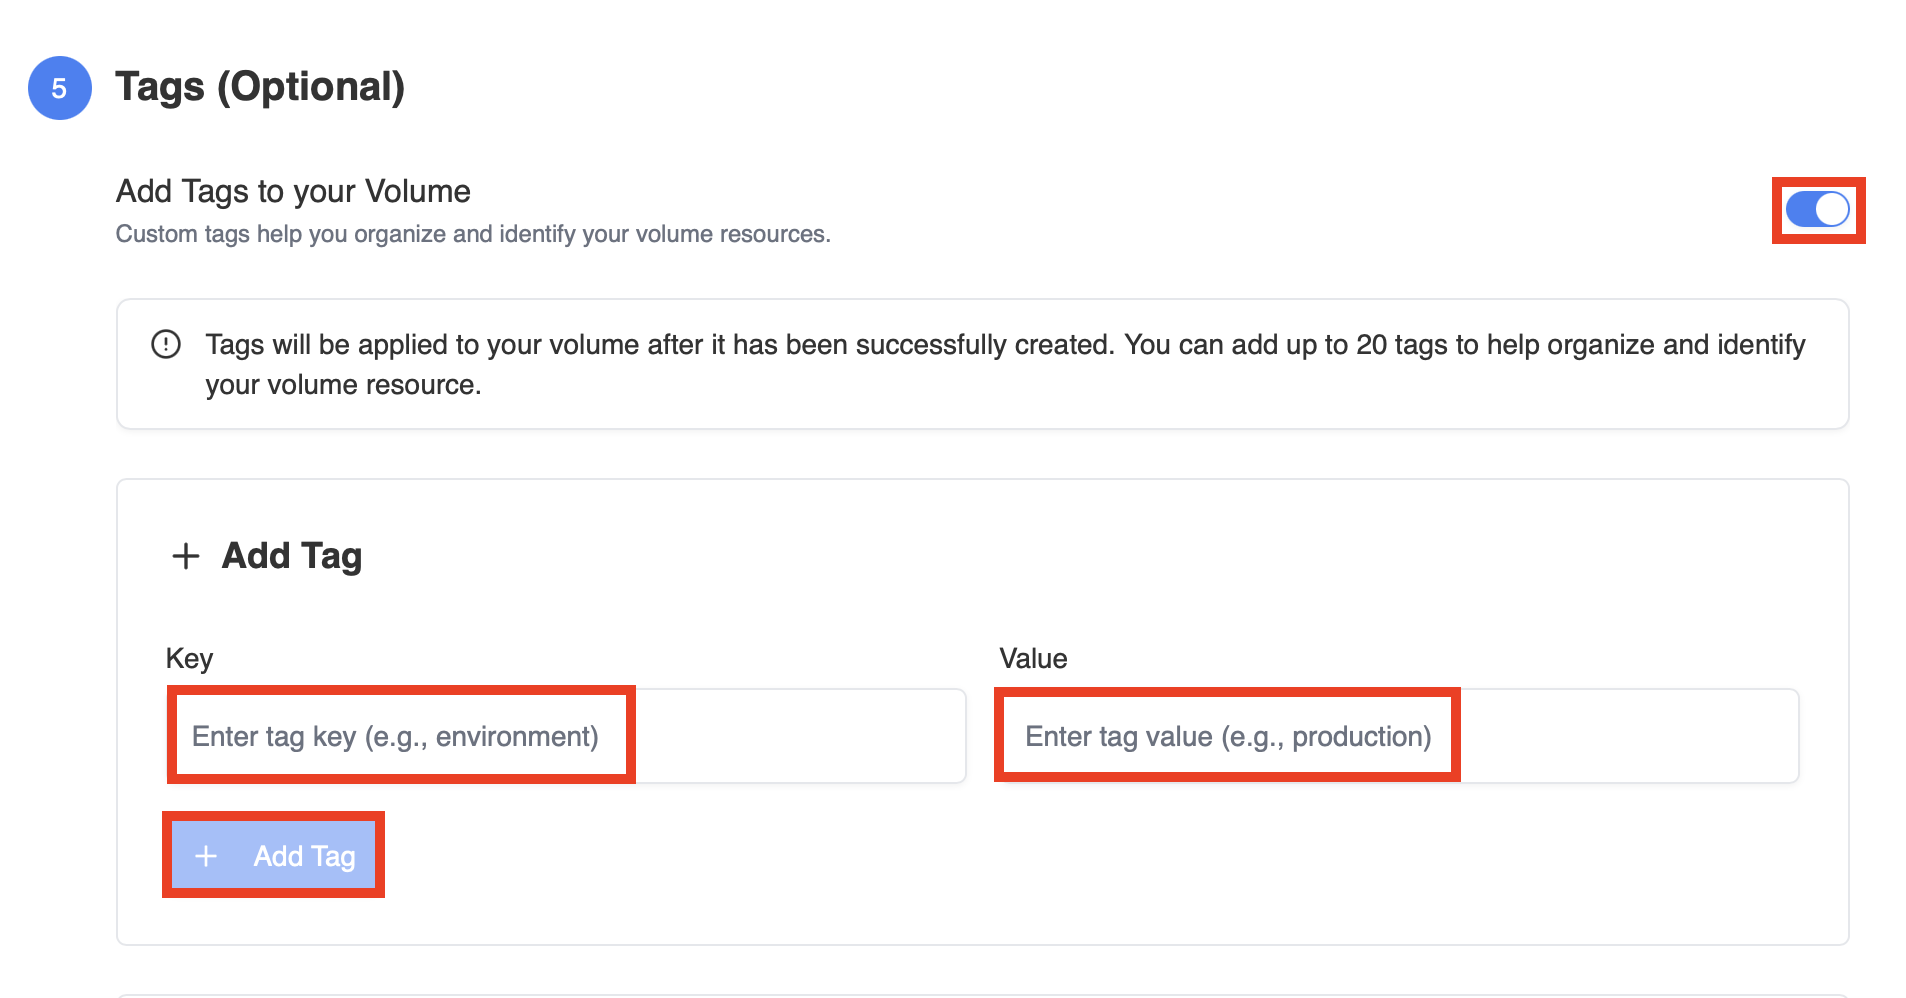
Figure 6 — Adding tags to a volume.
Step 7 — Deploy
Review your configuration before creating the volume.
The summary includes:
- volume name
- selected region
- storage configuration
- attachment type
- tags
- estimated cost
Click Deploy Volume to create your volume.
After Deployment
Once created, your volume will appear in the Volumes dashboard.
From there, you can:
- attach or detach volumes
- monitor usage
- delete unused volumes
- manage storage lifecycle
Viewing your Volumes
After creating a volume, you will be redirected to or can return to the Volumes dashboard, where all your storage resources are listed.
This page provides an overview of your storage usage and volume status.
Overview panels
At the top of the page, you will see summary metrics:
- Total Storage — total allocated storage across all volumes
- Volume Health — percentage of volumes that are ready and available
- Storage Billing — estimated cost based on current usage
Volume list
Below the summary, you will find a table displaying all your volumes.
Each row includes:
- Volume Name / ID
- Attached Virtual Machine (if applicable)
- Status (e.g., Allocated, Ready)
- Type (Root or Data)
- Size
- Zone
- Creation date
You can also:
- use the filters to search and refine results
- sort volumes by different columns
- access additional actions using the menu on each row
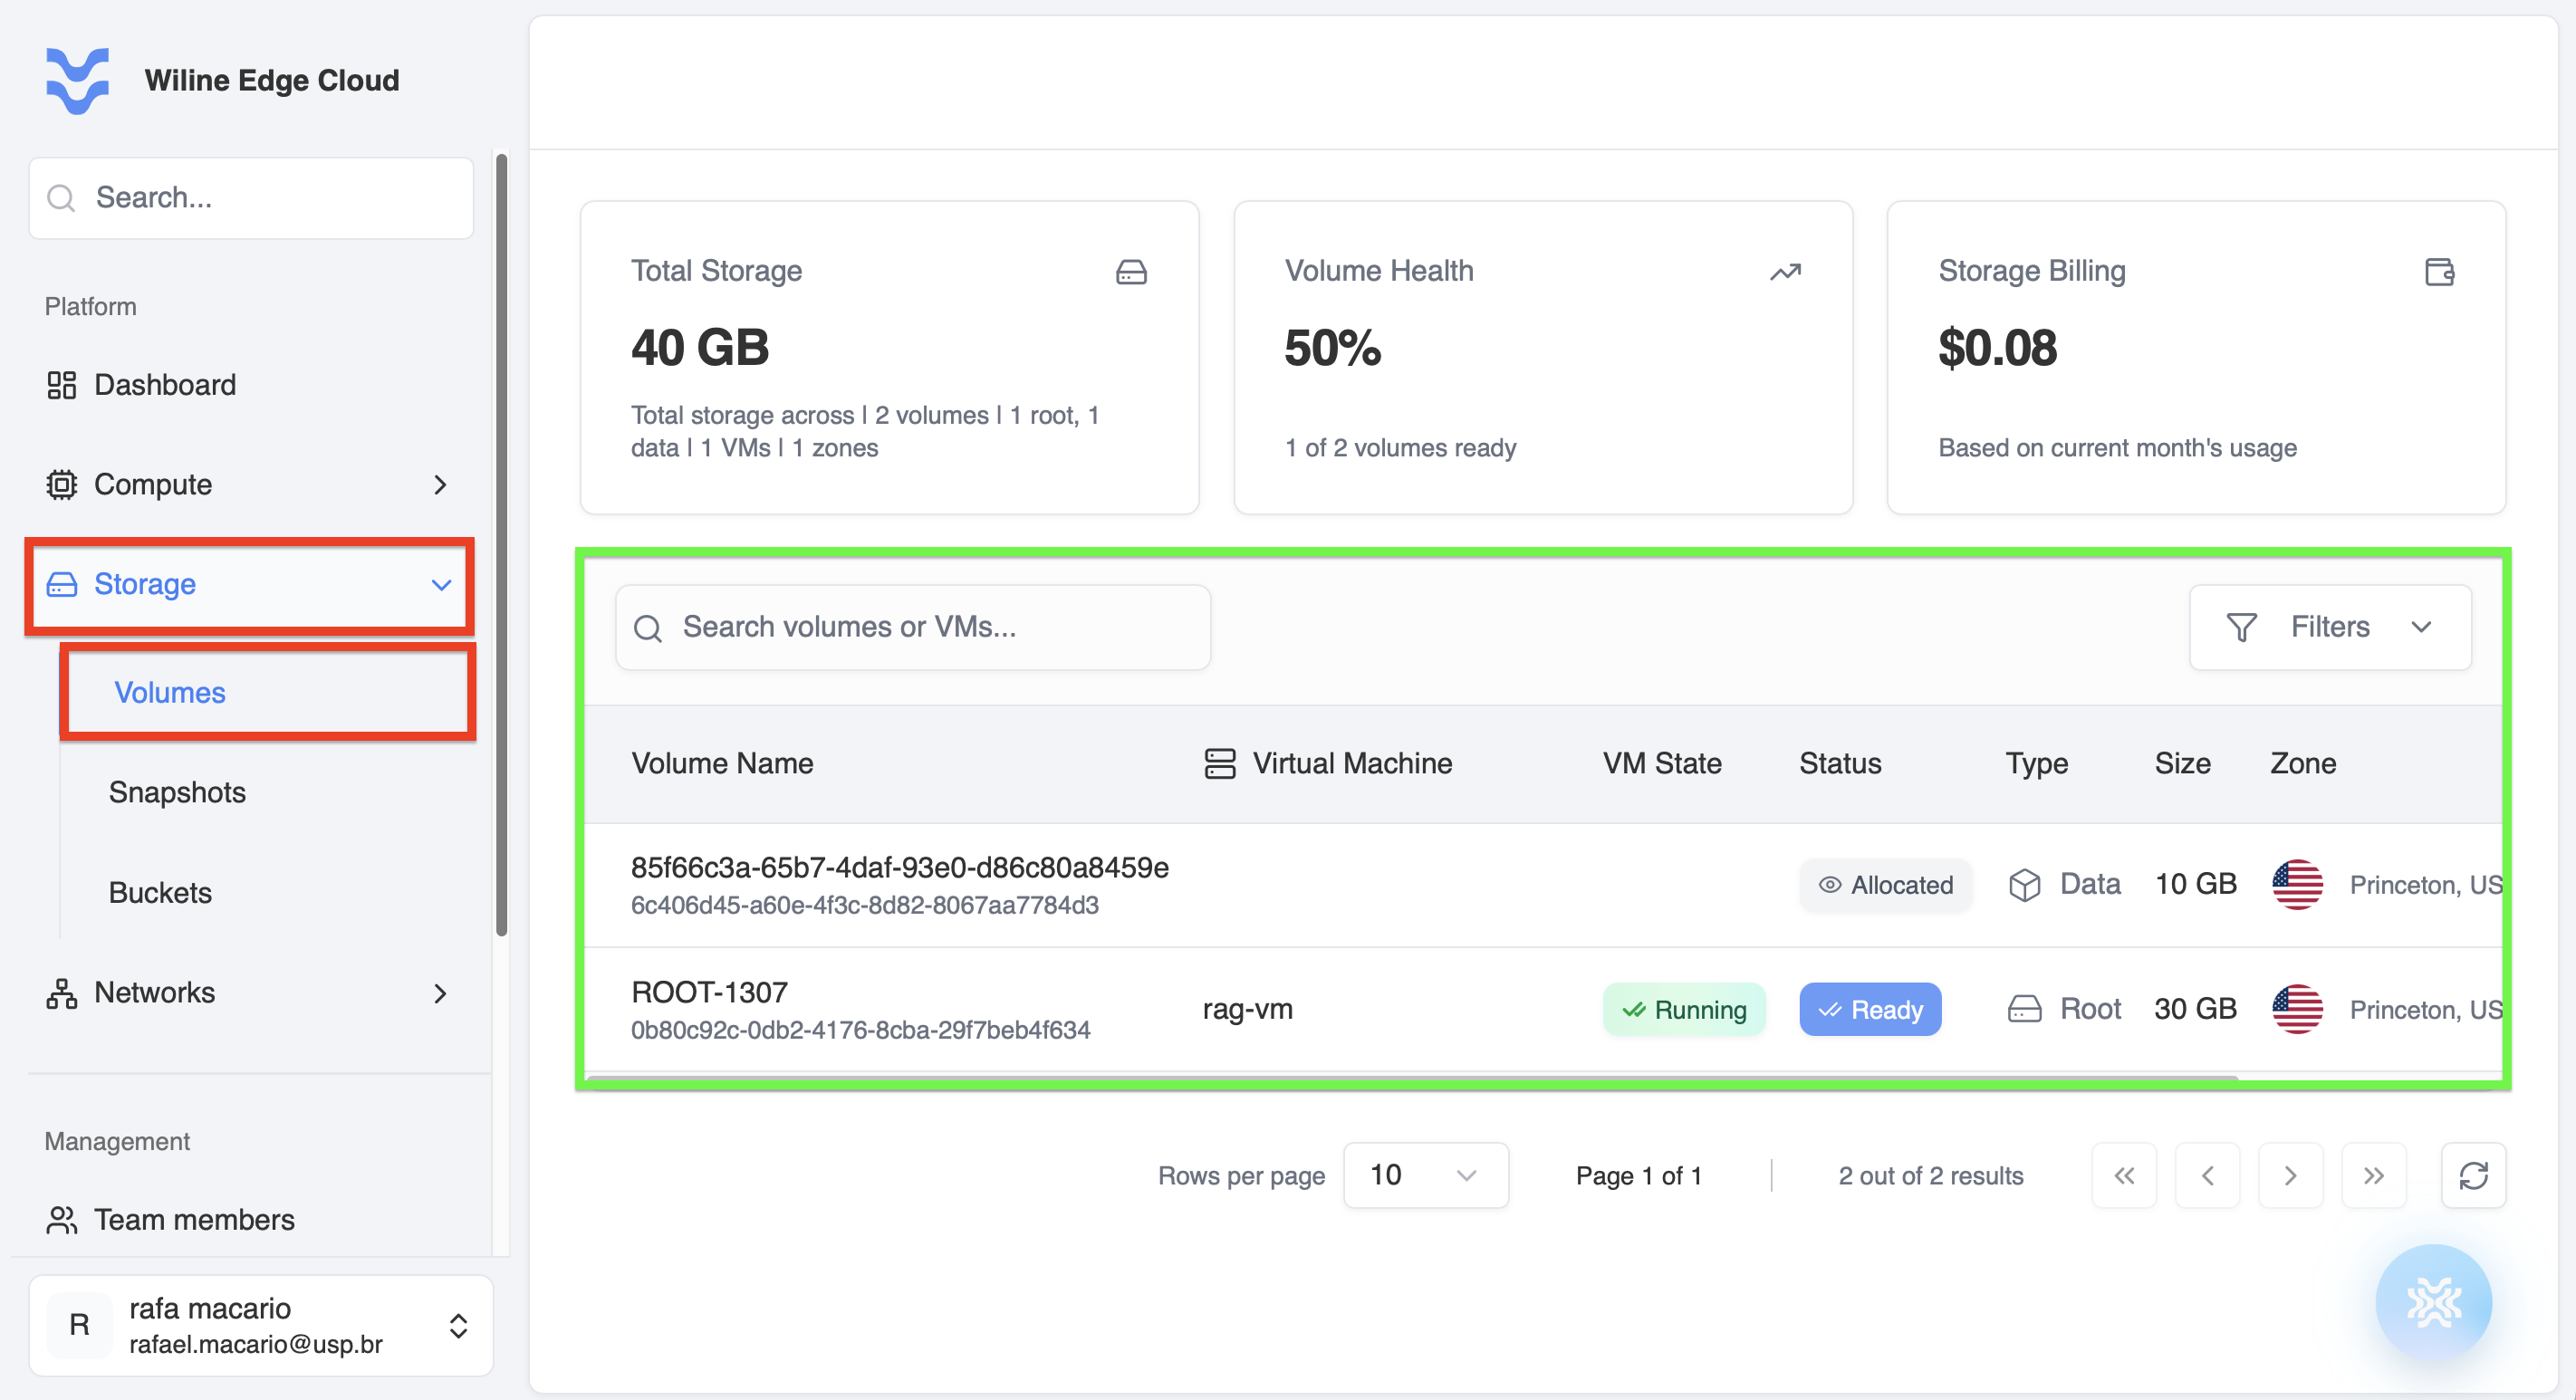
Figure 7 — Volumes dashboard showing created volumes and storage summary.
Attaching a Volume to a VM
If you created a detached volume, you can attach it later.
- Go to Storage → Volumes
- Select the volume
- Click Attach to VM
- Choose the target virtual machine
- Confirm the action
After attachment, the volume becomes available to the VM as a storage device.
Next steps
After creating volumes, you may want to:
- Attach volumes to virtual machines
- Expand storage capacity
- Create backups and snapshots
- Monitor storage usage
These actions are covered in the next sections of the documentation.