Create a Volume Snapshot
Volume snapshots provide a fast, reliable way to protect your data in WiLine Edge Cloud (WEC). A volume snapshot is a point-in-time copy of a storage volume, capturing its exact state for backup, recovery, or cloning.
Volume snapshots offer:
- Rapid backup and recovery — Safeguard your volumes before changes or updates.
- Cloning and testing — Create copies for testing, deployment, or rollback.
- Flexible protection — Capture individual storage volumes without affecting VM runtime state.
Creating a volume snapshot is a streamlined, single-page process. The configuration form provides a real-time summary as you make selections, ensuring clarity and control—just like the Volumes guide.
Snapshot Configuration
The form includes the following sections:
Step 1 — Open the Snapshot creation form
After logging in to the WiLine Edge Cloud:
- In the sidebar, click Storage
- Select Snapshots
- Click Create Snapshot
This opens the snapshot creation form.
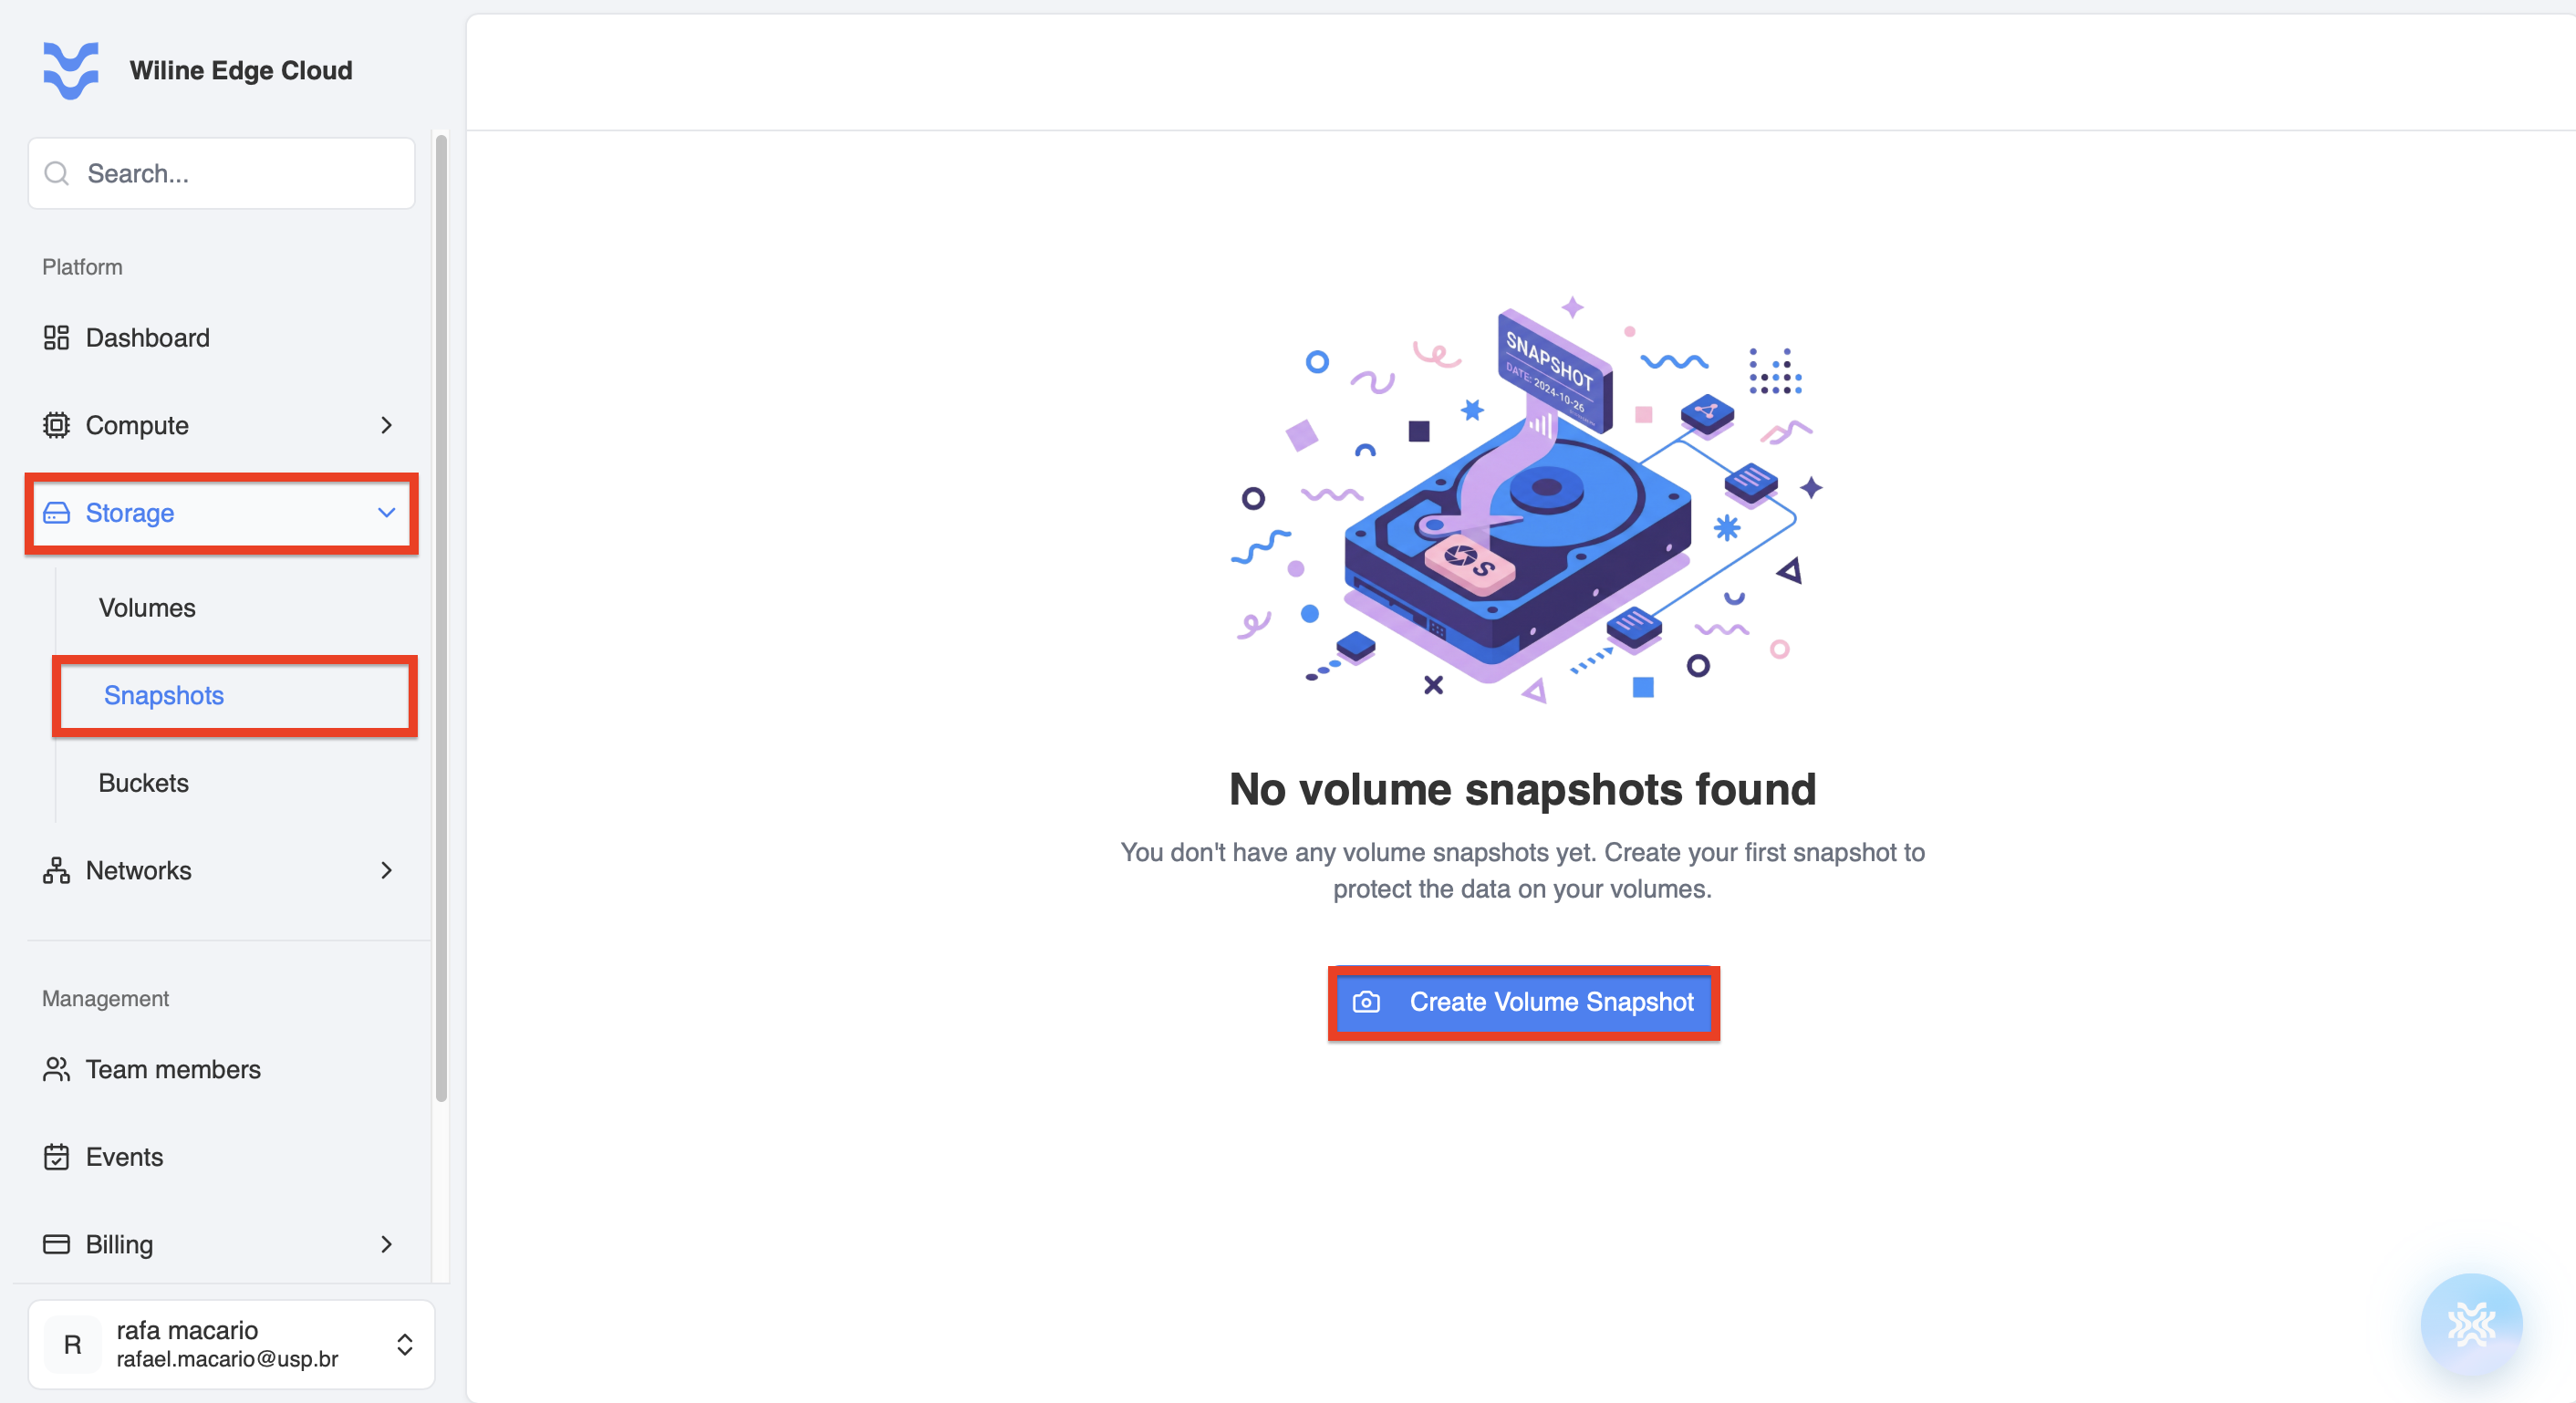
Figure 1 — Create Snapshot button in the Snapshots panel.
Step 2 — Select Snapshot Type
Choose the snapshot type:
Volume Snapshot
- Captures a single storage volume
- Does not include VM memory or runtime state
Use this option for:
- backups of specific disks
- database storage snapshots
- incremental storage protection
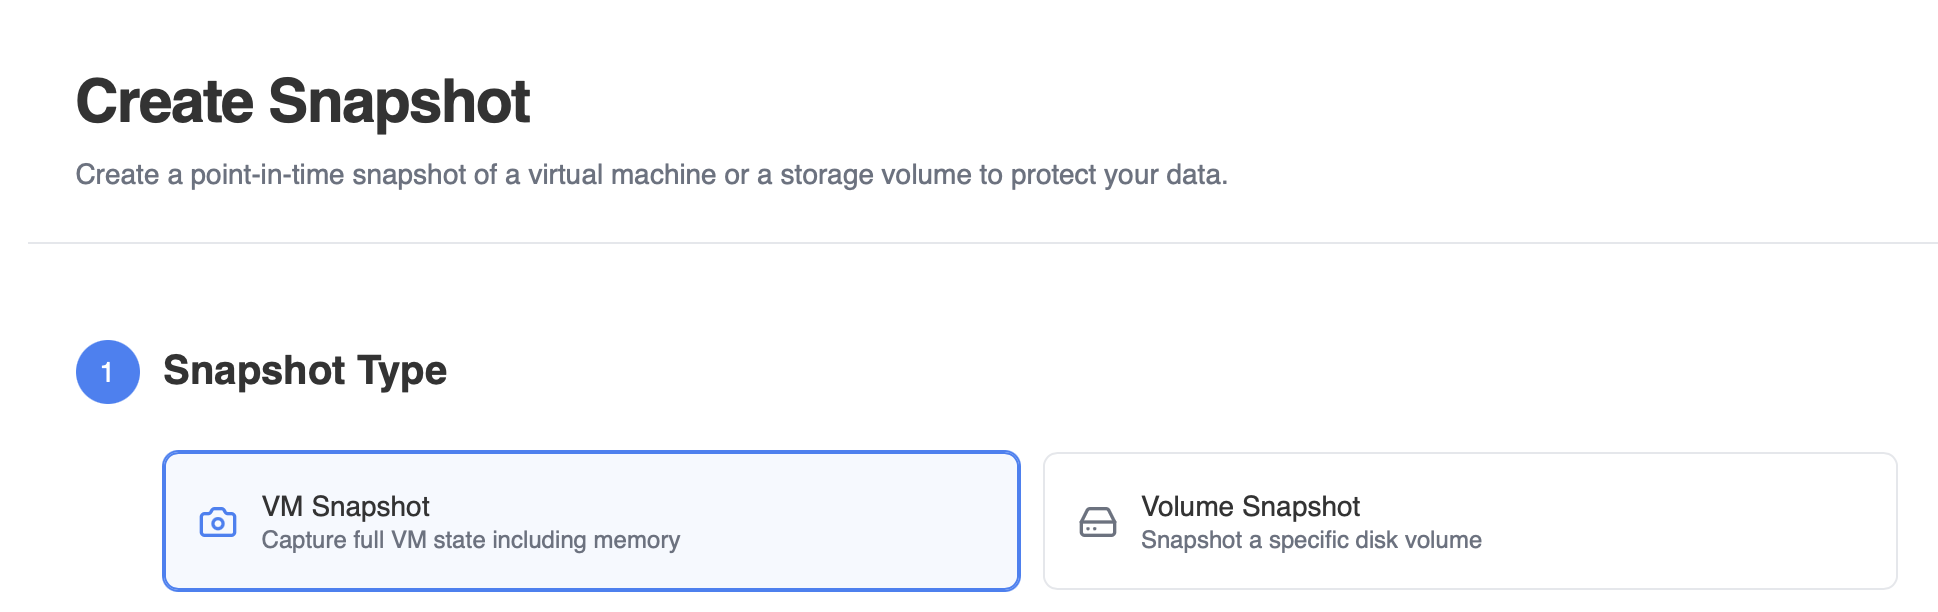
Figure 1 — Selecting snapshot type.
Selecting the snapshot type determines what additional options will be displayed in the form. For volume snapshots, you will select a specific volume later in the process.
Step 3 — Details
Provide basic information for your snapshot.
Name
Enter a descriptive name for the snapshot.
Examples:
database-volume-snapshotpre-update-backup
You can also add a description (optional) to document why the snapshot is being created, such as maintenance, backup, or pre-deployment checkpoints.
Use a clear and consistent naming convention to make it easier to identify snapshots later, especially when managing multiple backups.
If no name is provided, the platform will automatically generate one. The description field remains optional.
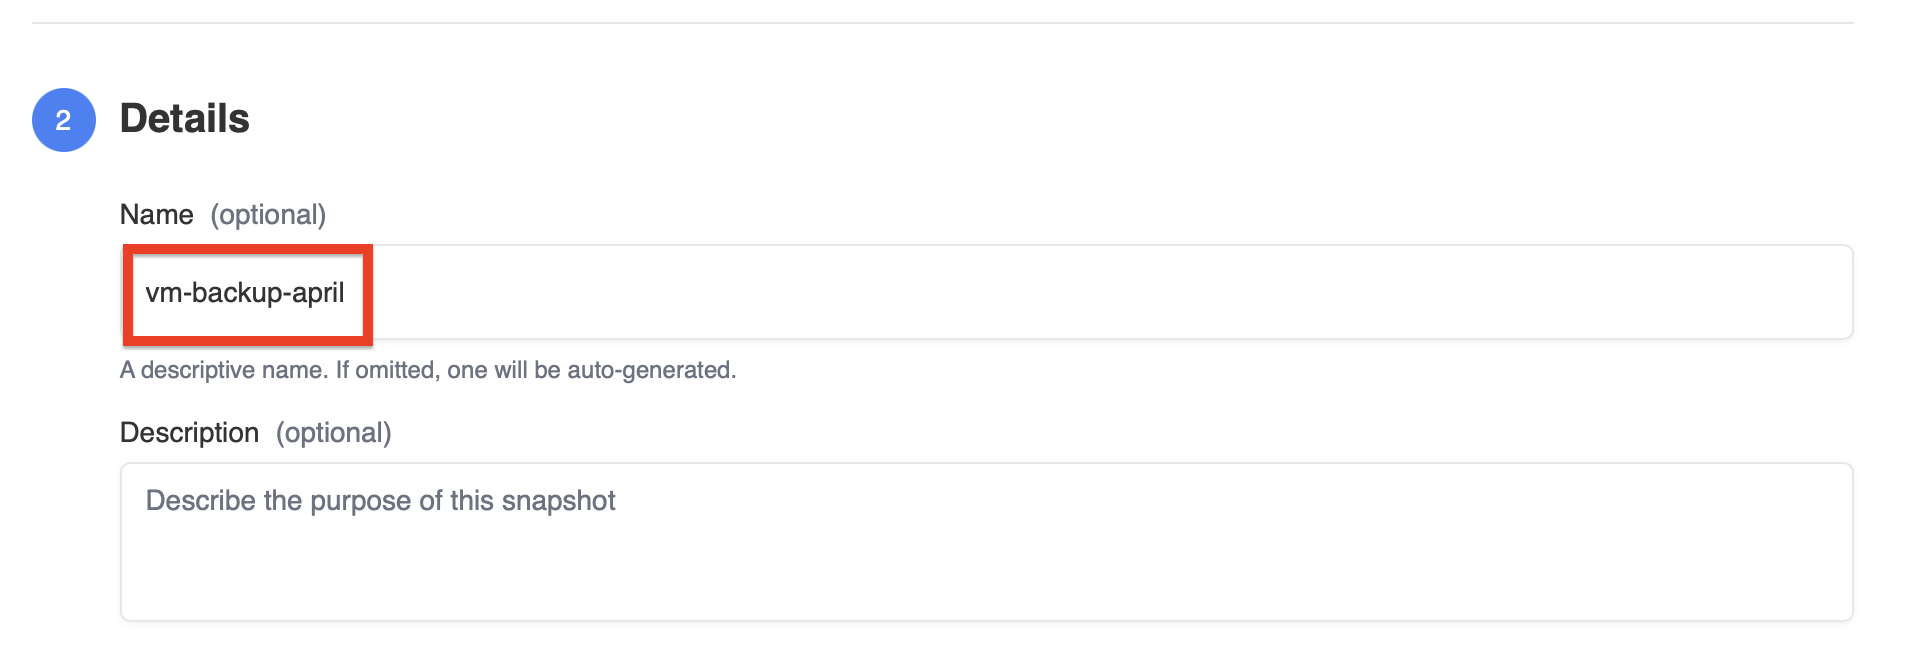
Figure 2a — Entering a snapshot name and description.
Step 4 — Advanced Options
This section is optional and can be enabled using a toggle. When enabled, additional configuration options will appear.
Configure optional settings for your snapshot.
Quiesce Volume
- Temporarily pauses writes to the volume
- Ensures data consistency during snapshot creation
This option is especially important for applications that frequently write data to disk.
Recommended for:
- databases
- transactional systems
Backup to Secondary Storage
- Copies the snapshot to secondary storage asynchronously
- Improves durability and recovery options
This process runs in the background and does not block snapshot creation.
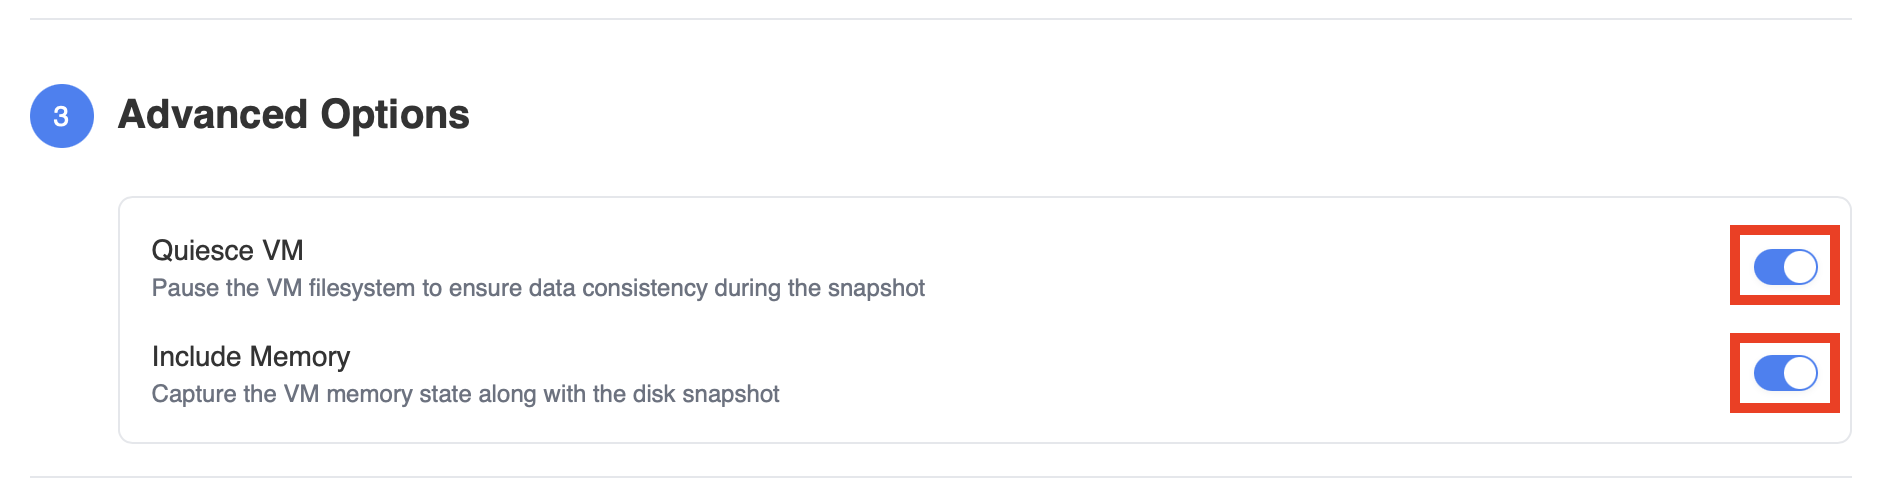
Figure 3 — Configuring advanced snapshot options.
Step 5 — Select Volume
Choose the target volume for your snapshot.
- Select from the list of available volumes in your account
- If no volumes are available, an empty state message will be displayed
If you do not see any volumes, you must create them first. Only existing resources will appear in this list.
This behavior is expected.
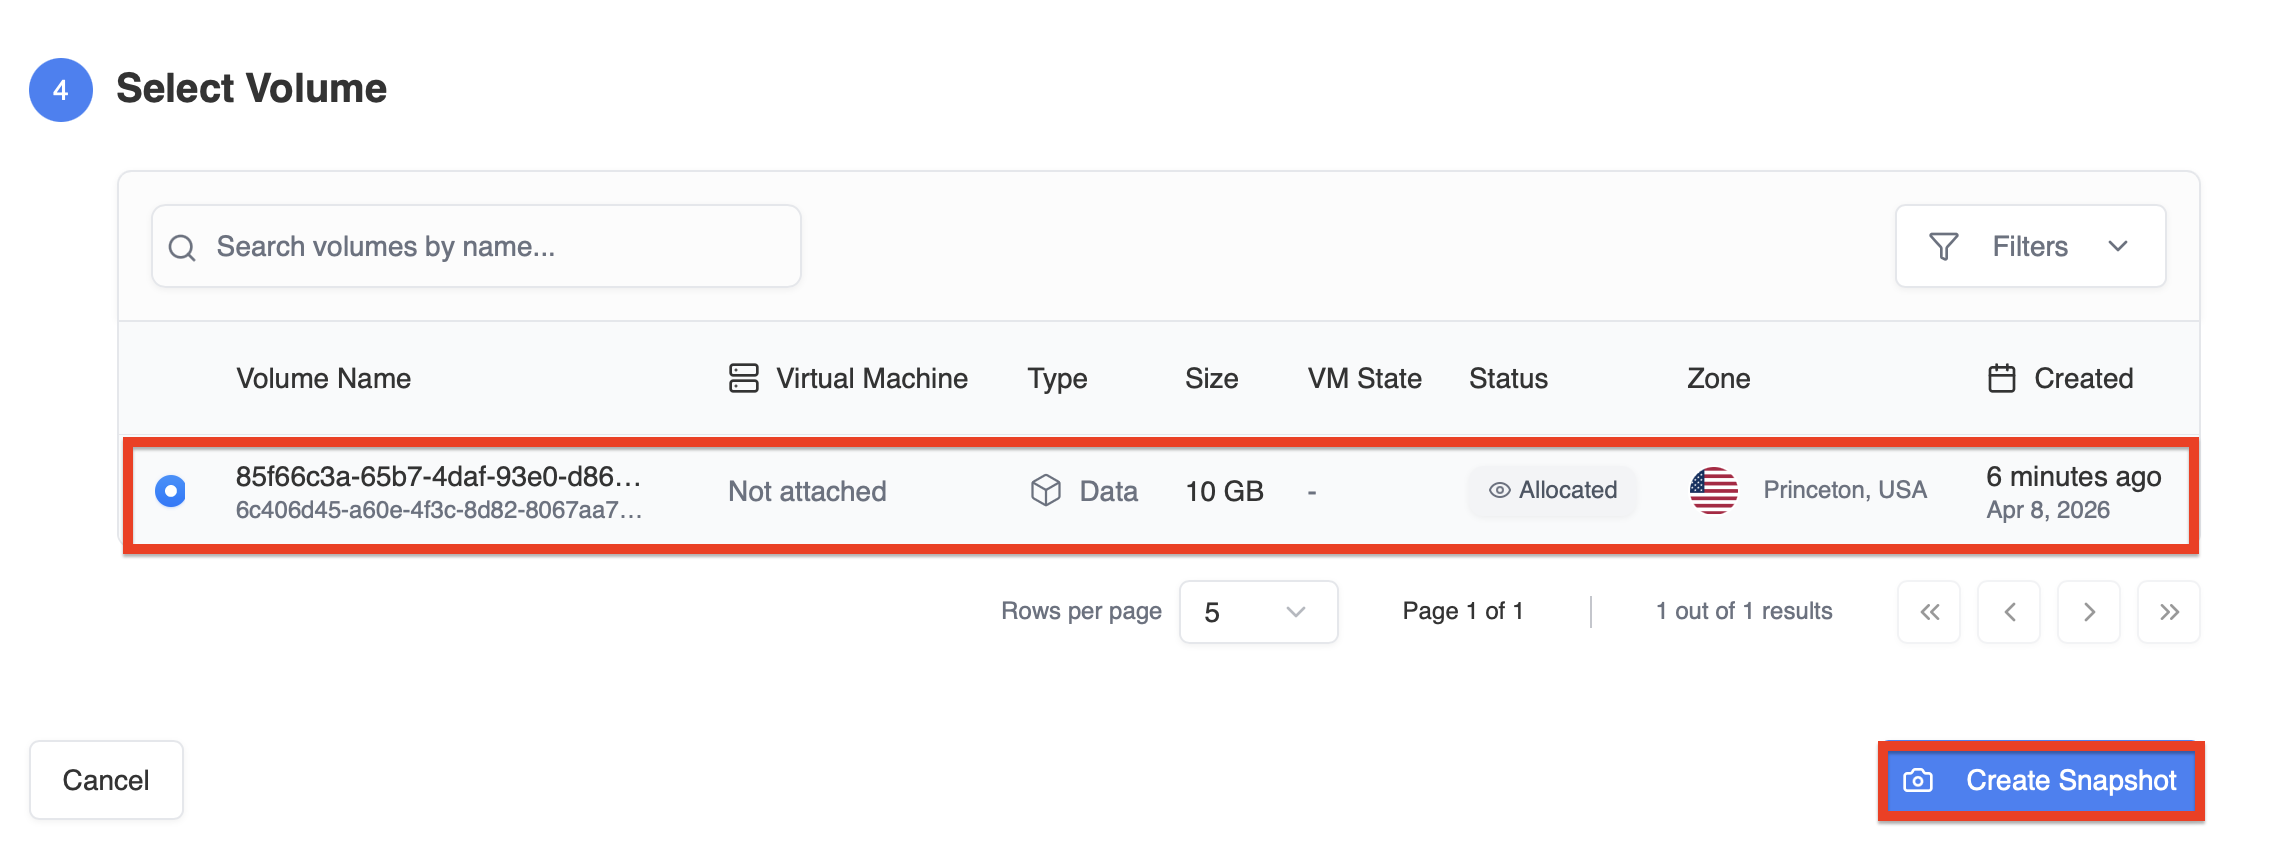
Figure 4 — Selecting a volume.
Scroll to the bottom of the form and click Create Snapshot to create your snapshot.
If the list is empty (e.g., “No volumes available”), this means there are no existing volumes to snapshot. You must create a volume before proceeding.
After Creation
After the snapshot is created, you can:
- restore data from the snapshot
- create new volumes from it
- use it for backup and recovery workflows
Accessing Your Snapshots
After creation, you can go to the Snapshots dashboard to view all your snapshots along with details such as Total Snapshots, Storage Used, and Snapshot Status. The dashboard allows sorting of columns by "Snapshot Name" or "Created" to help you manage your snapshots efficiently. Refer to the screenshot below for details.
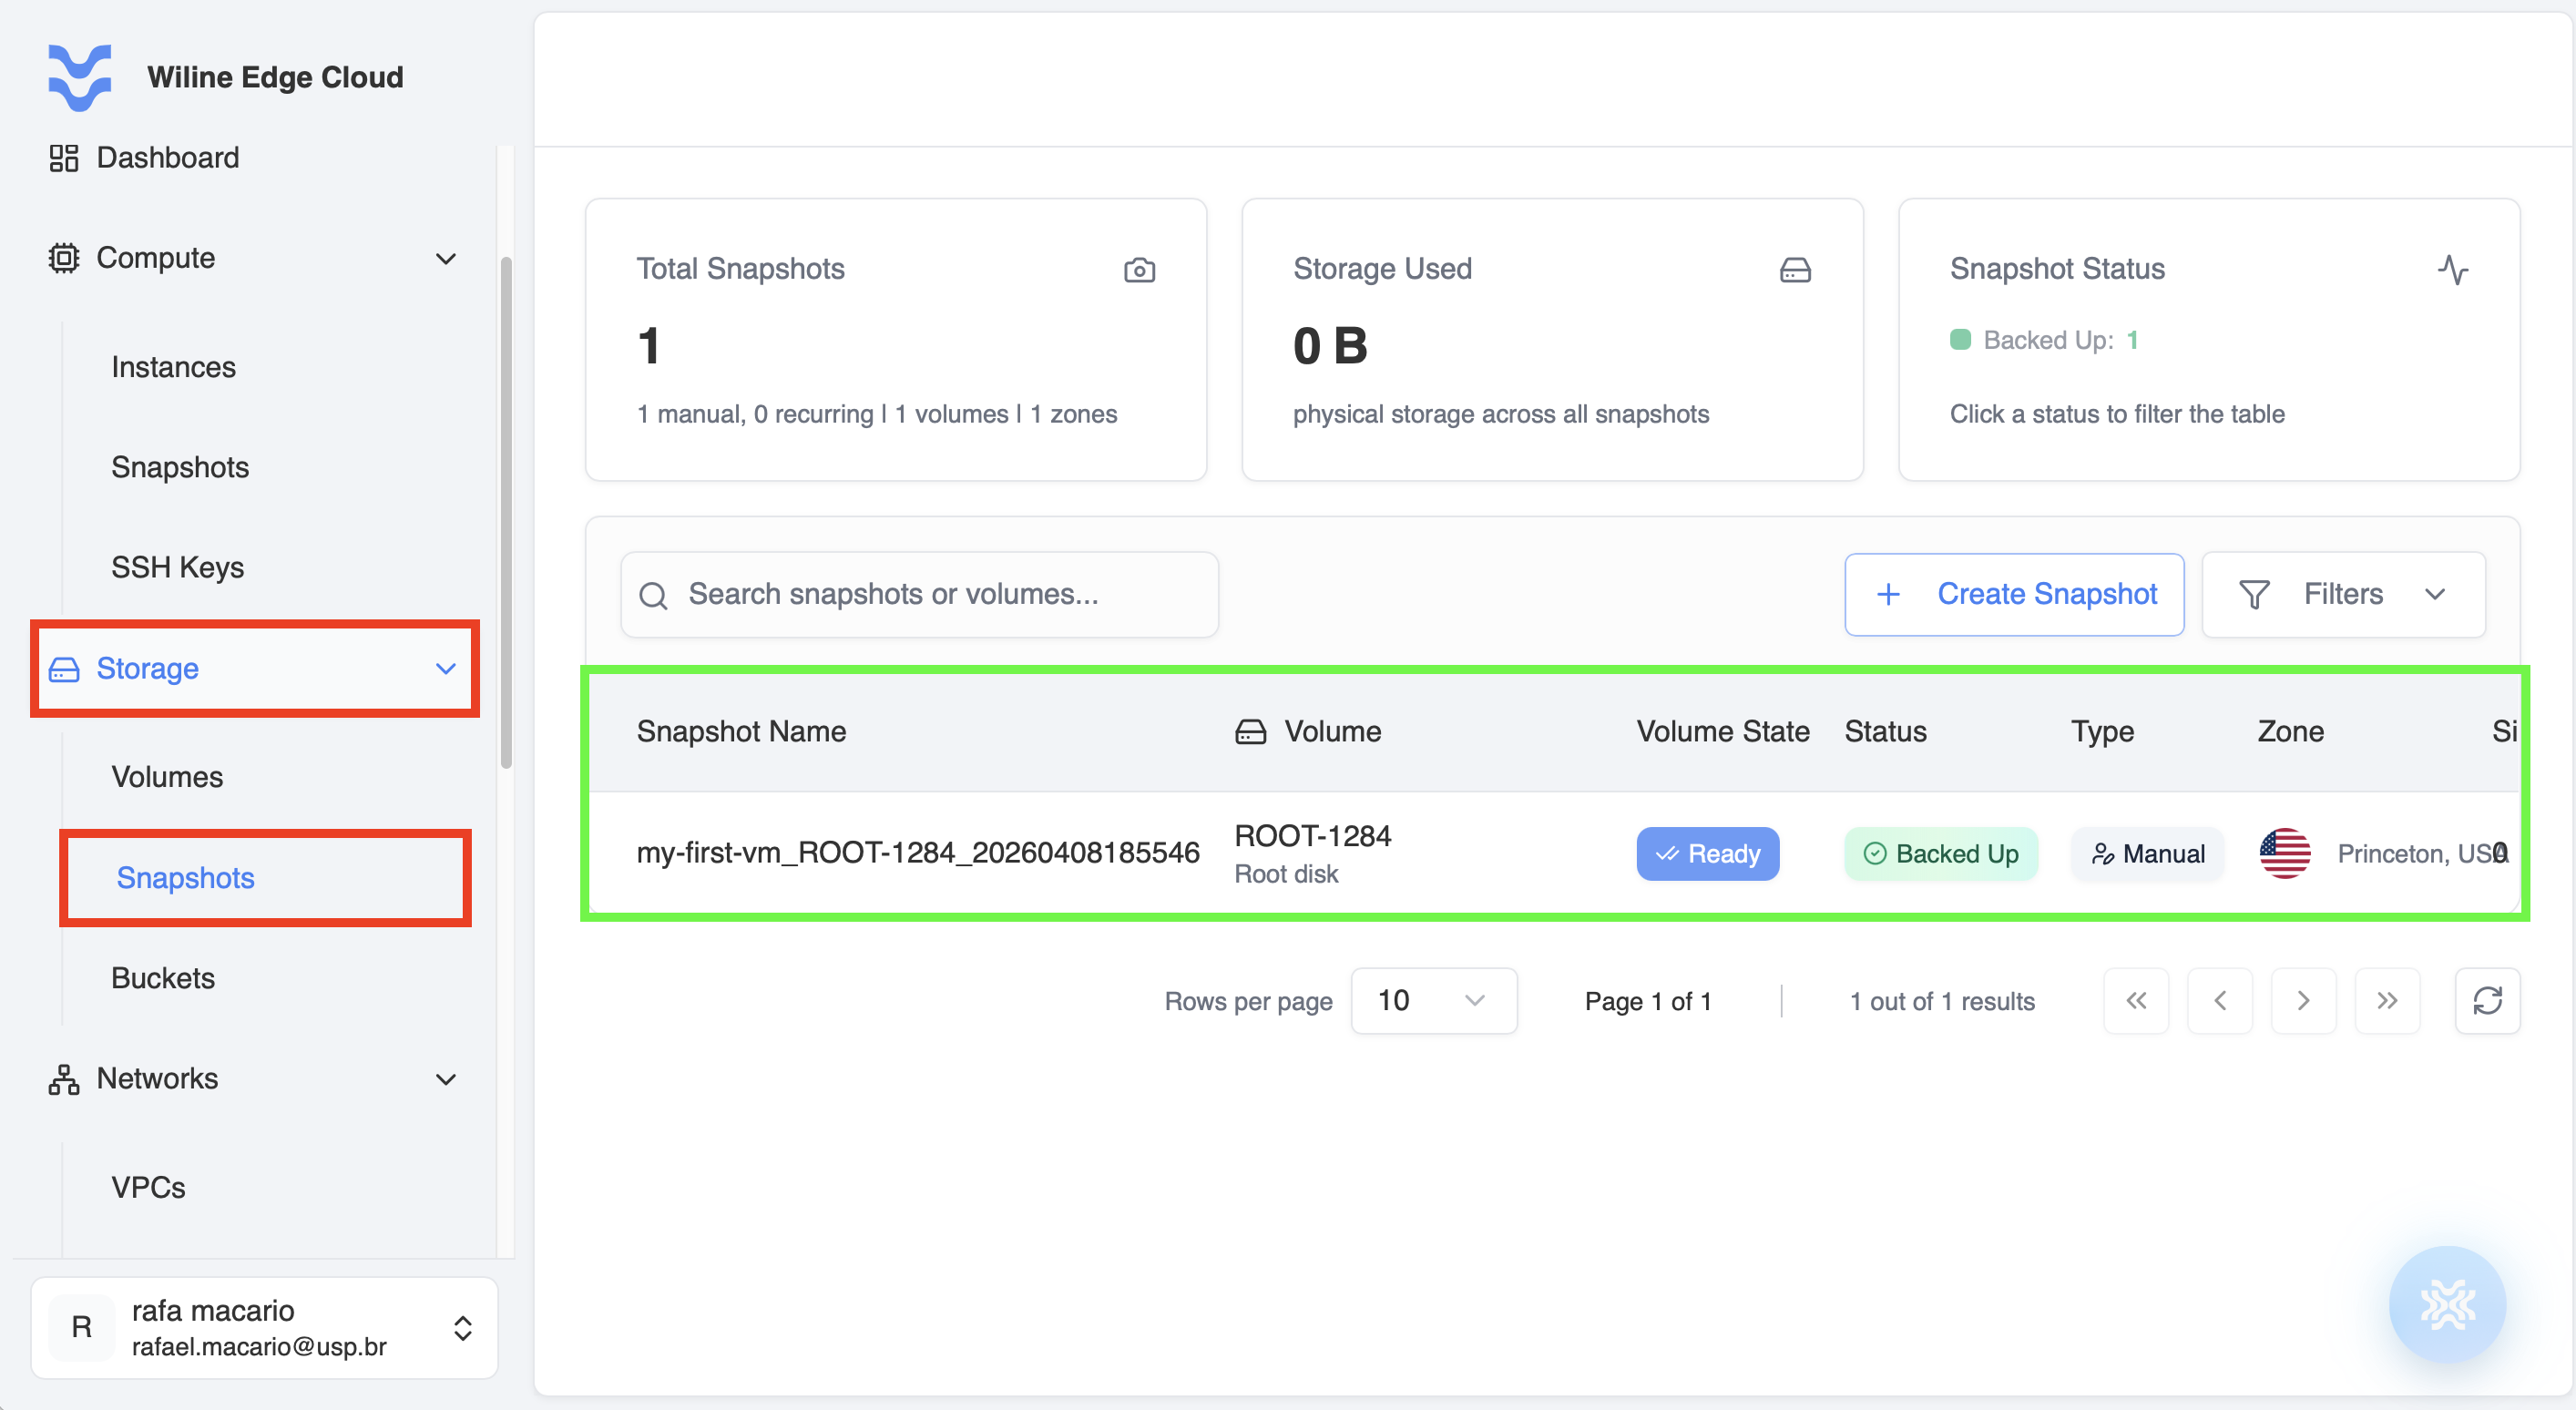
Figure 5 — Snapshots dashboard overview.
Next steps
After creating volume snapshots, you may want to:
- schedule regular backups
- automate snapshot creation
- manage snapshot retention
These topics are covered in the next sections of the documentation.