Create a Bucket
Object storage buckets provide a scalable and flexible way to store and manage unstructured data in WiLine Edge Cloud (WEC). A bucket acts as a container for objects such as files, images, backups, and application assets.
Buckets offer:
- Scalable storage — Store large amounts of data without worrying about capacity limits
- Flexible access control — Define fine-grained permissions using bucket policies
- Data protection features — Enable versioning and encryption for durability and security
Creating a bucket is a simple, form-based process. The configuration modal allows you to define storage location, access policies, and data protection settings in a single step.
Bucket Creation
The creation process is performed through a modal (pop-up) form.
Step 1 — Open the Create Bucket form
After logging in to the WiLine Edge Cloud:
- In the sidebar, click Storage
- Select Buckets
- Click Create Bucket
This opens the bucket creation modal.
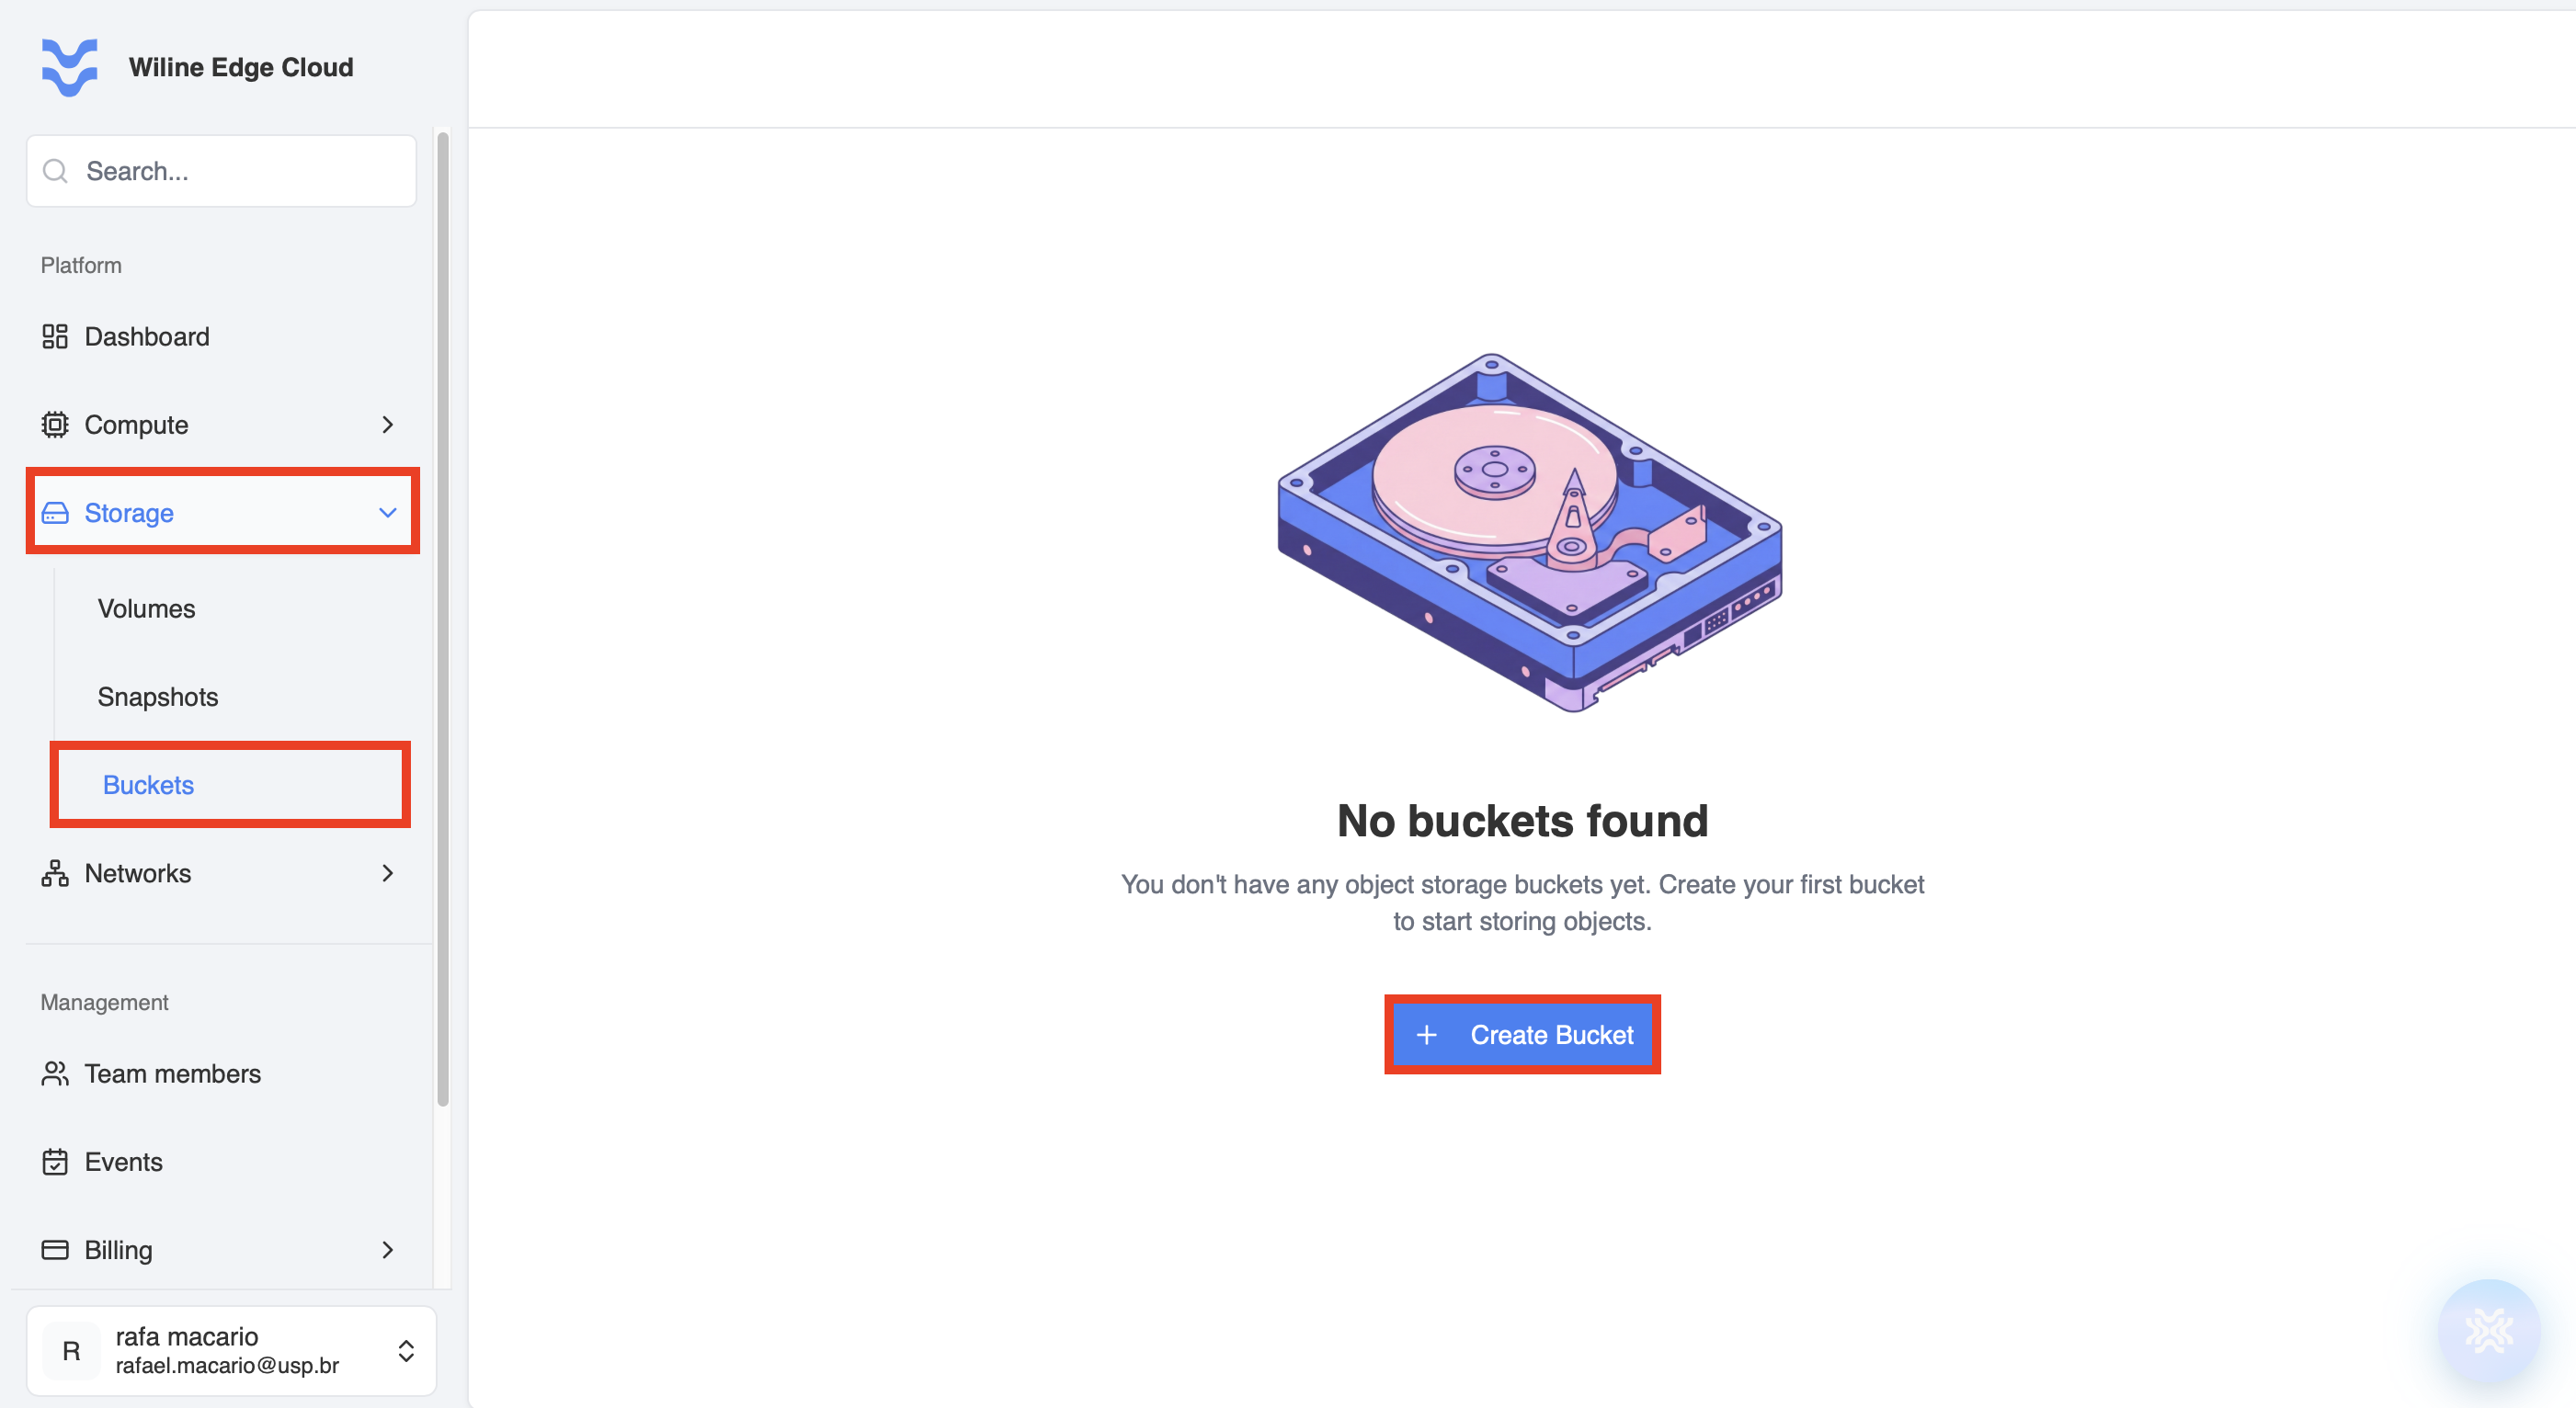
Figure 1 — Create Bucket button in the Buckets panel.
Step 2 — Bucket Configuration
The configuration is displayed in a pop-up window. Fill in the required fields:
Bucket Name
Enter a unique name for your bucket.

Figure 1 — Create Object Storage Bucket.
Requirements:
- 3–63 characters
- lowercase letters, numbers, and hyphens only
- must start and end with a letter or number
Examples:
app-storage-produser-uploadsbackup-bucket-01
Object Storage Pool
Select the storage pool where the bucket will be created.
- This is a dropdown field
- Example:
ceph
The selected pool determines where your data is physically stored.
Server-Side Encryption (Optional)
Enable this toggle to encrypt objects automatically.
- Encrypts data at rest
- Uses server-side encryption with bucket keys
Recommended for:
- sensitive data
- compliance requirements
Bucket Versioning (Optional)
Enable this toggle to store multiple versions of objects.
- preserves previous versions of files
- allows recovery of deleted or overwritten data
Useful for:
- backups
- audit trails
- rollback scenarios
Bucket Policy (Optional)
Enable this toggle to define access permissions using a JSON policy.
When enabled:
- a text field appears
- you can enter a JSON policy document
This allows you to define:
- who can access the bucket
- what actions they can perform
- conditions for access
Example use cases:
- public read access
- restricted internal access
- service-to-service permissions
Example JSON policy that grants read-only access to all objects in the bucket:
{
  "Version": "2012-10-17",
  "Statement": [
    {
      "Effect": "Allow",
      "Principal": "*",
      "Action": ["s3:GetObject"],
      "Resource": ["arn:aws:s3:::your-bucket-name/*"]
    }
  ]
}
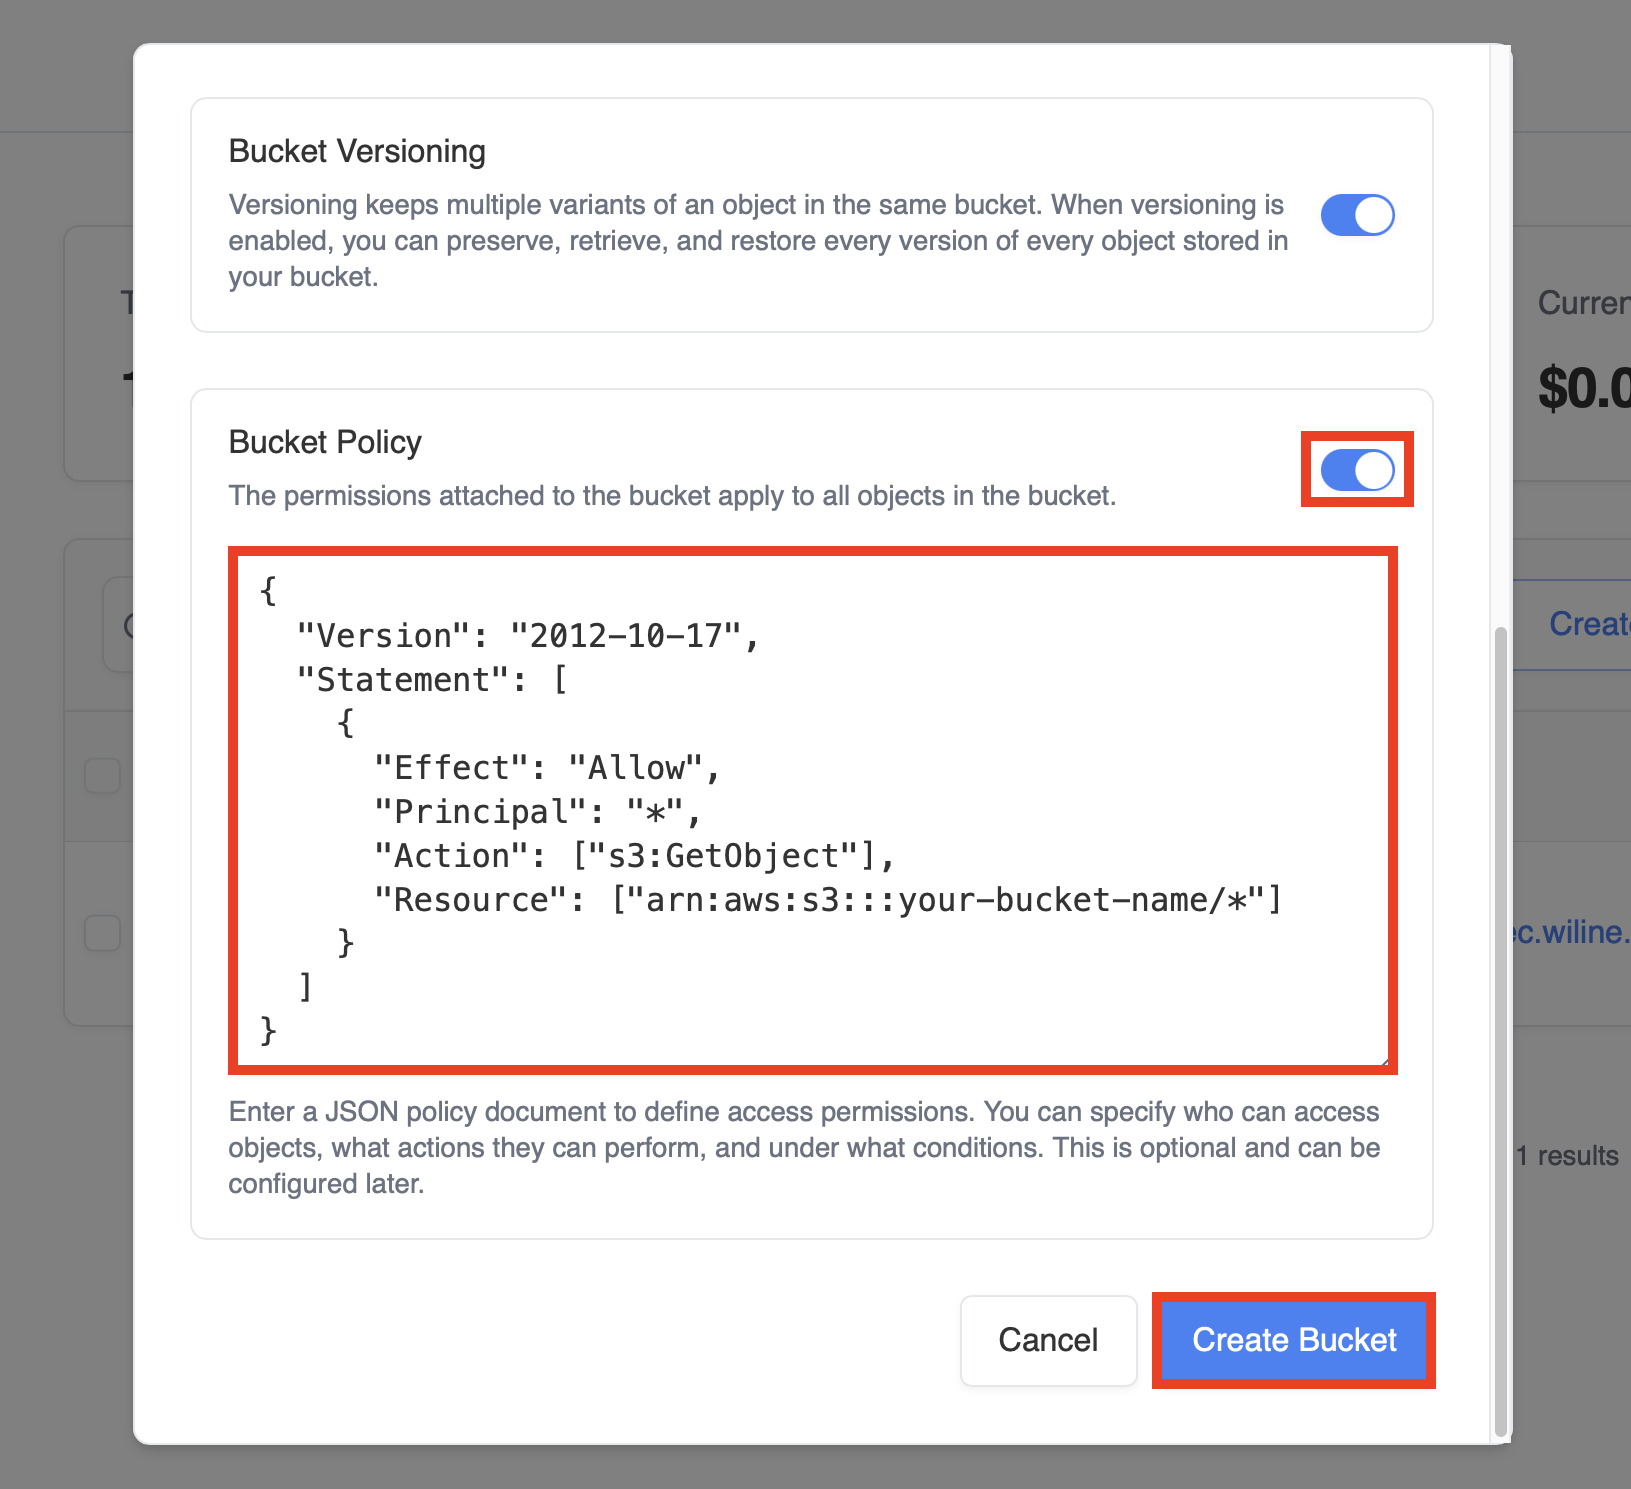
Figure 2 — Create Bucket modal with configuration options.
Accessing Your Buckets
After creating a bucket, you can view the list of all your buckets in the Buckets dashboard.
The dashboard displays the following metrics and features:
- Total Buckets: The total number of buckets you have
- Storage Pools: Number of storage pools in use
- Current month charges: Billing information for the current month
- Filters: Tools to filter buckets based on various criteria
All bucket details are shown in the dashboard screenshot below. You can sort the list by clicking on the Bucket Name or Created columns.
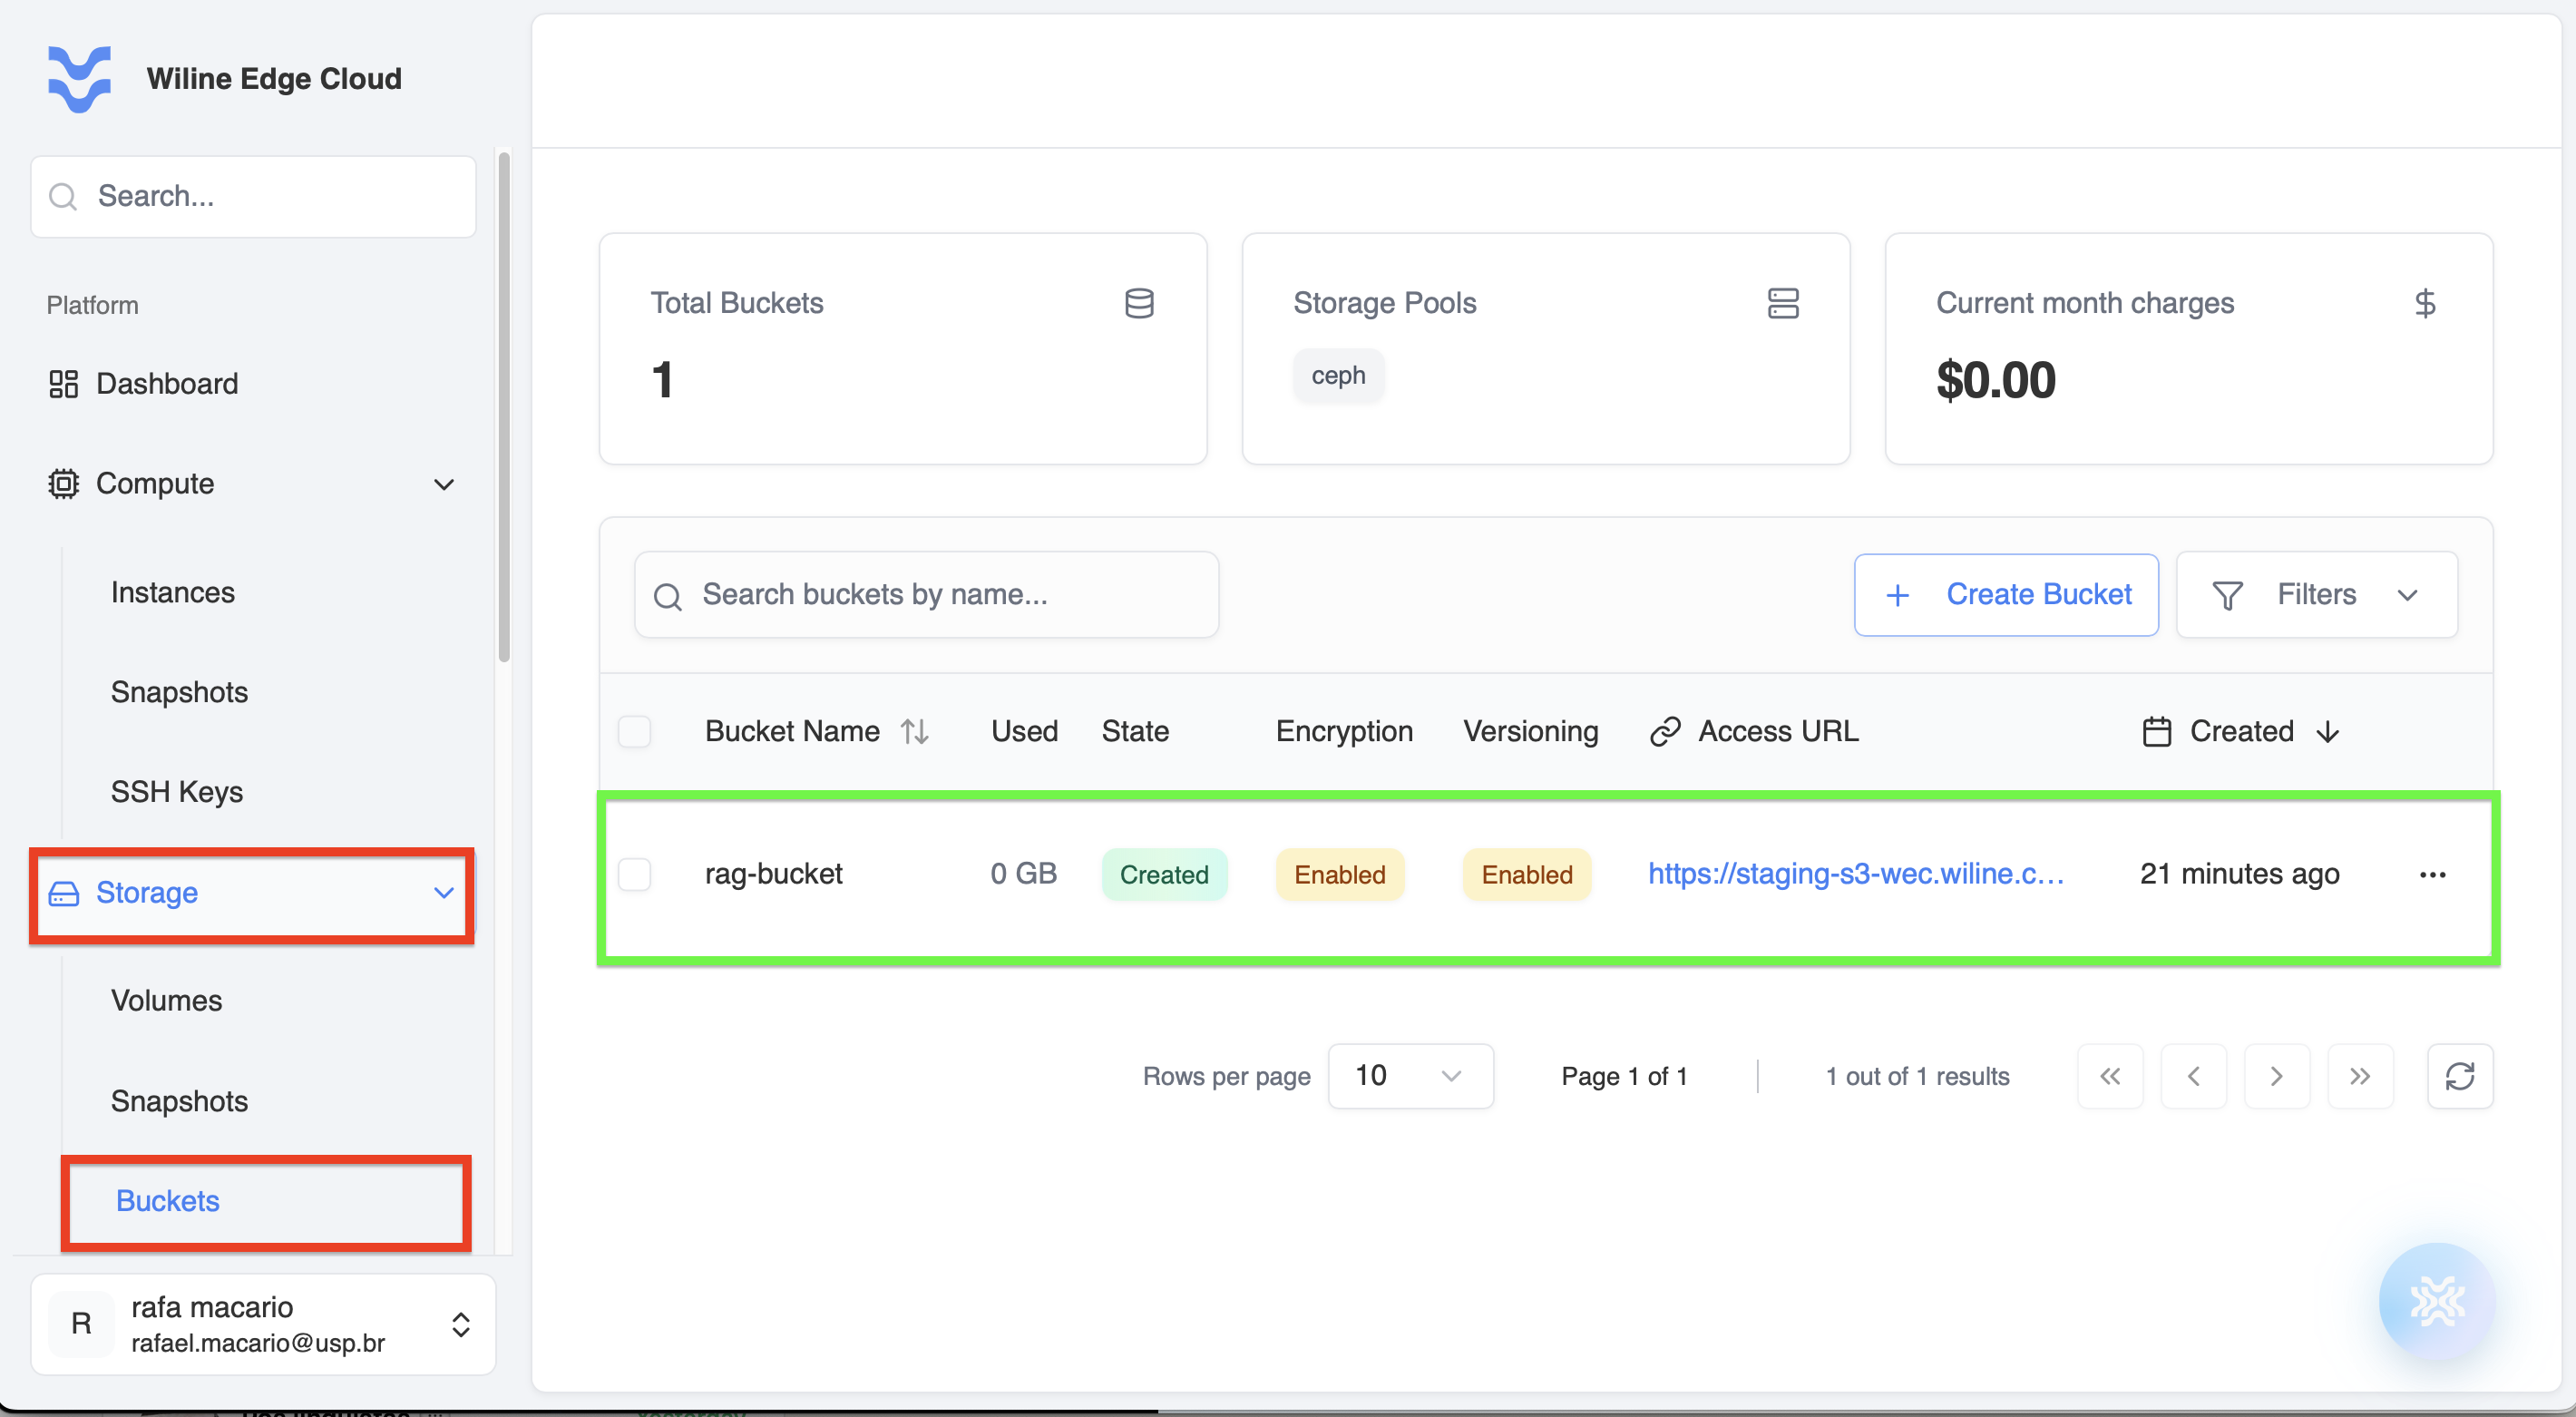
Figure 3 — Buckets dashboard showing detailed bucket information.
Once created, your bucket will appear in this dashboard, where you can:
- upload and manage objects
- configure permissions
- enable or modify versioning
- monitor usage
Next steps
After creating a bucket, you may want to:
- upload files and objects
- configure bucket policies
- integrate with applications using S3-compatible APIs
These topics are covered in the next sections of the documentation.