Experiment with AI models
The Playground lets you test the models on your endpoint directly in the browser—no code required. Try prompts, tune parameters, and even transcribe audio before integrating a model into your app.
Open the Playground
After logging in to the WiLine Edge Cloud:
- In the left sidebar, expand Inference.
- Click Playground.
At the top you'll see two tabs — Chat and Transcribe. The Playground opens on Chat.
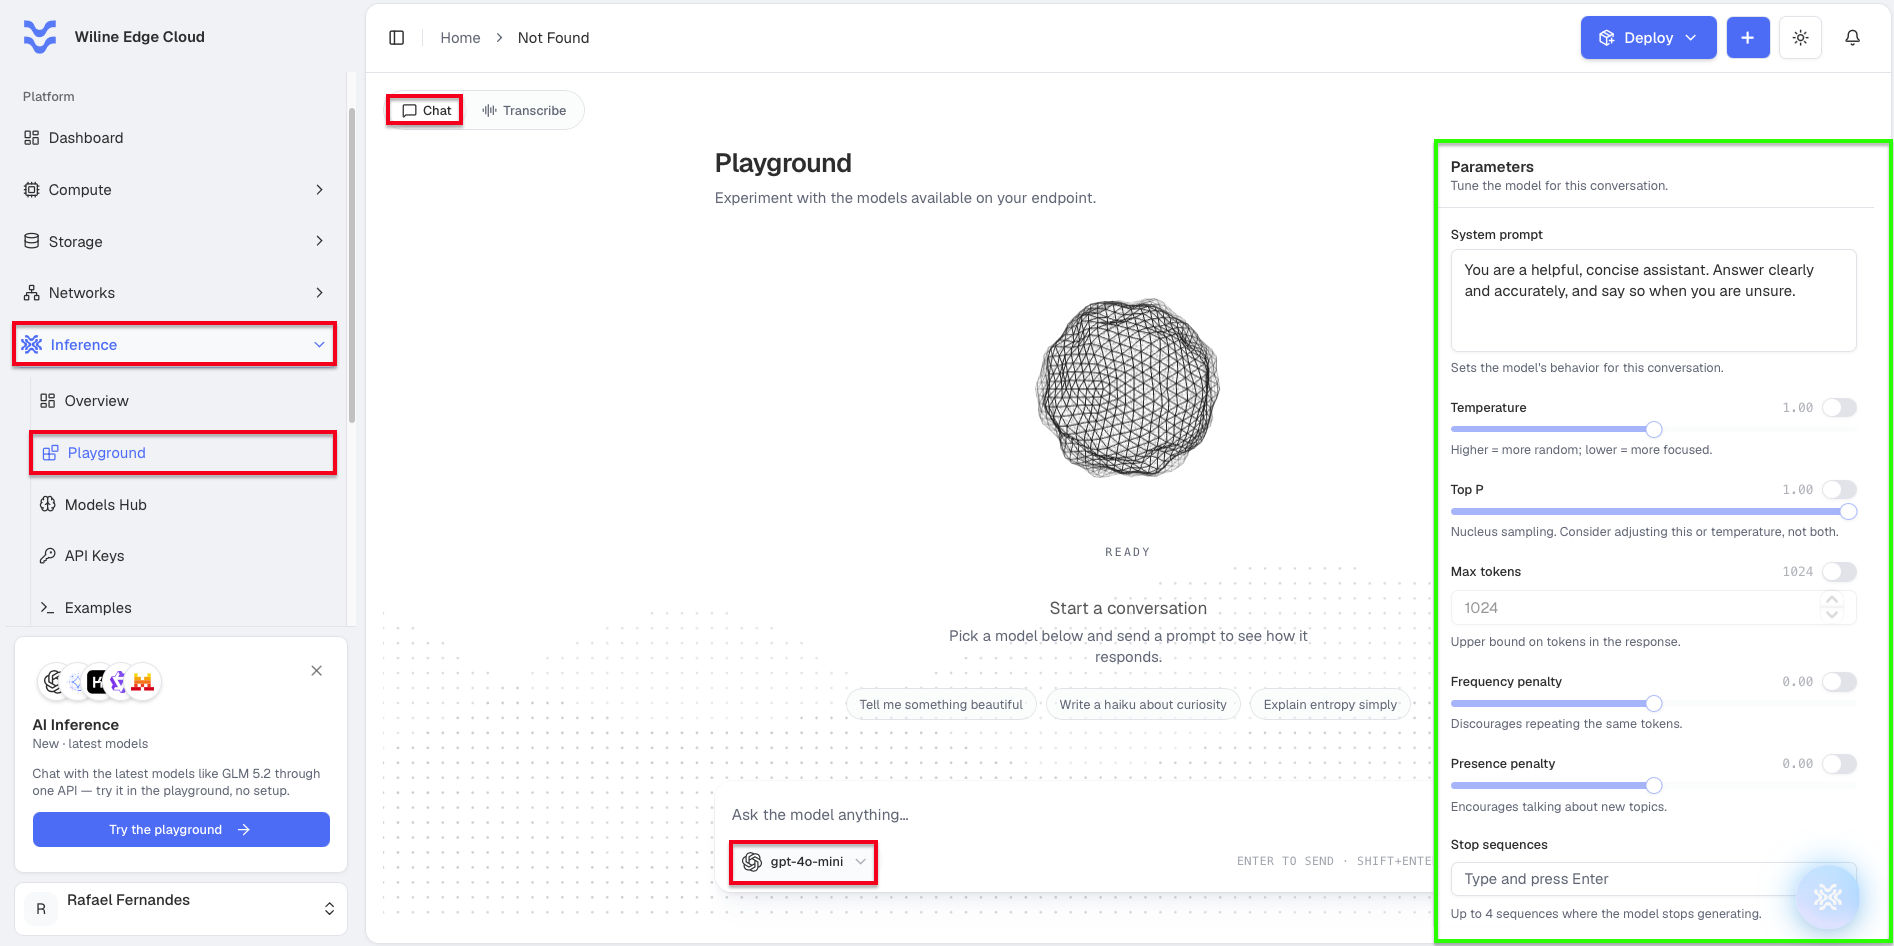
Figure 1: The Playground (Chat tab) — the conversation area with the model picker and prompt box, and the Parameters panel on the right.
Chat
The Chat tab is a full conversation view:
- Pick a model. Use the model dropdown at the bottom of the conversation area to
switch models at any time, without leaving the chat. It lists the models enabled on
your endpoint — for example:
deepseek-ai/DeepSeek-V3.1(DeepSeek)google/gemma-3-27b(Google)GLM-5.2(Z.ai)Qwen3.5 9B
- Ask the model anything. Type your prompt in the message box and press Enter to send (use Shift+Enter for a new line).
- The model's reply streams into the conversation above.
Until you send something, the conversation area shows an empty state that invites you to pick a model and send a first prompt, with a few one-click example prompts to get you started. The status indicator reads READY when the endpoint can take your prompt.
A model only knows what you tell it, so the more specific your prompt, the better the answer. A strong prompt usually has:
- A clear task — say exactly what you want ("summarize this in 3 bullets" beats "tell me about this").
- Context — paste the text, data, or background the model needs to work from.
- Constraints — length, tone, audience, and what to avoid ("plain English, no jargon, under 100 words").
- A format — ask for a list, table, or JSON if you'll use the output programmatically.
- An example — showing one good input/output pair often works better than a long description.
Use the System Prompt (below) for rules that should hold for the whole conversation (the model's role and style), and the message box for the specific request.
Parameters
On the right is the Parameters panel — "Tune the model for this conversation." These settings apply to the current chat only.
The numeric parameters each sit behind a toggle. By default they're off, so the model uses its own defaults; flip a toggle on to override the value and adjust it with the slider or the up/down arrows.
| Parameter | Default | How to set it |
|---|---|---|
| System Prompt | (empty) | Type freely |
| Temperature | 1.00 | Toggle on, then adjust |
| Top P | 1.00 | Toggle on, then adjust |
| Max Tokens | 1024 | Toggle on, then use the arrows |
| Frequency Penalty | 0.00 | Toggle on, then adjust |
| Presence Penalty | 0.00 | Toggle on, then adjust |
| Stop Sequences | (none) | Type a sequence and press Enter |
| Seed | (optional) | Type a value and press Enter, or use the arrows |
Each control's on-screen hint tells you what it does in a few words; the next section explains them properly — what they mean and when to change them.
Leave the toggles off to use the model's defaults. Only flip on the parameters you actually want to change — and as the panel notes, tune Top P or Temperature, not both at once.
Understanding the parameters
What the controls actually do, and when to reach for them:
- System Prompt — the model's standing instructions for the conversation: its role, tone, and rules ("You are a concise support agent; never invent product features"). Set it once and it shapes every reply, unlike the message box which is one request at a time.
- Temperature — how random the output is. Low values (≈
0.2) make the model focused and repeatable — good for code, data extraction, and factual answers. Higher values (≈0.8–1.2) make it more creative and varied — good for brainstorming or copywriting.1.0is a balanced default. - Top P — nucleus sampling: the model only considers the most likely tokens whose
probabilities add up to
P(e.g.0.9= the top 90%). It's an alternative way to control randomness, so adjust either Top P or Temperature, not both. - Max Tokens — the hard ceiling on response length (1 token ≈ ¾ of a word). Raise it for long outputs; lower it to cut cost and latency. It caps length but doesn't make the model concise — ask for that in the prompt.
- Frequency Penalty — discourages reusing the same words the more often they've
appeared. Nudge it up (≈
0.3–0.8) if replies feel repetitive or loop on a phrase. - Presence Penalty — pushes the model toward new topics it hasn't mentioned yet.
Useful for brainstorming and variety; leave at
0when you want it to stay on one subject. - Stop Sequences — strings that make the model stop generating the moment they
appear (e.g.
###, or a closing tag). Handy to keep output in a strict shape or stop it running on. You can set up to four. - Seed — set a fixed number to make sampling reproducible: the same prompt + parameters + seed returns (best-effort) the same answer. Useful for testing and comparisons; leave it empty for normal use.
Models read and write in tokens, not words (roughly ¾ of a word each). You're billed per token, and Max Tokens caps only the response — your prompt and system prompt count too. Keeping prompts tight and a sensible Max Tokens limit keeps both latency and cost down.
Transcribe
The Transcribe tab turns speech into text using a Whisper model.
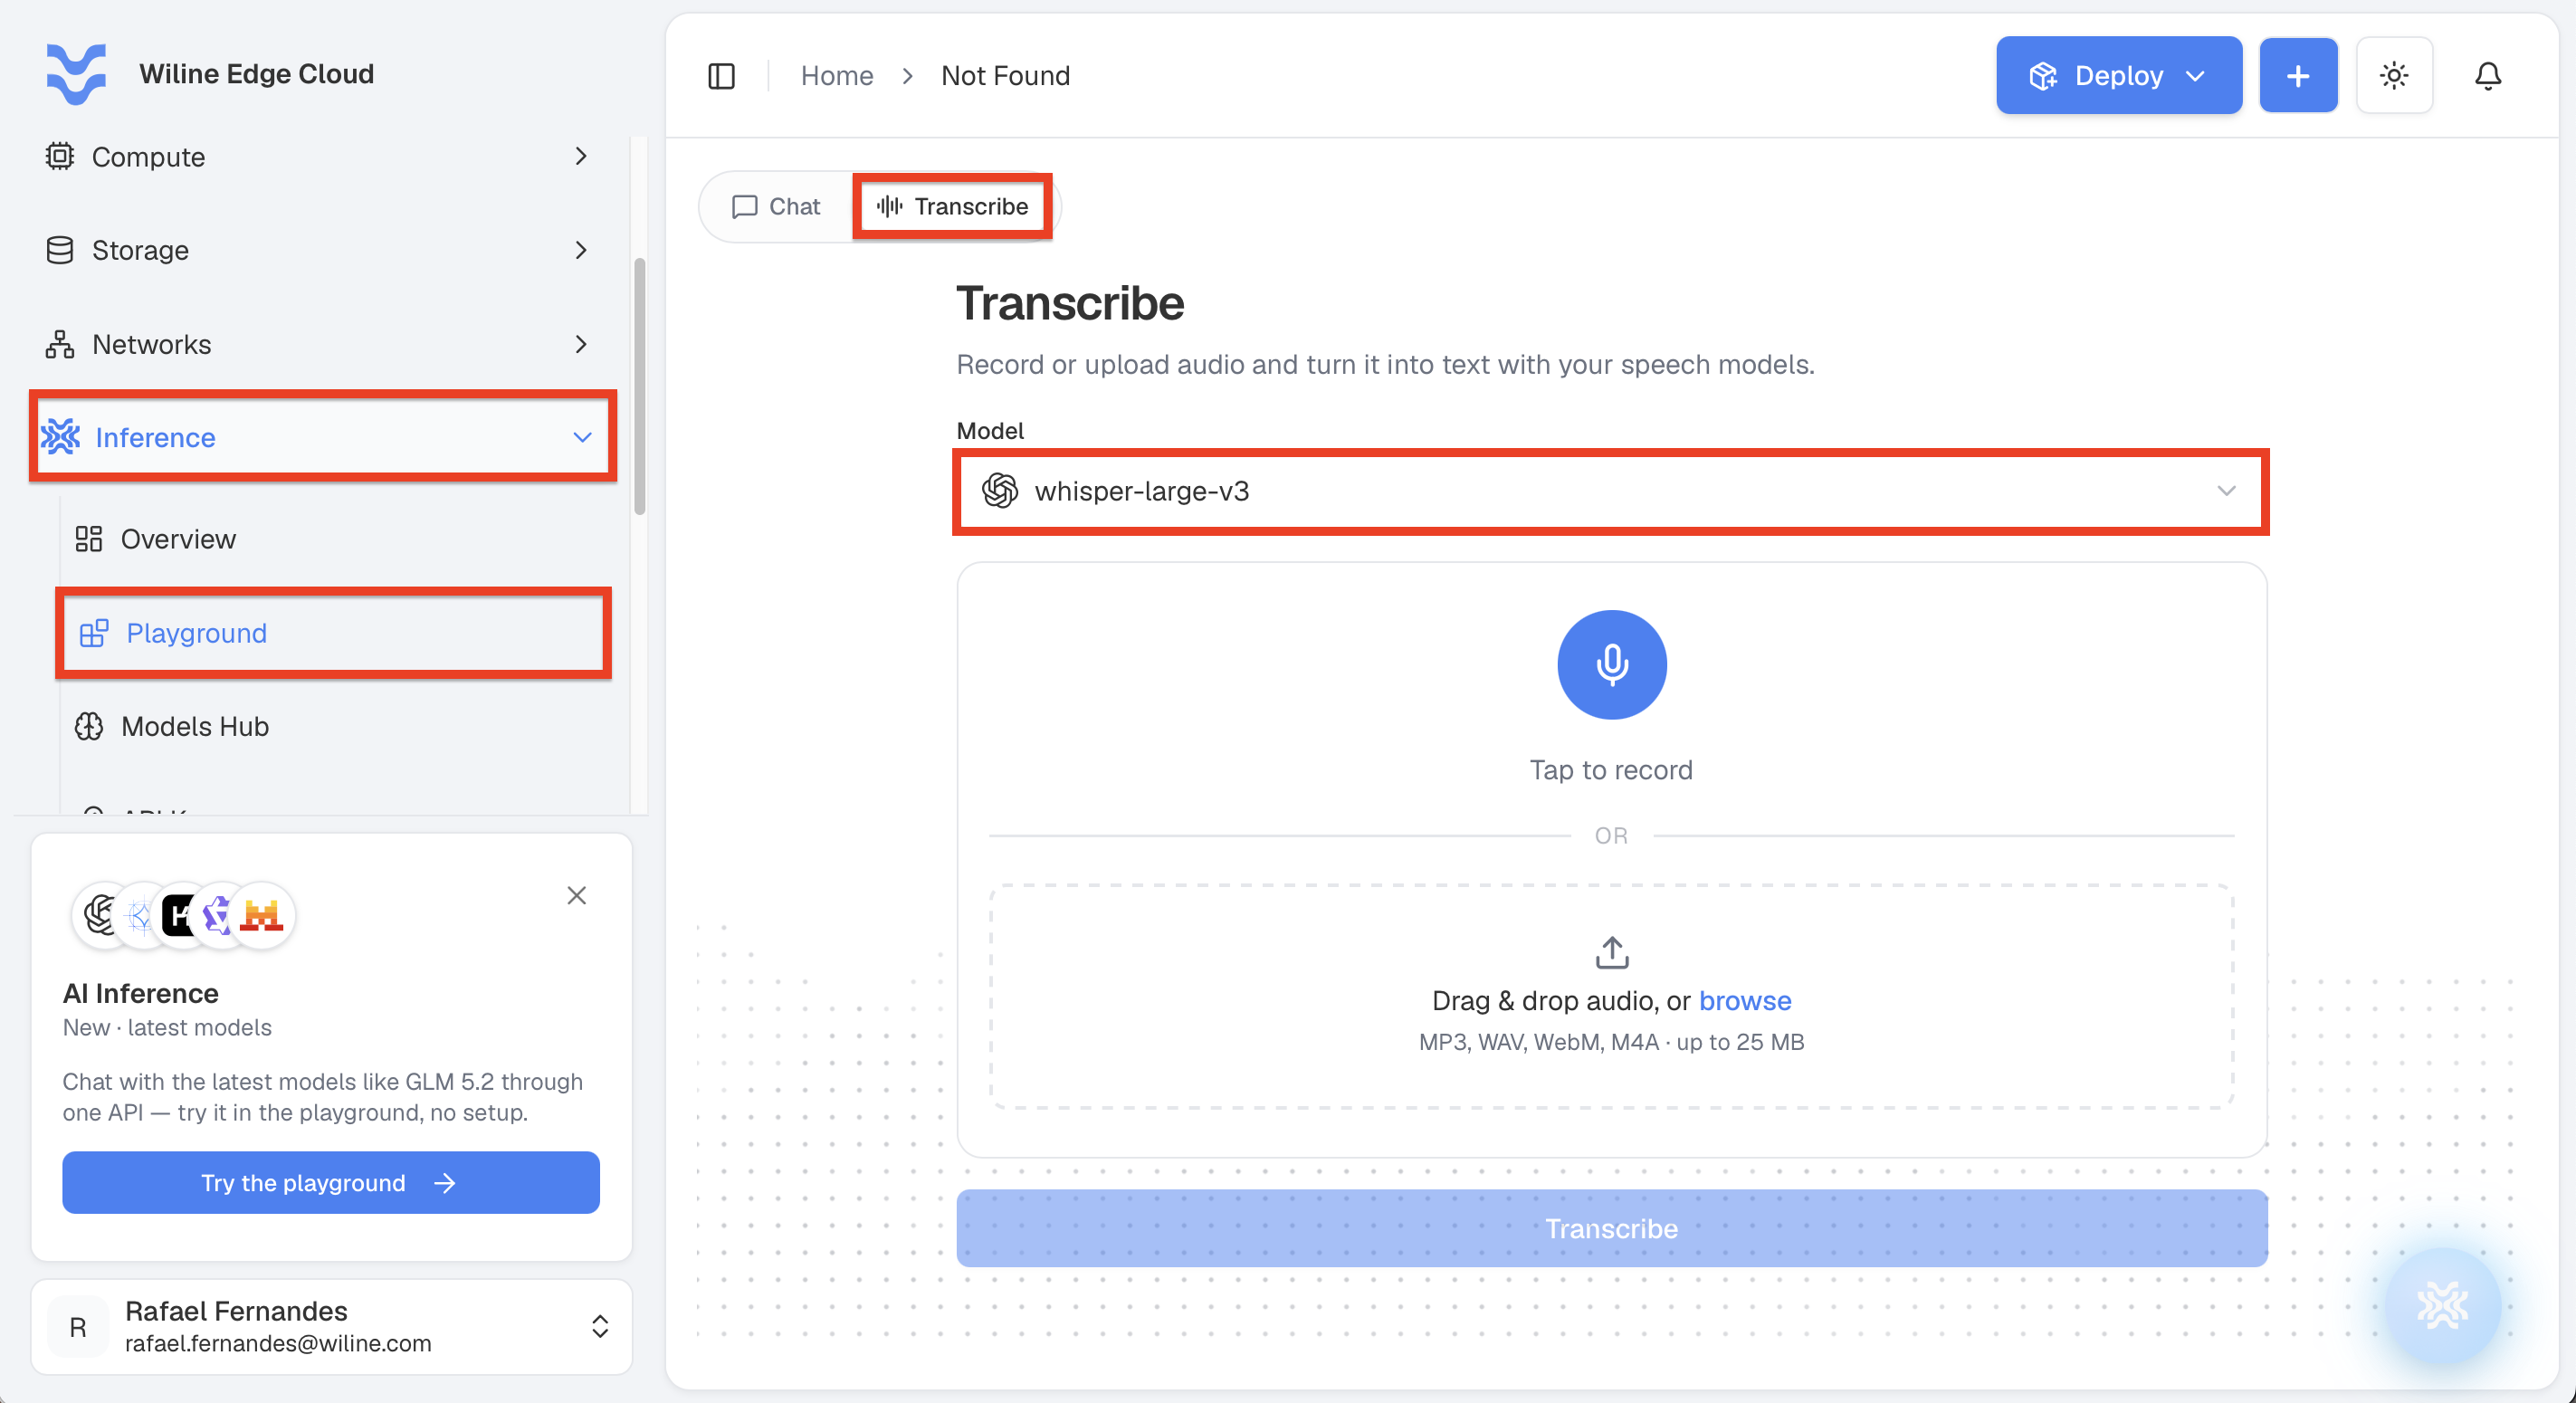
Figure 2: The Playground (Transcribe tab) — the Whisper model picker and the record / stop / transcribe controls.
To get a transcription:
- At the top of the tab, choose a model —
whisper-large-v3,whisper-base, orwhisper-medium. - Click Tap to record.
Allow the microphone. The first time you record, your browser asks for permission to use the microphone. Choose Allow (or Allow while visiting this site). If you pick Never, recording stays blocked until you re-enable the microphone for the portal in your browser settings.
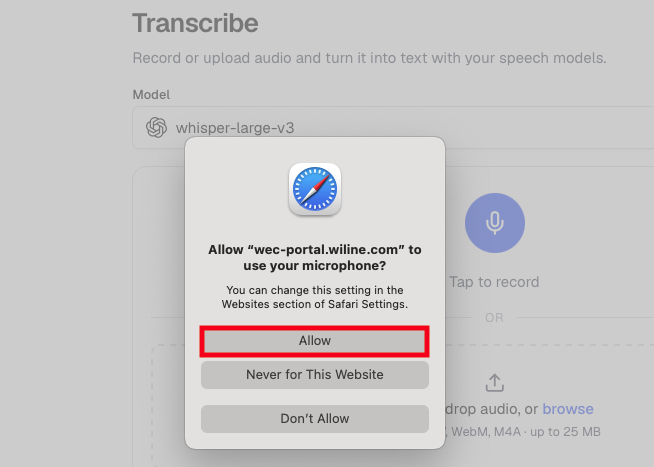
Figure 3: The browser's microphone-permission prompt — choose Allow so the portal can record.
Record. Speak your text. While recording, the control switches to a recording state; click Stop when you're done.
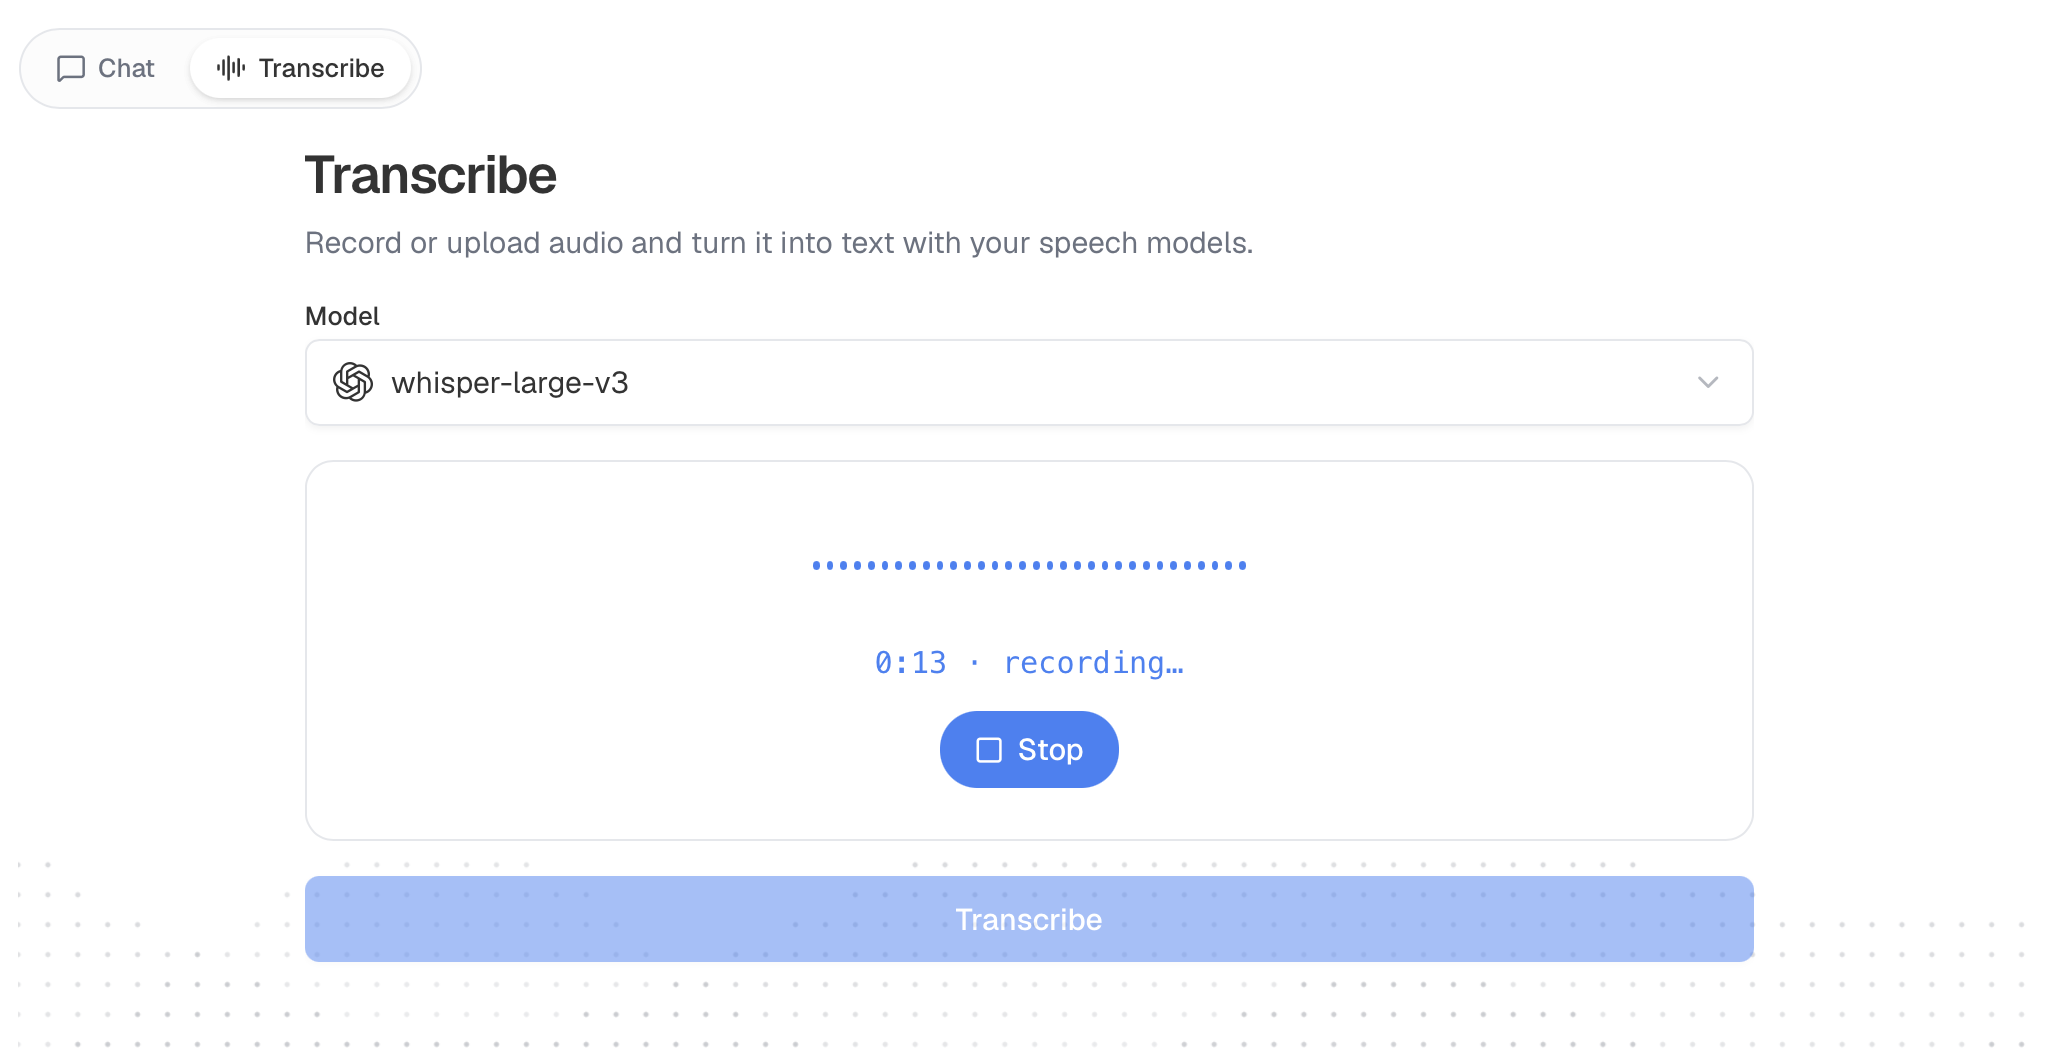
Figure 4: Recording in progress — click Stop when you've finished speaking.
Transcribe. Click Transcribe to send the audio to the selected Whisper model and get the text back.
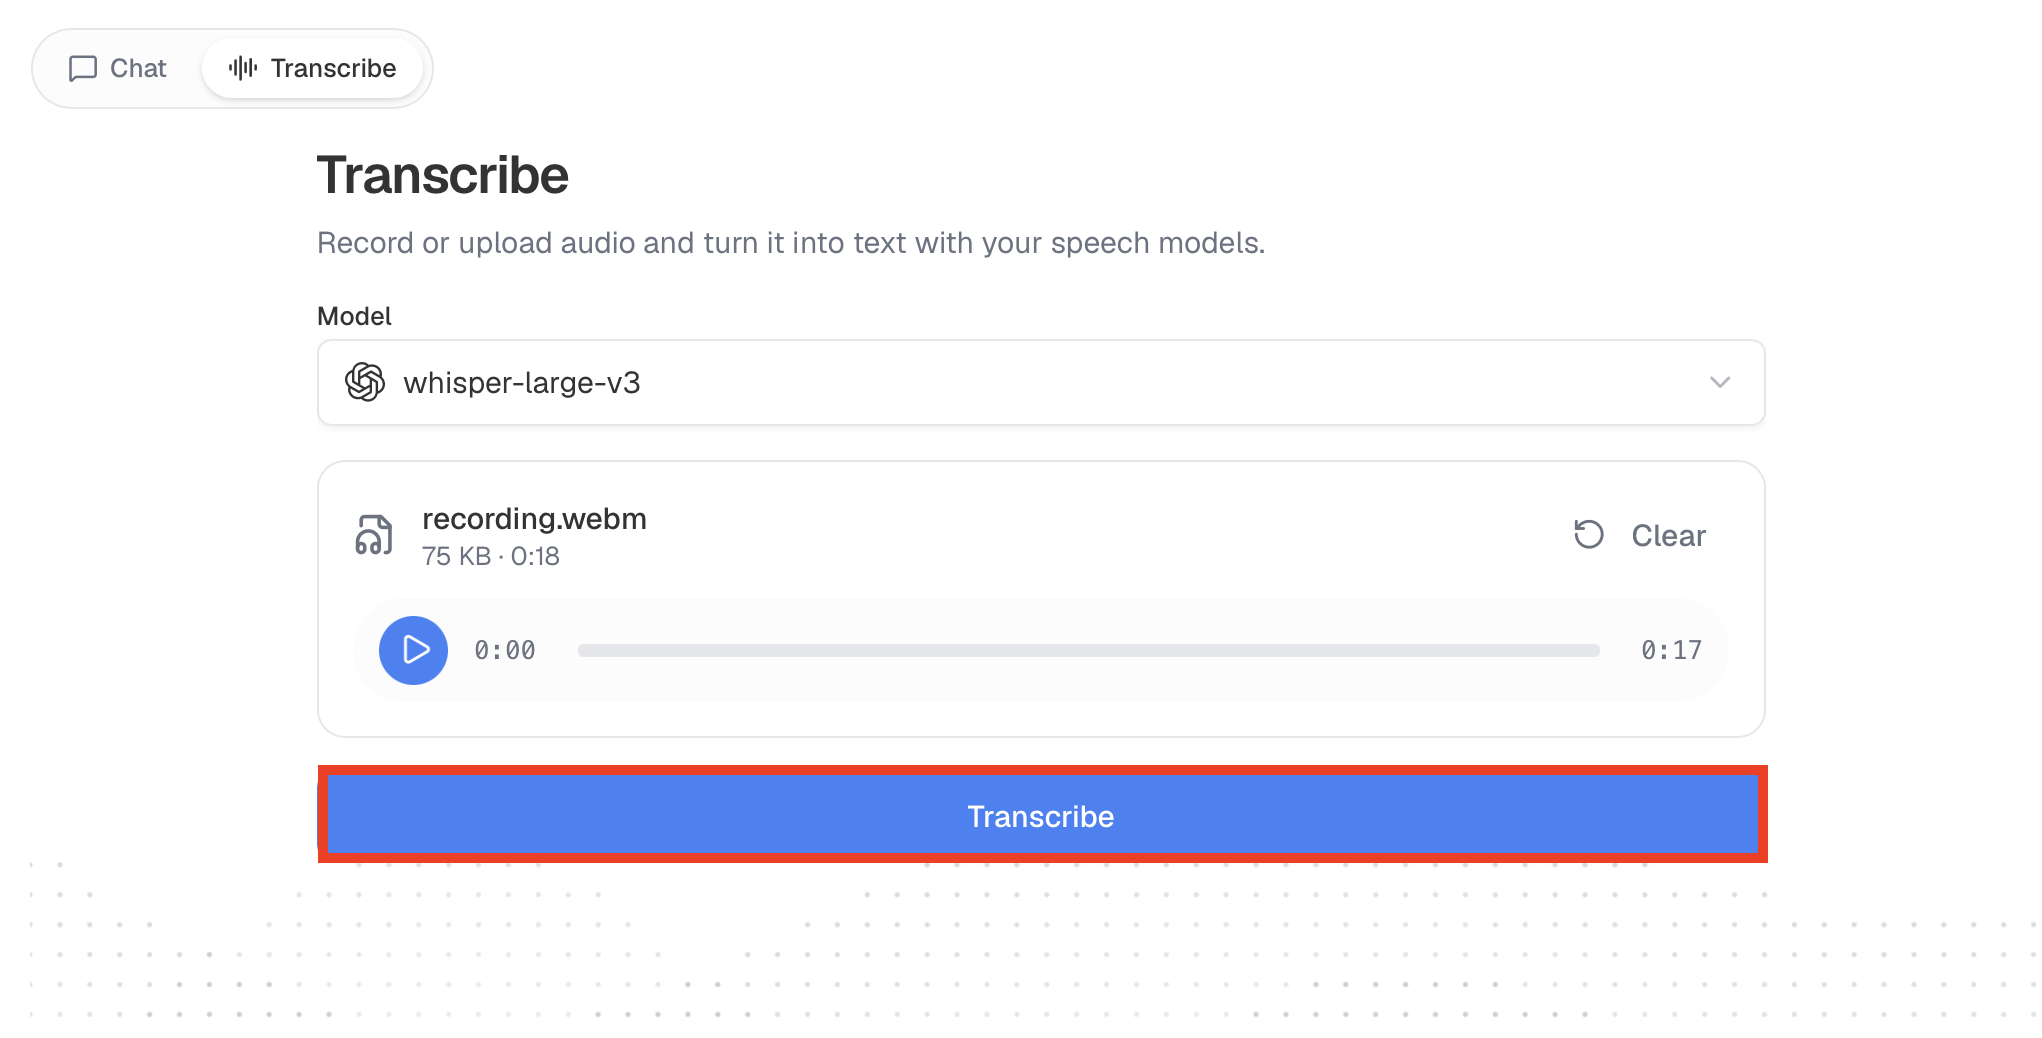
Figure 5: The transcript returned by the Whisper model after you click Transcribe.
Microphone access requires a secure context (HTTPS), which the portal uses. If the record button does nothing, check that the microphone isn't blocked for the site in your browser's site settings.
Next steps
The Playground is for trying models by hand. When you're ready to use the same models in your application:
- Create an API key — generate a key and save it to
WEC_API_KEY. - Code examples — copy-paste snippets for chat, streaming, tool calling, and embeddings.
- Models Hub — compare every model's context window, capabilities, and pricing.