Create and manage API keys
The API Keys page is where you create and manage the keys that authenticate your
inference requests. Each key is passed as a Bearer token (and saved to the
WEC_API_KEY environment variable in the quickstart). The endpoint and quickstart
themselves live on the Overview.
Open API Keys
After logging in to the WiLine Edge Cloud:
- In the left sidebar, expand Inference.
- Click API Keys.
The header shows a quick count of your keys — for example 1 active · 1 total.
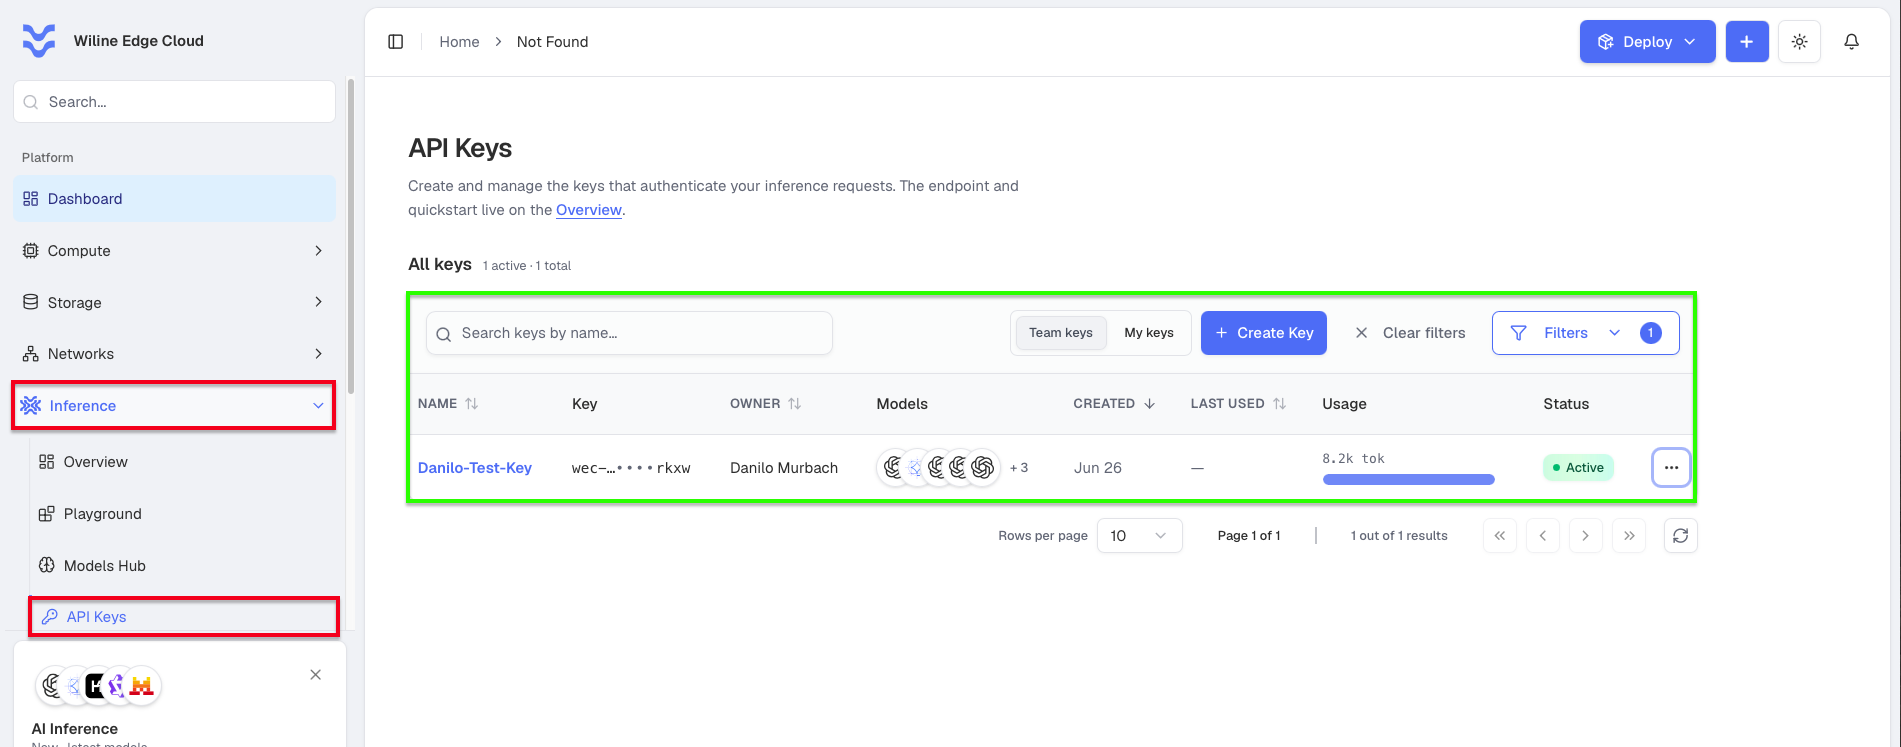
Figure 1: The API Keys page — the keys table with search, the Team keys / My keys tabs, Create Key, and Filters above it.
Create a key
Click + Create Key (above the table) to open the Create API key dialog. You can reach the same dialog from Get API key on the Models Hub and the Overview, so you can create a key from any of those places.
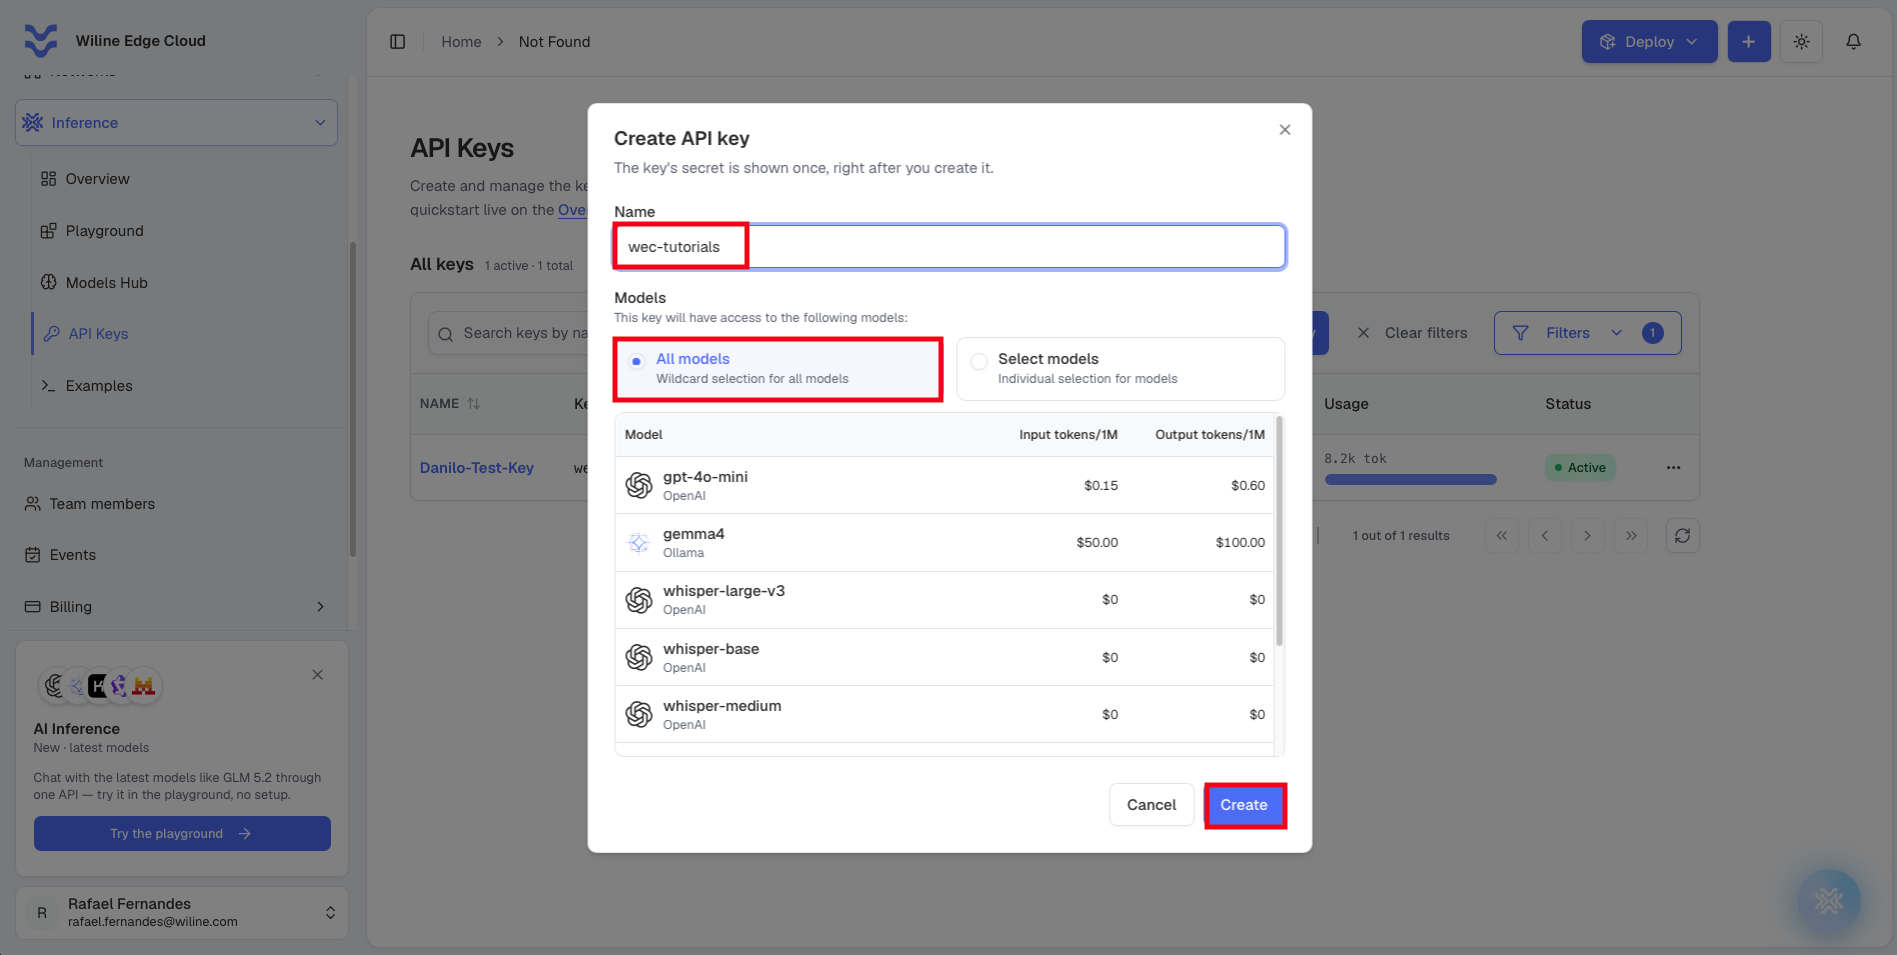
Figure 2: The Create API key dialog — name the key and choose which models it can access.
- Name the key something memorable (e.g.
wec-tutorials) — ideally one per app or environment. - Under Models, choose what the key can call:
- All models — a wildcard granting access to every model on your endpoint.
- Select models — pick individual models. The list shows each model's input and output token pricing, so you can scope a key tightly.
- Click Create.
The dialog then shows your new secret once:
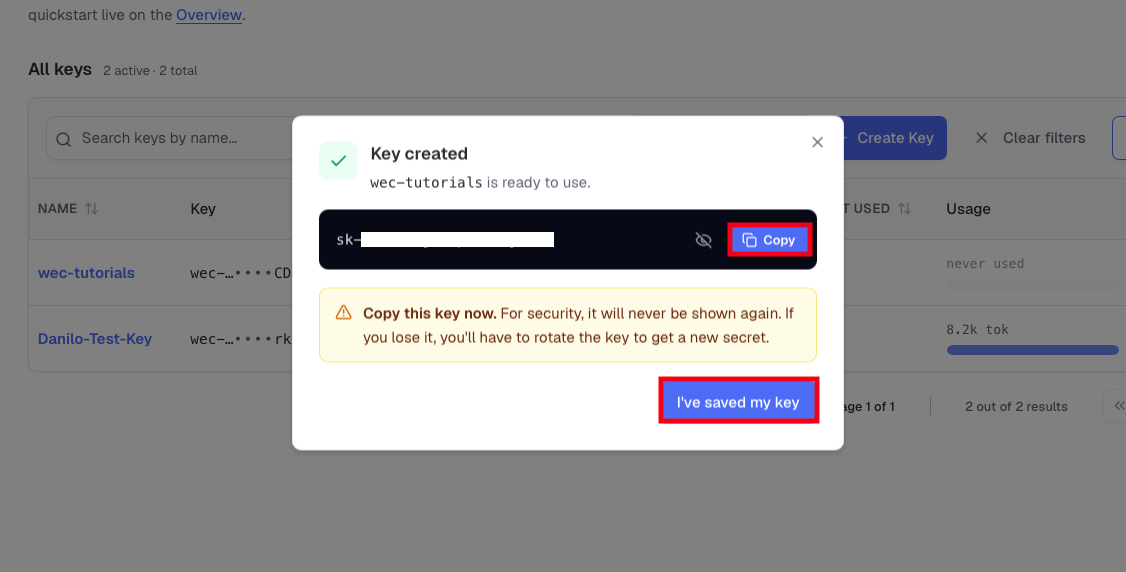
Figure 3: The Key created dialog — copy the secret now; it is never shown again.
- Click Copy (use the eye icon to reveal it first if you want to check it).
- Save it to the
WEC_API_KEYenvironment variable and use it as your Bearer token (see the Overview quickstart). - Click I've saved my key to close the dialog.
For security, the full secret is shown only at creation and never again — afterwards the table only shows a masked version. Copy it immediately, store it somewhere safe, and never share it or commit it to source control. If you lose it or it's exposed, rotate the key (from its Actions menu) to get a new secret, or revoke it. Use a separate key per app or environment so you can rotate or revoke one without affecting the others.
Find a key
Above the table you have several ways to narrow the list:
- Team keys / My keys — switch between all keys created across your team and just your own.
- Search — type into Search keys by name to filter instantly.
- Filters — filter by Status: All statuses, Active, or Revoked. The Filters button shows a badge with how many filters are applied.
- Clear filters — reset the search, tabs, and filters back to the full list.
Read the keys table
Each row is one key. The columns are:
| Column | What it shows |
|---|---|
| Name | The label you gave the key (e.g. my-app-prod). |
| Key | A masked version of the secret (e.g. wec-…••••rkxw) — the full value is only shown once, at creation. |
| Owner | The team member who created the key. |
| Models | Which models the key can call, shown as icons; +N indicates more than fit. |
| Created | The date the key was created. |
| Last used | When the key last made a request (— if it never has). |
| Usage | Tokens consumed by the key, with a usage bar (e.g. 8.2k tok). |
| Status | Active or Revoked. |
| Actions | The ⋯ menu to manage the key. |
Use Rows per page and the pager at the bottom to move through long lists.
Manage a key
Once you've clicked I've saved my key, the dialog closes and the secret is never shown again. From then on you can't see the secret — only rotate it for a new one or revoke it. There are two ways to get to those actions:
From the table — open the key's Actions menu (the ⋯ at the end of its row):
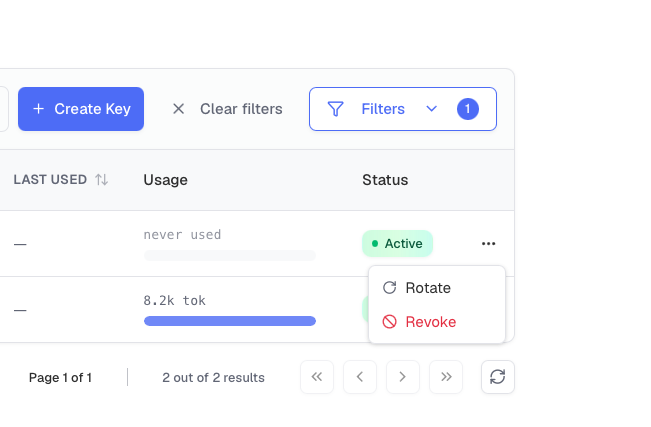
Figure 4: The ⋯ Actions menu on a key's row, with Rotate and Revoke.
From the key's detail page — click the key's name to open it. The same Rotate and Revoke buttons sit at the top right, alongside the key's usage and metadata:
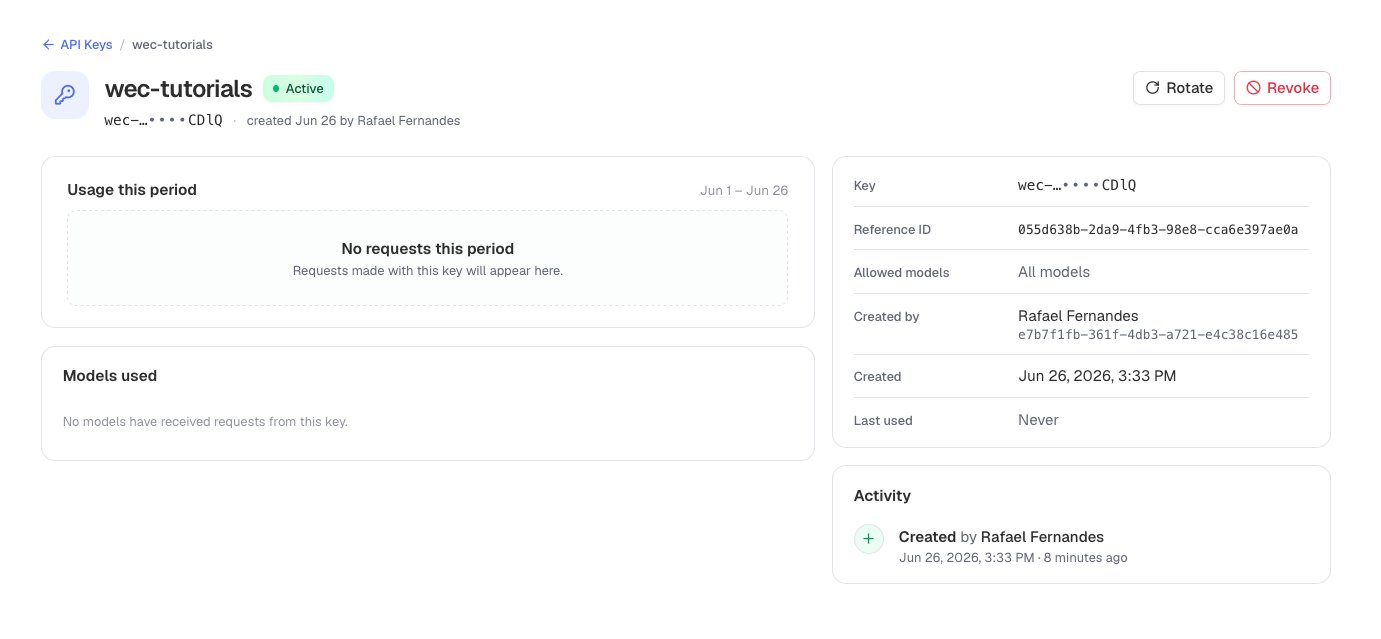
Figure 5: A key's detail page — usage, allowed models, metadata, and an activity log, with Rotate / Revoke at the top right.
The detail page shows:
- Usage this period — requests and tokens for the current billing period (empty until the key is used).
- Models used — which models have received requests from this key.
- A metadata panel — the masked Key, a Reference ID (a unique identifier handy for support requests), Allowed models (All models or the selected list), Created by, the Created timestamp, and Last used.
- Activity — a log of events on the key (created, rotated, revoked).
Rotate vs. revoke
- Rotate — generate a new secret for the same key and invalidate the old one. Use this when a secret is lost or exposed: apps switch to the new secret while the key's name, scope, and history stay the same. The new secret is shown once, just like at creation — copy it right away.
- Revoke — disable the key entirely. Revoking is immediate and permanent: the key stops working for all requests at once, so any app still using it starts getting authentication errors. Revoked keys remain listed (with a Revoked status) for your records — filter by status to show or hide them.
Next steps
- Code examples — use your key to call the API.
- Experiment in the Playground — try models in the browser.
- Models Hub — see which models a key can call.