Configure an SSH Key
SSH keys provide a secure and convenient way to authenticate and access your virtual machines without passwords. Configuring SSH keys in the Cloud Portal improves security, simplifies access, and streamlines management across your cloud resources.
Key benefits include:
- Enhanced security: Eliminates password-based authentication to protect your virtual machines.
- Simplified access: Streamlines login processes across your cloud instances.
- Efficient management: Makes handling access credentials easier and more organized.
- Wide compatibility: Works seamlessly with various operating systems and tools.
SSH Key Configuration Overview
You can either use an existing SSH key or create a new one if you don't have an SSH key yet. Follow the steps below to configure SSH keys in the Cloud Portal.
Step 1: Open the SSH Keys Page
To begin configuring SSH keys, navigate to the WiLine Edge Cloud:
- In the sidebar, select Compute → SSH Keys.
If no SSH keys are configured, click Create an SSH Key.
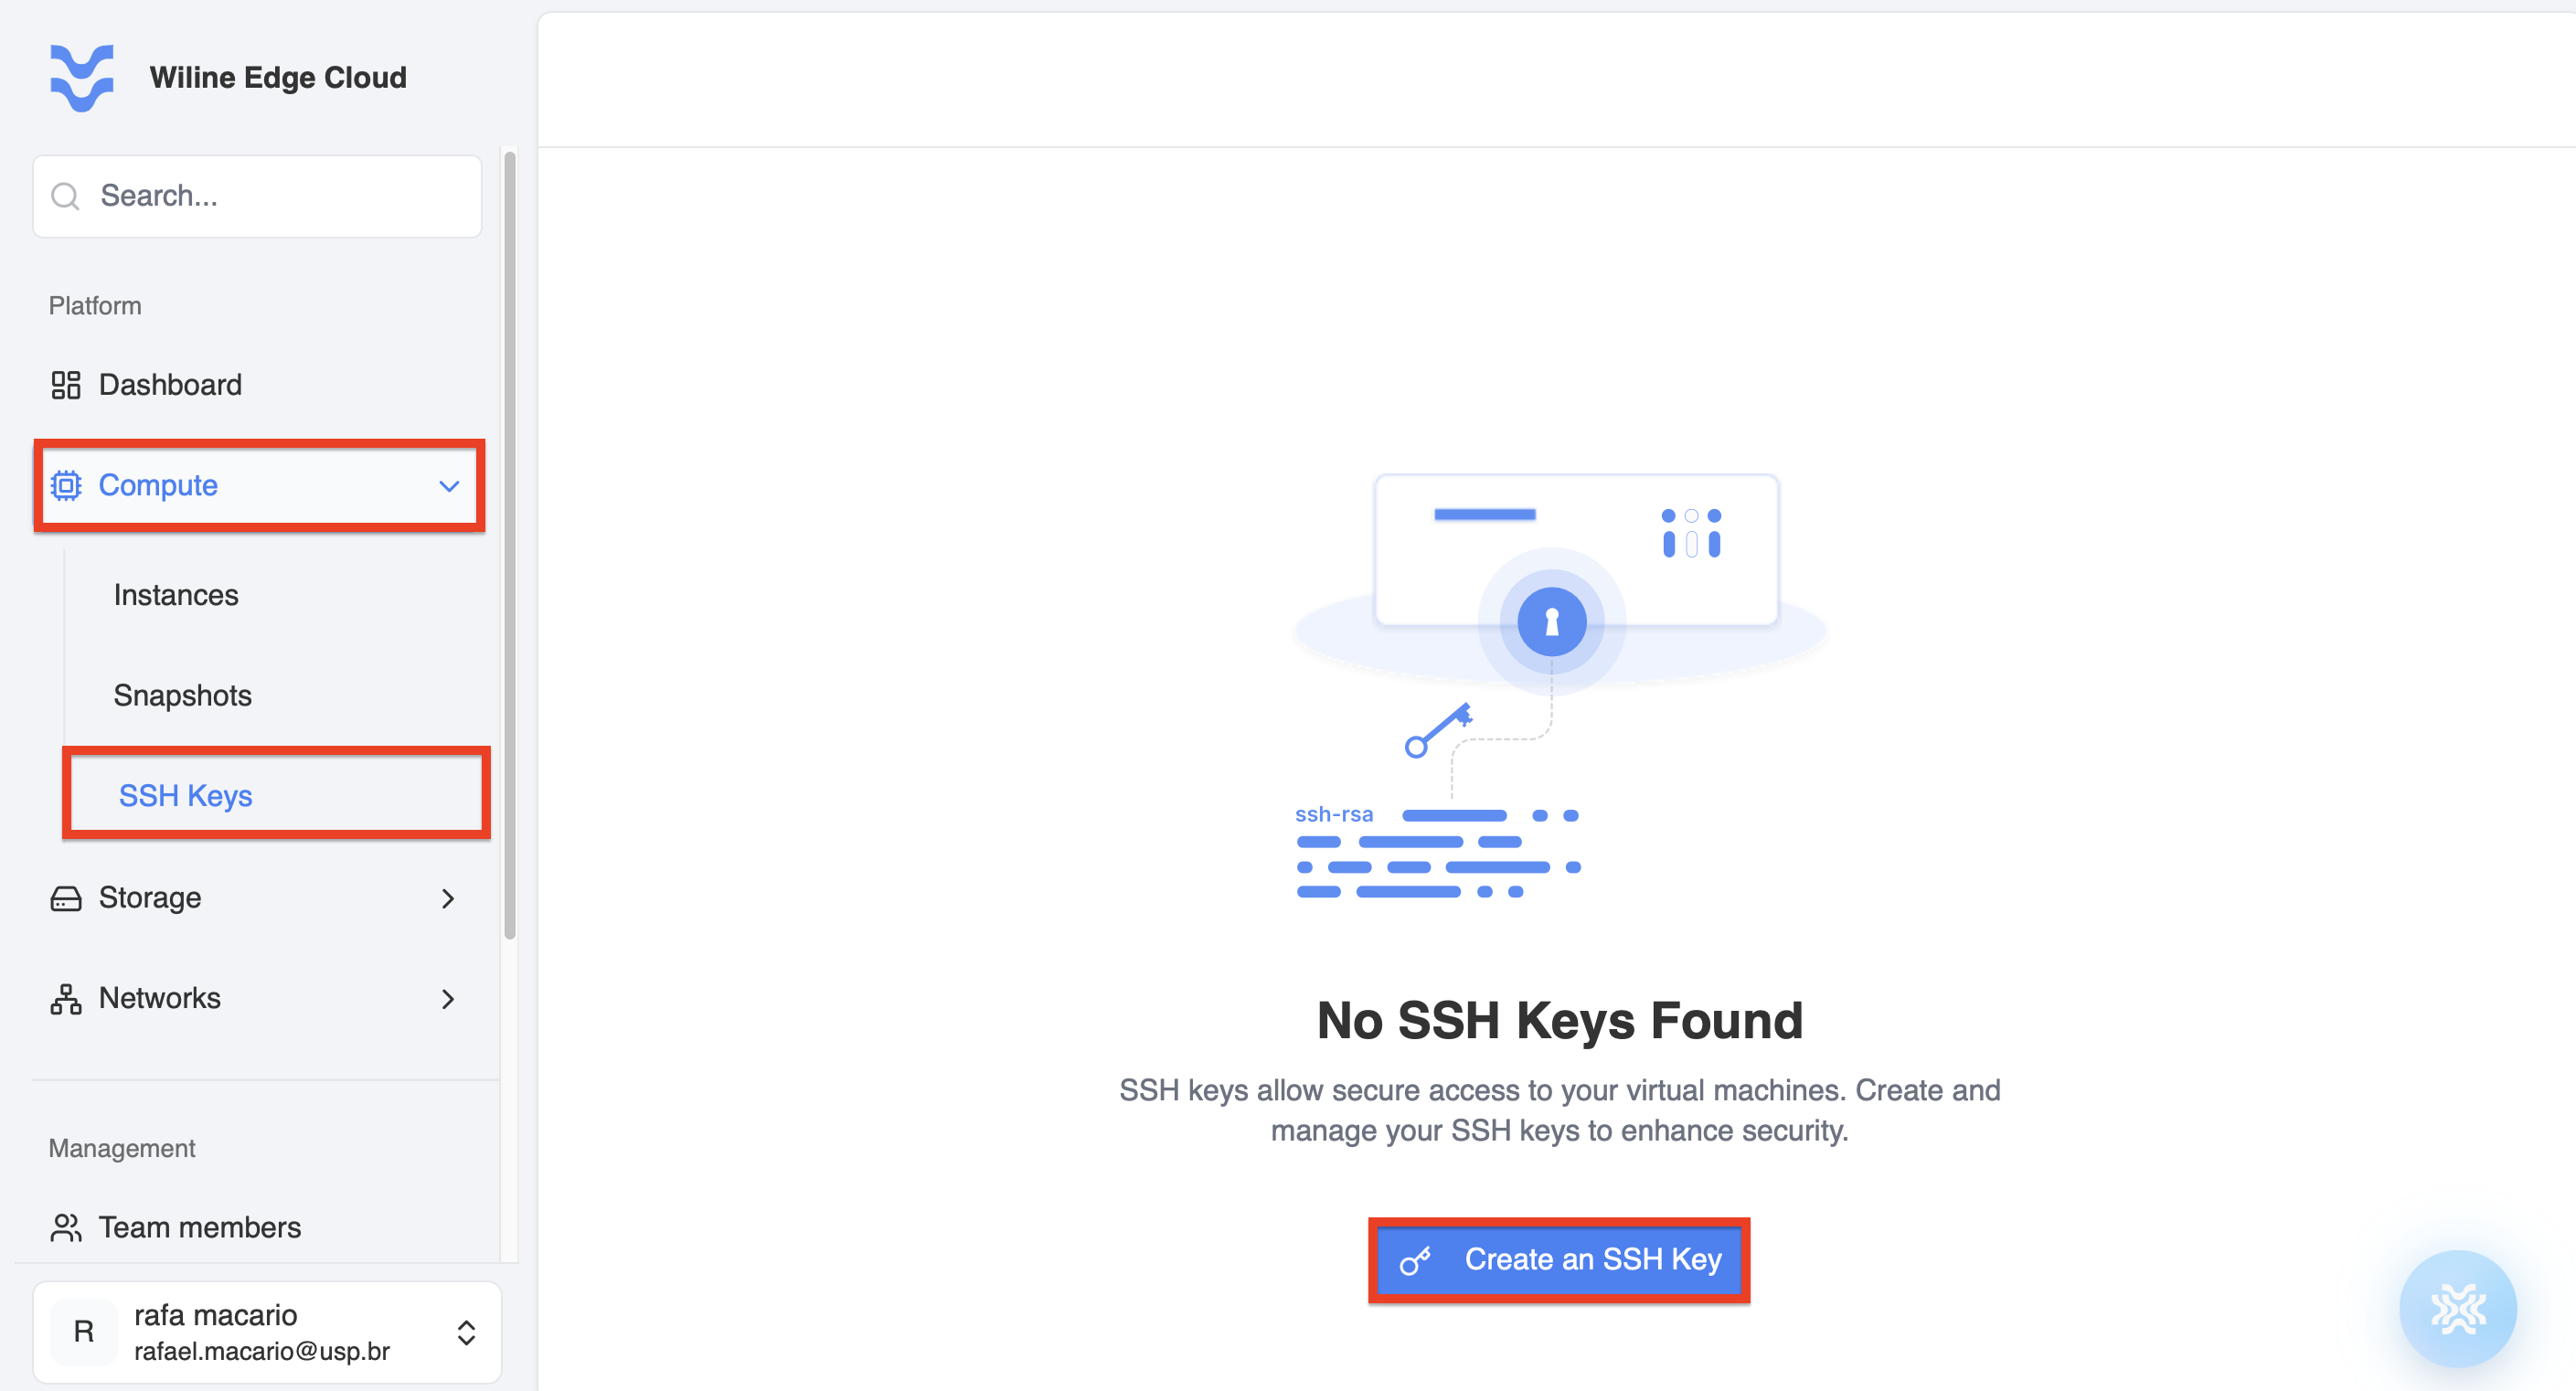
Figure 1 – SSH Keys page with no keys configured.
Step 2: Use an Existing SSH Key or Generate a New One
Option A: Use an Existing SSH Key
If you already have an SSH public key, you can add it directly to the WiLine Edge Cloud:
- Click Create an SSH Key.
- Provide a Keypair Name to identify your key.
- Paste your existing public key into the Public Key field.
- Click Create Keypair to save, or Cancel to abort.
Make sure to copy the entire contents of your public key file (including the ssh-rsa prefix) when adding it to the Cloud Portal.
Option B: Generate a New SSH Keypair
If you do not have an SSH key, generate a new keypair on your local machine. This creates a private key (kept securely on your computer) and a public key (uploaded to the Cloud Portal).
Follow these steps:
-
Open a terminal (Linux/macOS) or PowerShell (Windows).
-
Run the following command, replacing
your_email@example.comwith your email address:ssh-keygen -t rsa -b 4096 -C "your_email@example.com" -
Press
Enterto accept the default file location. -
Set a secure passphrase when prompted (optional but recommended).
-
View your public key with the command:
- On Linux/macOS:
cat ~/.ssh/id_rsa.pub
- On Windows (PowerShell):
Get-Content $env:USERPROFILE\.ssh\id_rsa.pub
-
Copy the entire contents of the public key file.
-
Return to the Cloud Portal, click Create an SSH Key, provide a Keypair Name, paste the public key into the Public Key field, and click Create Keypair.
Your new SSH keypair will now be available for use with your virtual machines.
Step 3: Review and Create
After entering the details, click Create SSH Key to save your key.
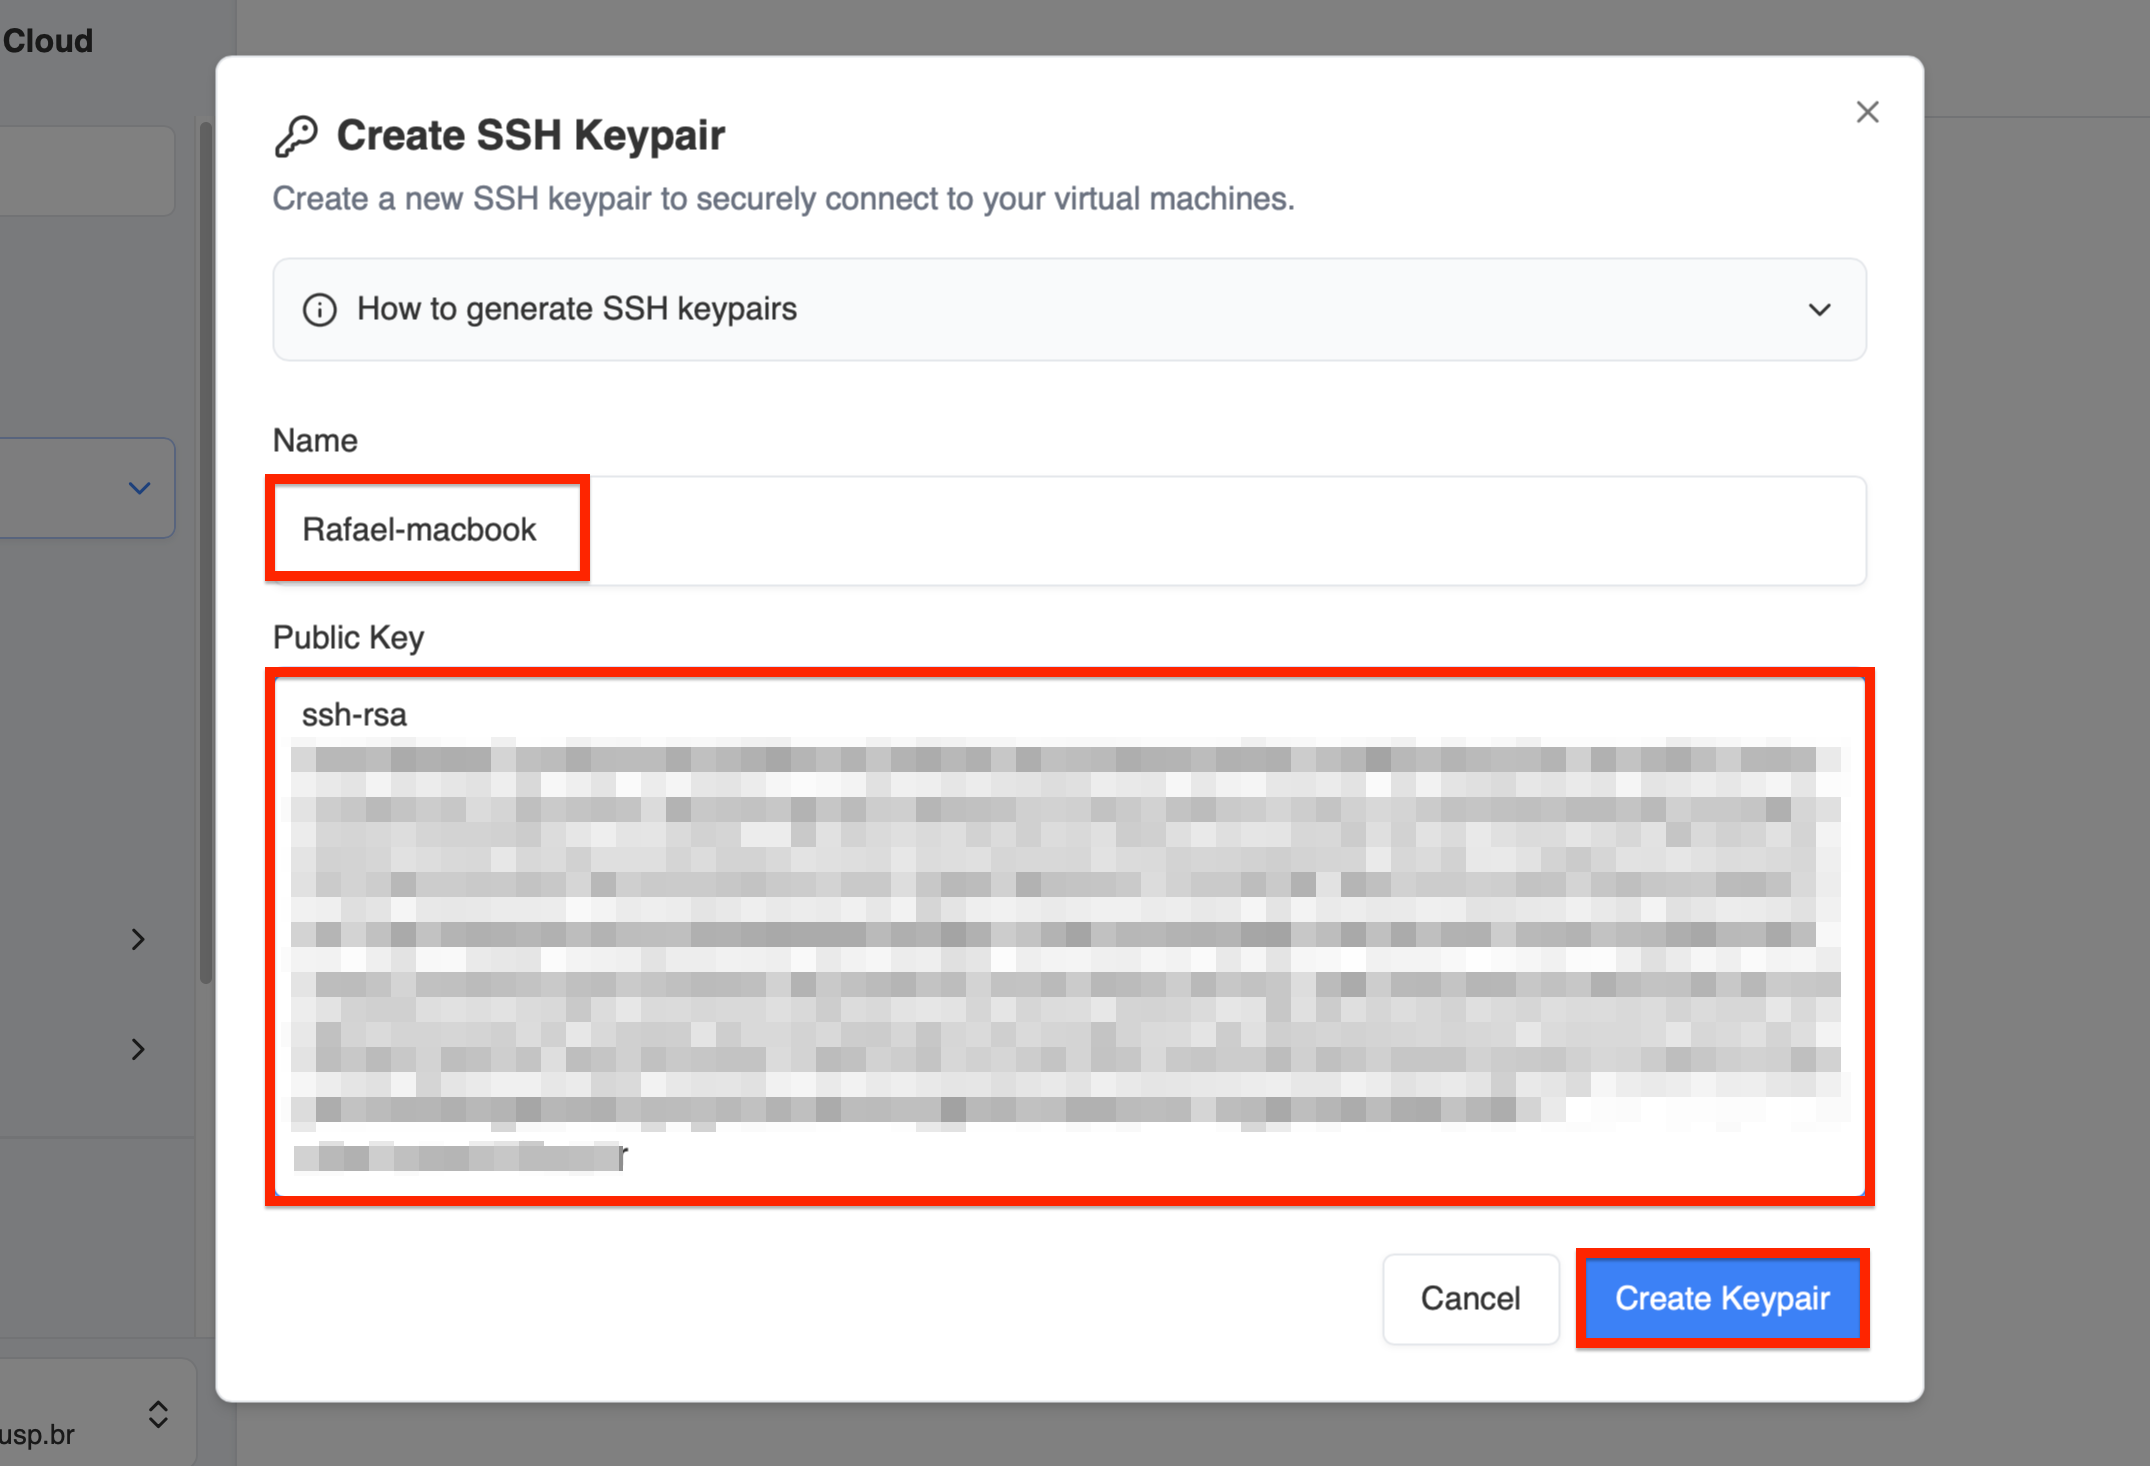
Figure 3 – SSH Keys page showing a successfully created SSH key.
Once created, your SSH key will appear in the list of available keys.
Step 4: Use Your SSH Key with Resources
After configuring an SSH key, return to the resource where you want to use it (such as a virtual machine setup or API). Select the SSH key from the available keys list or paste the public key into the relevant Public Key field to enable secure access.
The SSH Keys dashboard displays columns such as Name, Fingerprint, Account, and Actions, helping you manage your keys efficiently.
An SSH key is required to configure a virtual machine (VM) to enable secure access.
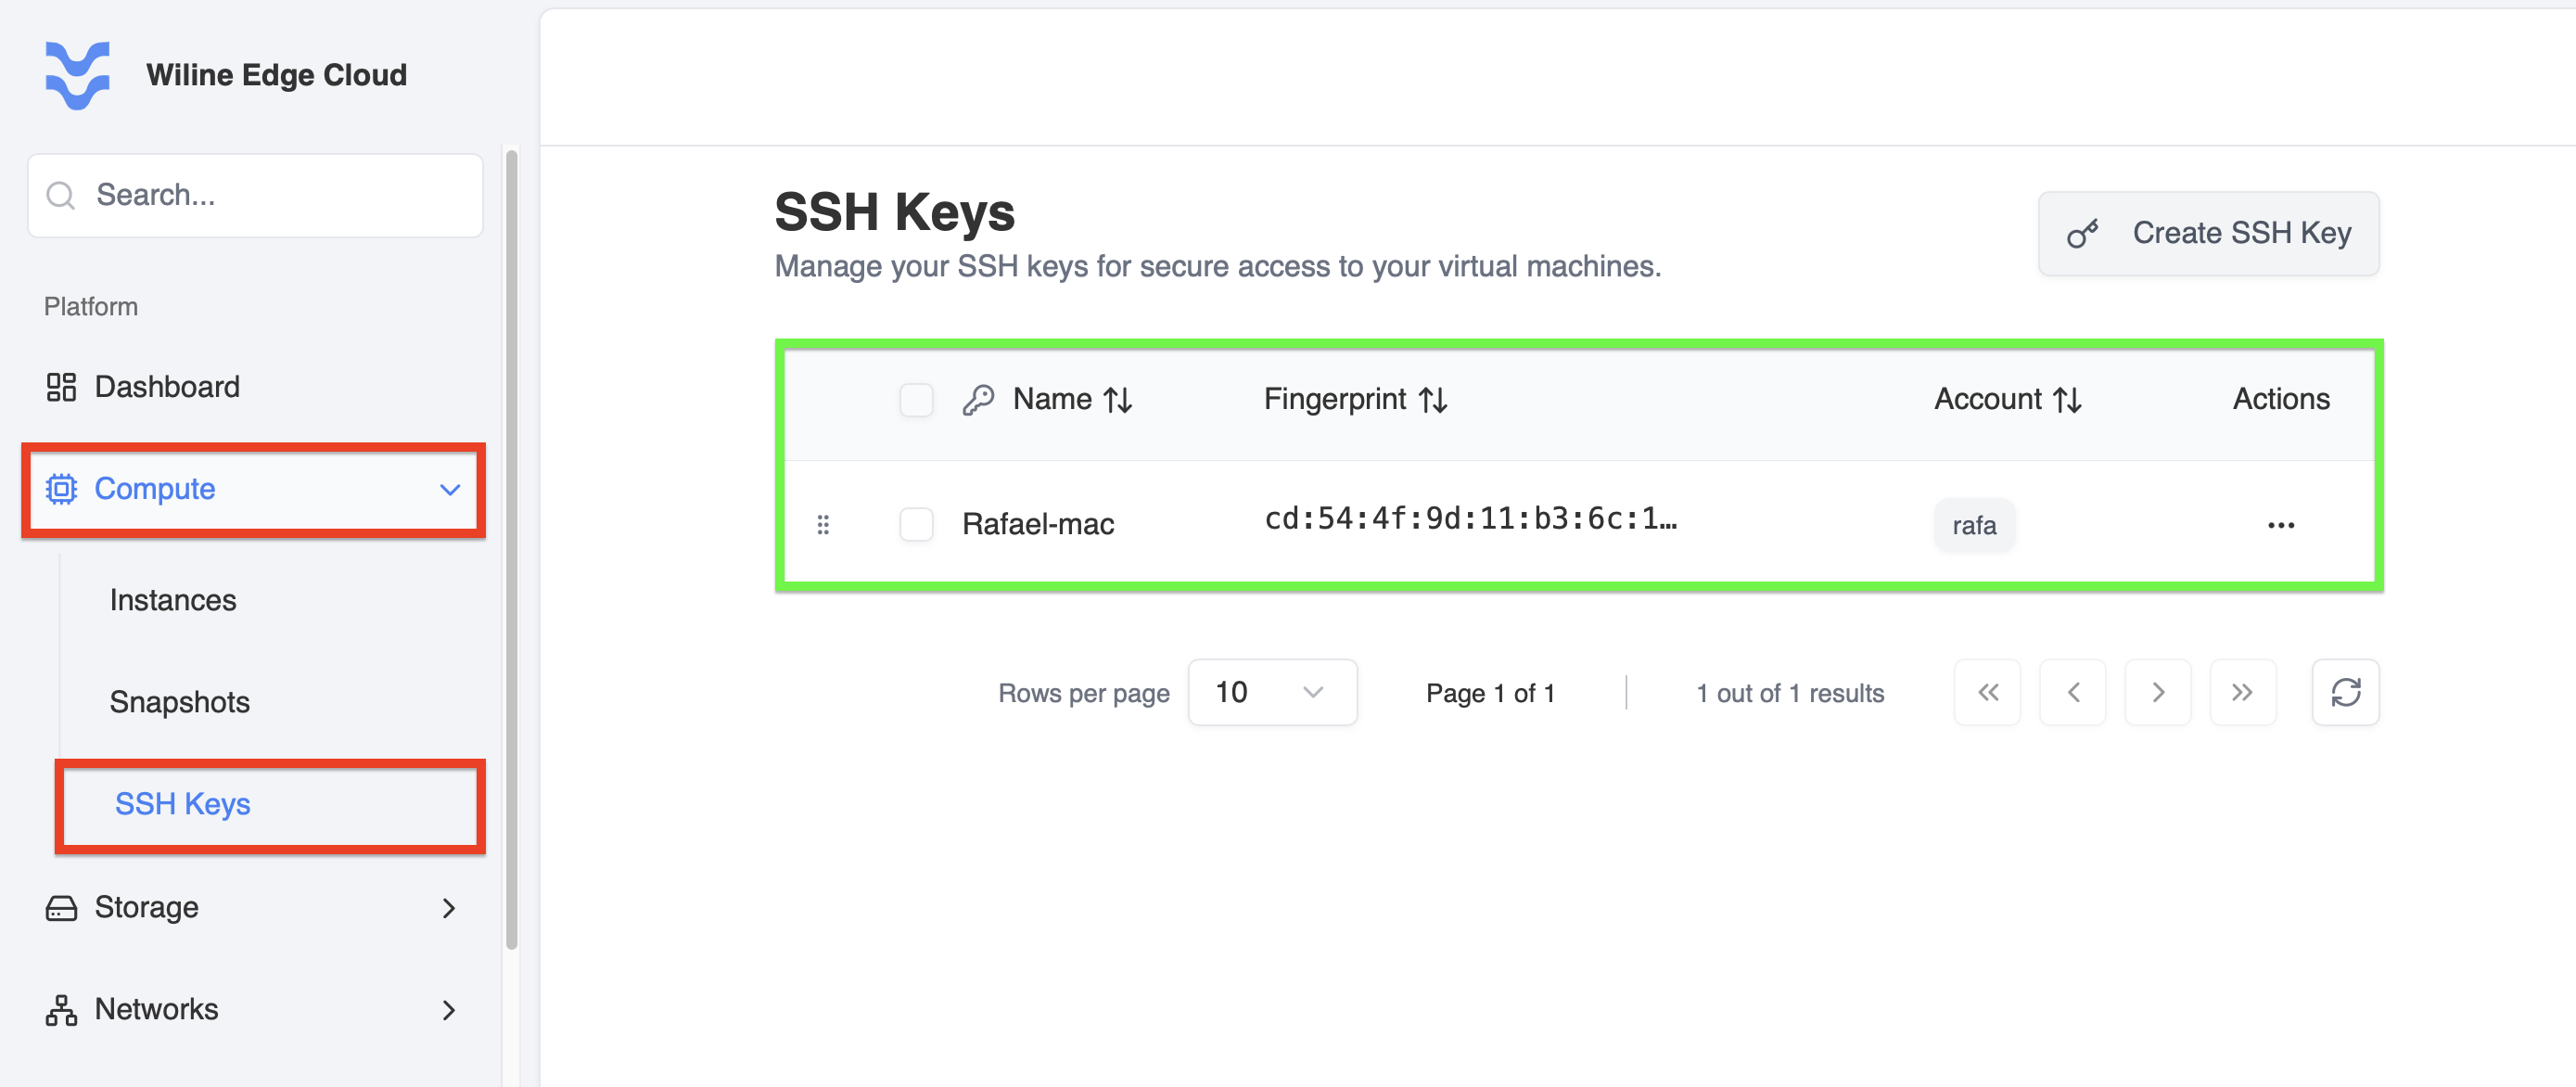
Figure 4 – SSH Keys dashboard showing the newly added SSH key.
Best Practices
- Always keep your private key secure and never share it.
- Use strong passphrases when generating SSH keys.
- Regularly review and remove unused SSH keys from the Cloud Portal.
- Backup your private keys securely to avoid losing access.
For a complete walkthrough of deploying virtual machines, see:
→ Compute Instances (Deploy Your First Virtual Machine documentation section).