Create a VM Snapshot
Snapshots allow you to capture a point‑in‑time copy of a virtual machine (VM). This is useful for creating backups before system changes, protecting data during updates or migrations, and restoring infrastructure after failures.
VM snapshots offer:
- Rapid backup and recovery: Quickly capture the entire state of a VM to safeguard against data loss.
- Cloning and testing: Create VM copies for development, testing, or troubleshooting without impacting production.
- Flexible protection: Include disk data, system configuration, and optionally memory state for consistent snapshots.
Snapshot Configuration
The form includes the following sections:
Step 1 — Open the Snapshots Page
After logging in to the WiLine Edge Cloud:
- In the sidebar, click Compute.
- Select Snapshots.
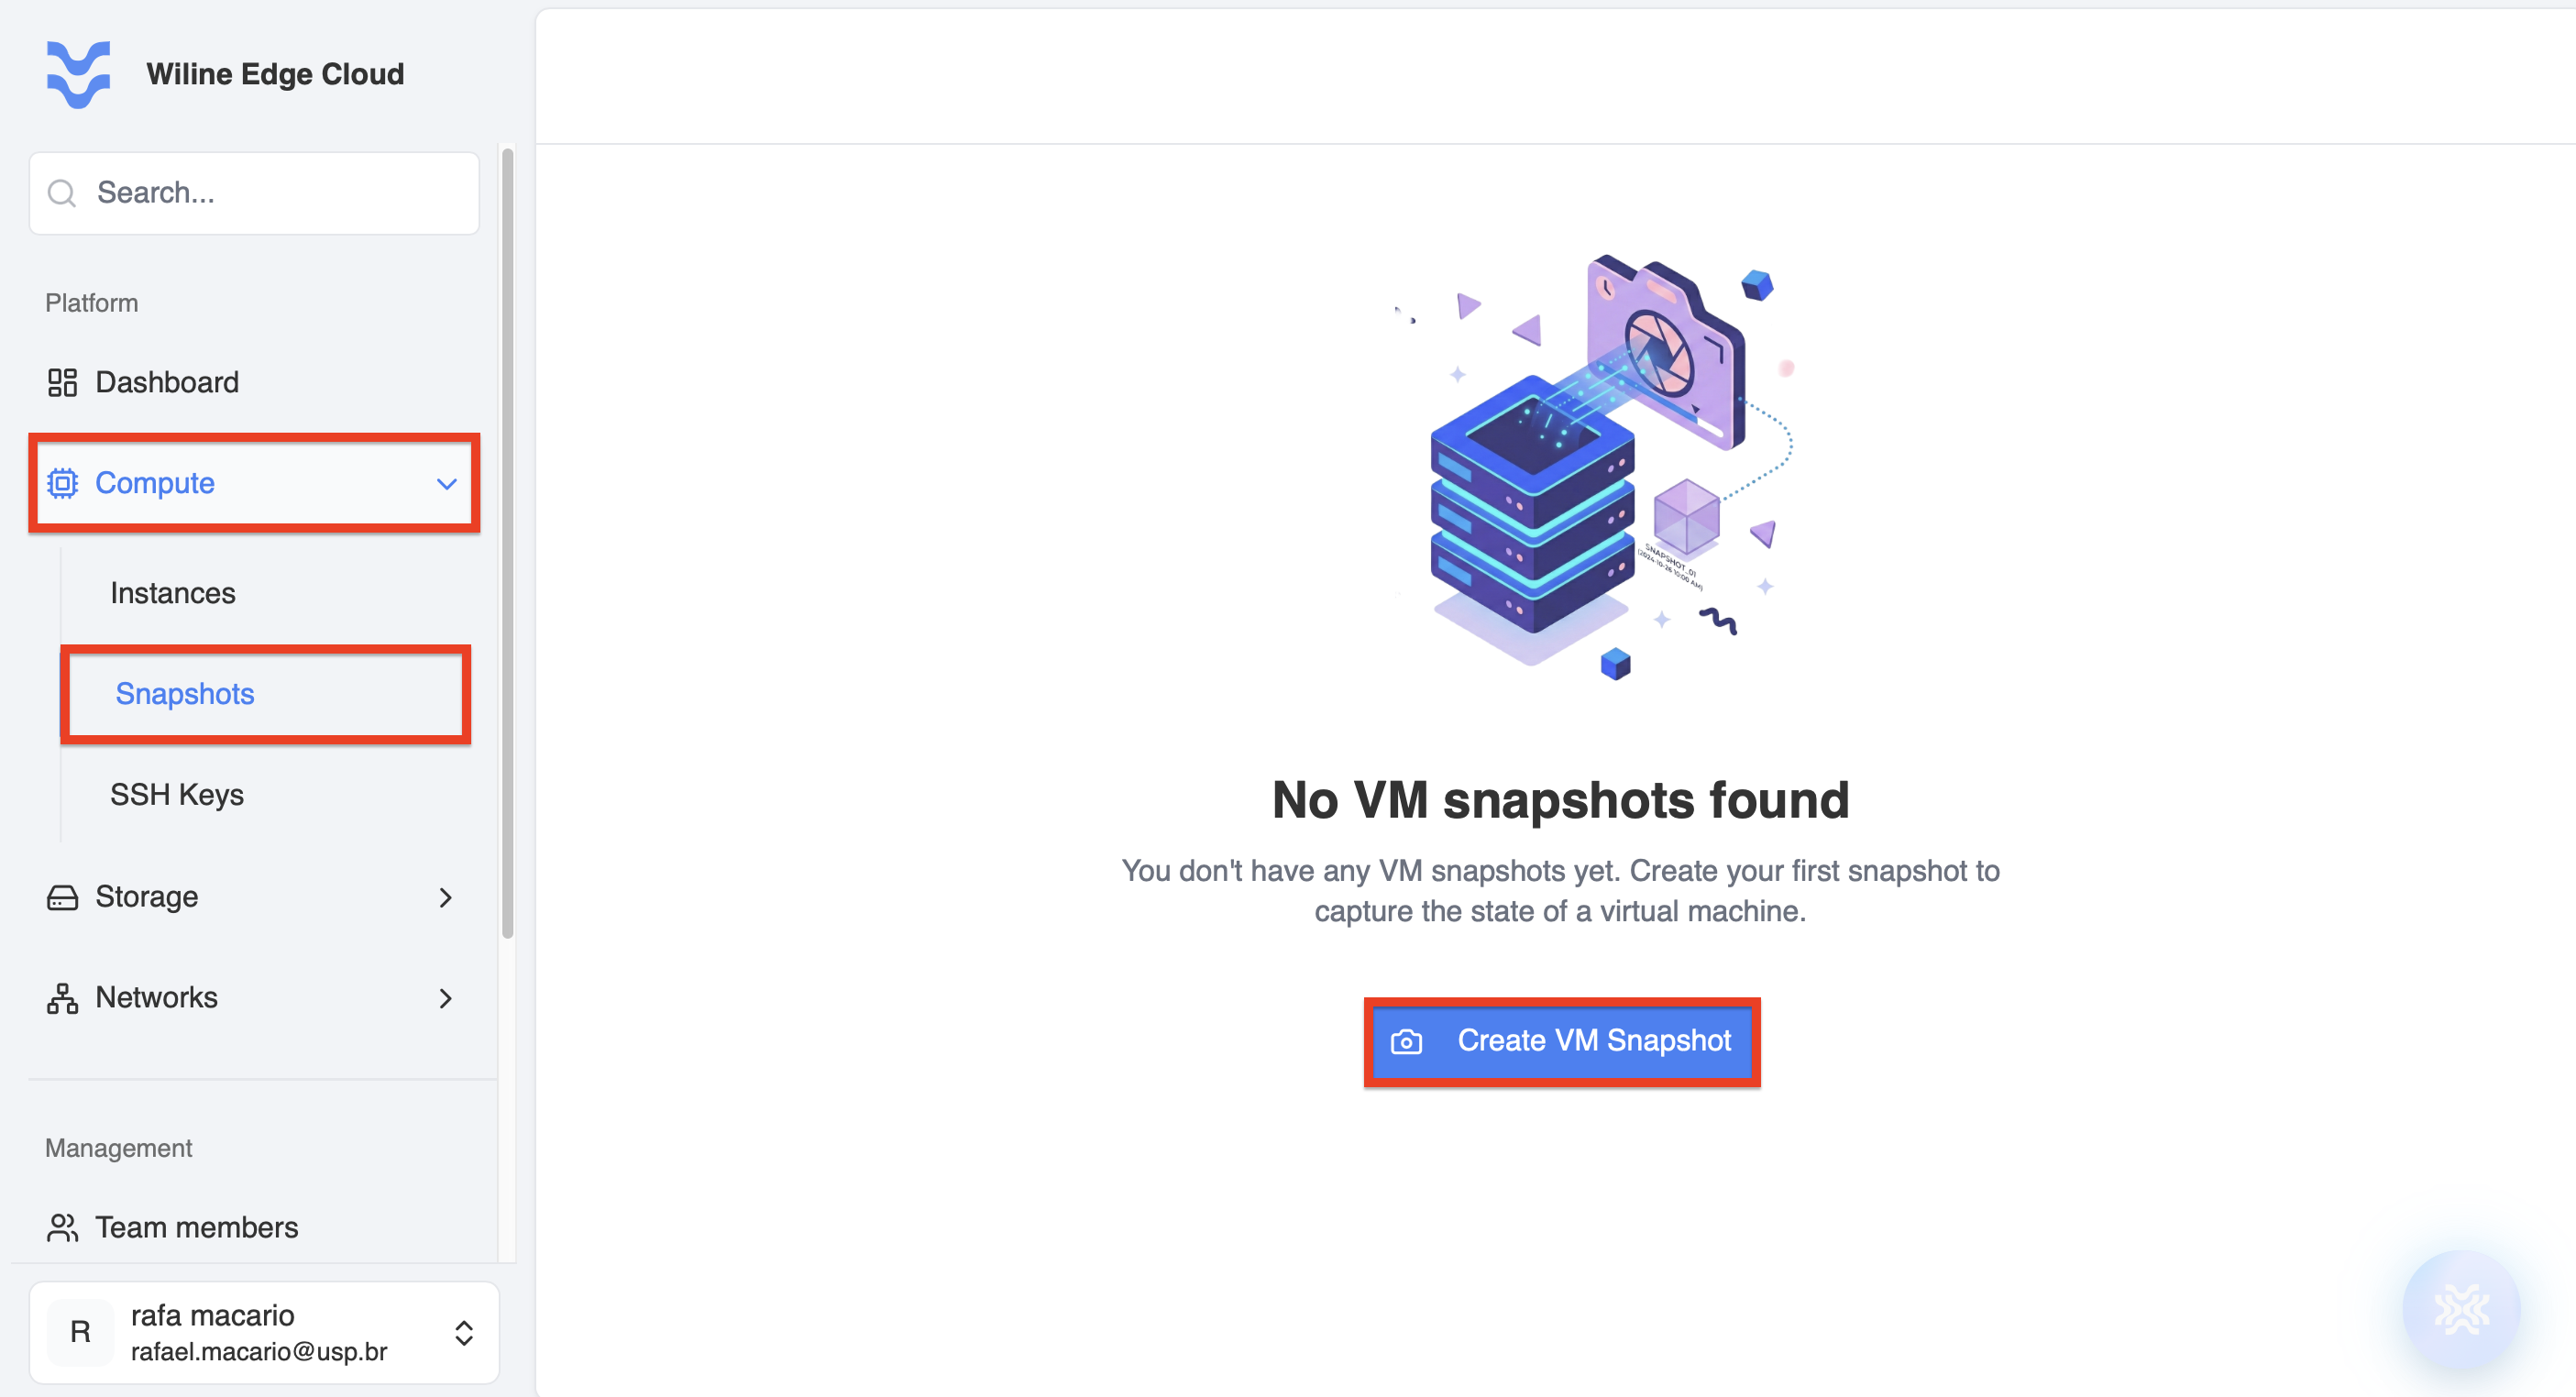 Figure 1 — Snapshots dashboard with a list of snapshots and the Create VM Snapshot button.
If no snapshots exist, the Create VM Snapshot button will be prominently displayed.
Click Create VM Snapshot to open the snapshot creation form.
Step 2 — Choose Snapshot Type
Select the type of snapshot to create.
VM Snapshot
A VM snapshot captures the complete state of a virtual machine, including:
- VM disk data
- System configuration
- Optional memory state
Note: The virtual machine must be running and attached to ensure a consistent snapshot.
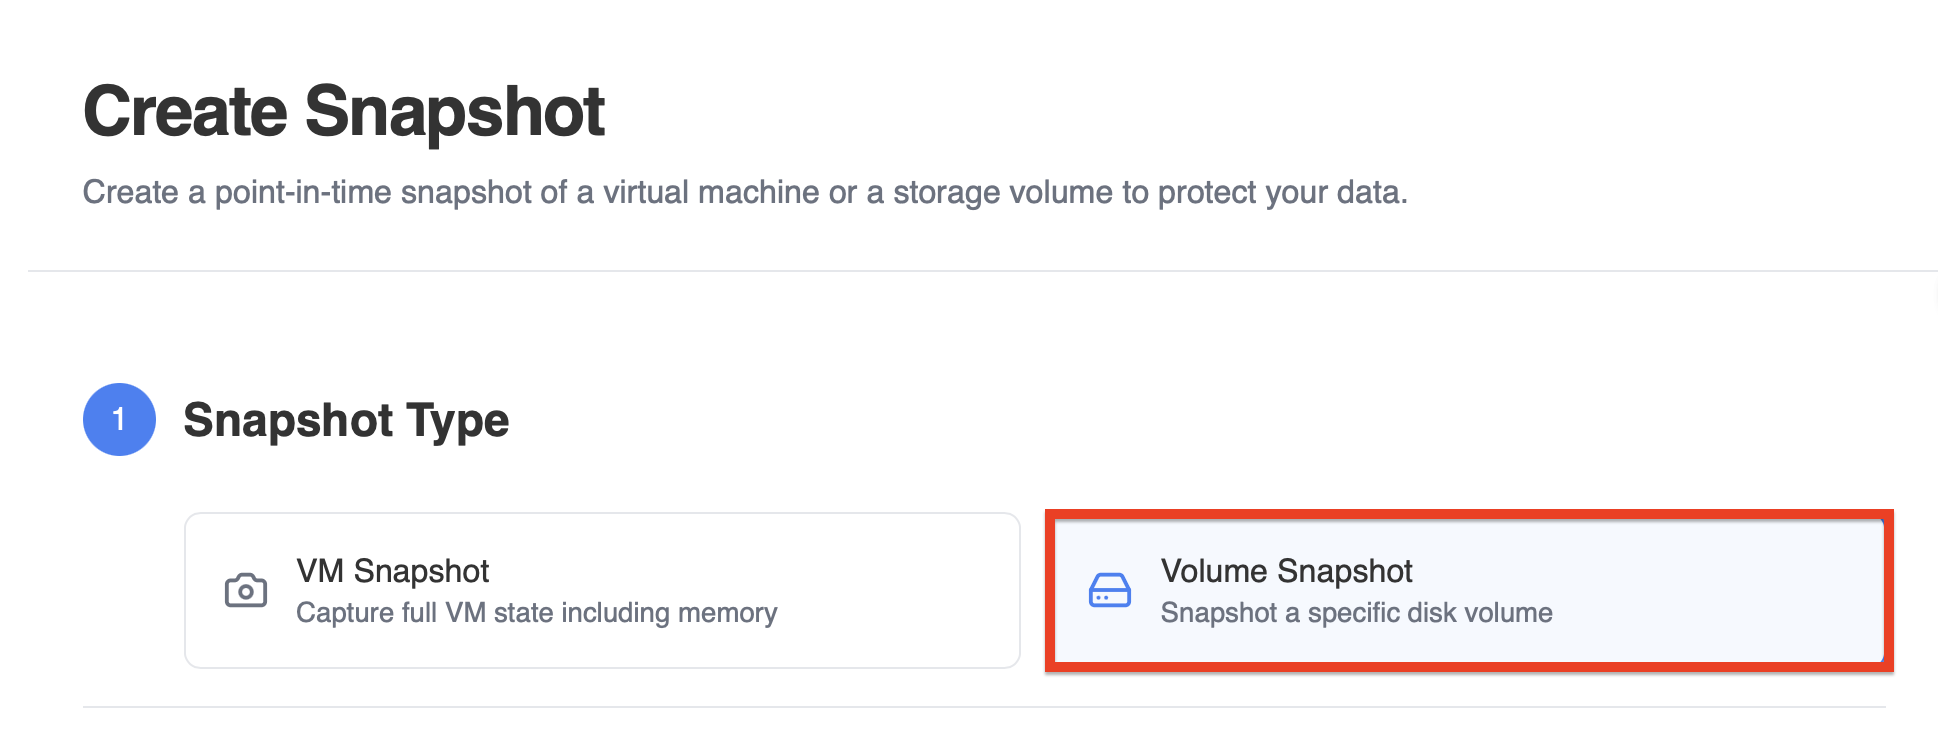 Figure 2 — Snapshot Type selection with VM Snapshot option.
Step 3 — Enter Snapshot Details
Provide the following information:
Snapshot Name
Enter a descriptive name for the snapshot, for example, production-backup-march. If left blank, the platform will generate a name automatically.
Description (Optional)
Add a description explaining the snapshot's purpose, such as Snapshot before upgrading the production API server.
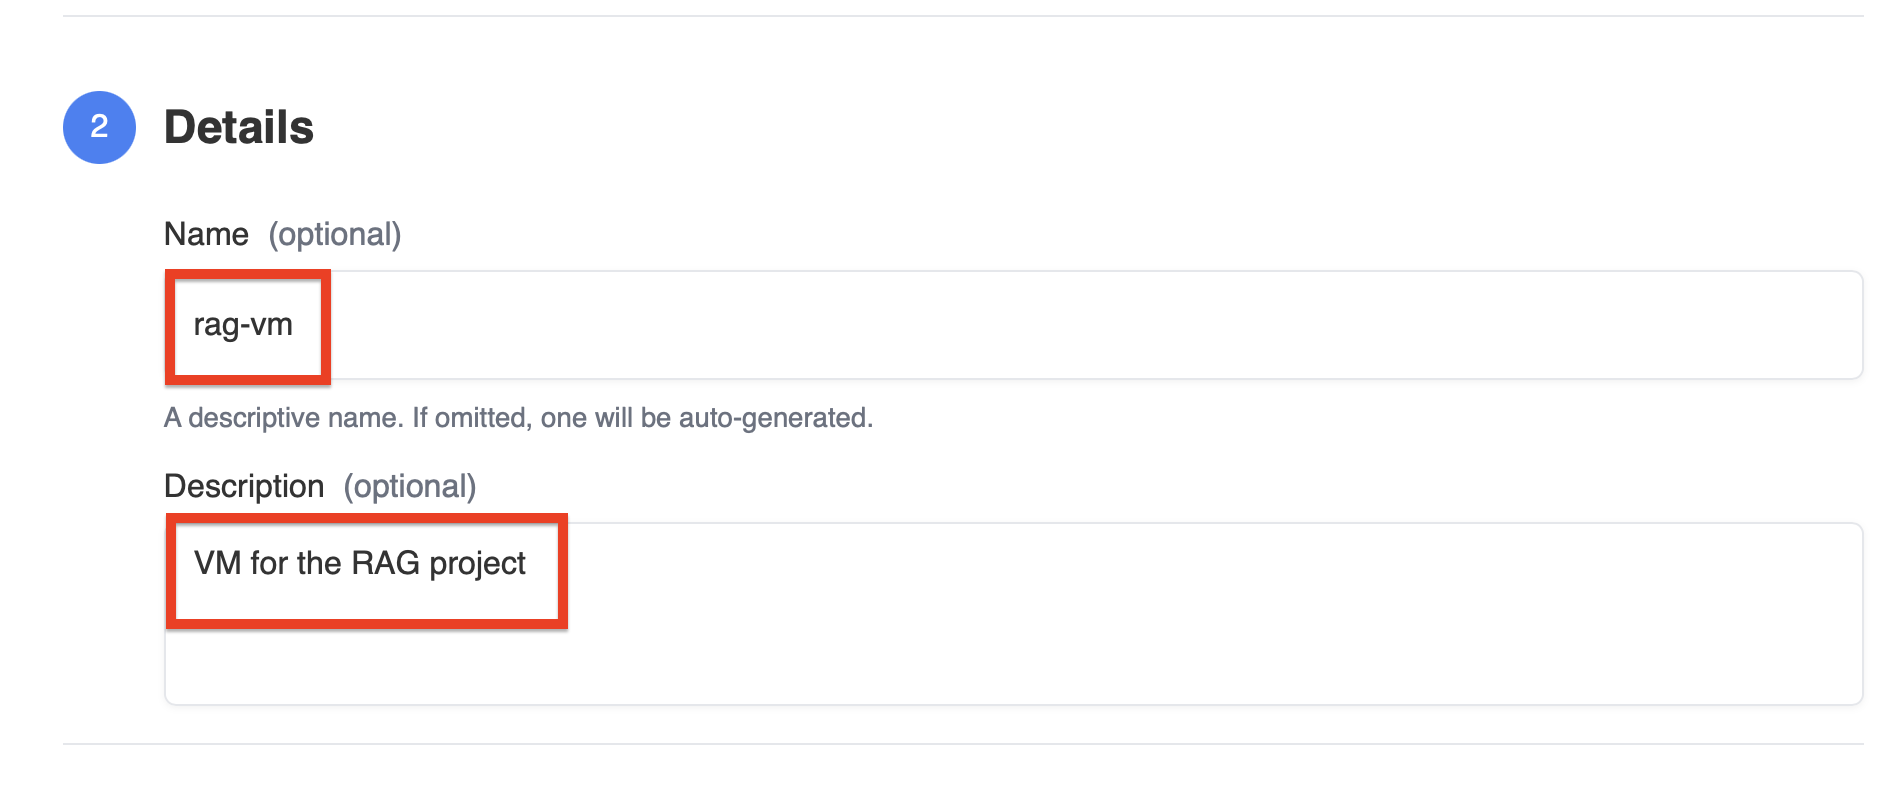 Figure 3 — Snapshot details fields for name and description.
Step 4 — Configure Advanced Options
Adjust optional settings to improve snapshot consistency and capture additional system state.
Quiesce VM
Enable this to temporarily pause filesystem activity during snapshot creation.
Benefits:
- Improves data consistency
- Prevents partially written files
- Recommended for database workloads
Include Memory
Enable this option to include the VM's memory state in the snapshot.
This captures:
- Running processes
- Active memory
- Current execution context
Allowing the VM to resume exactly where it left off when restored.
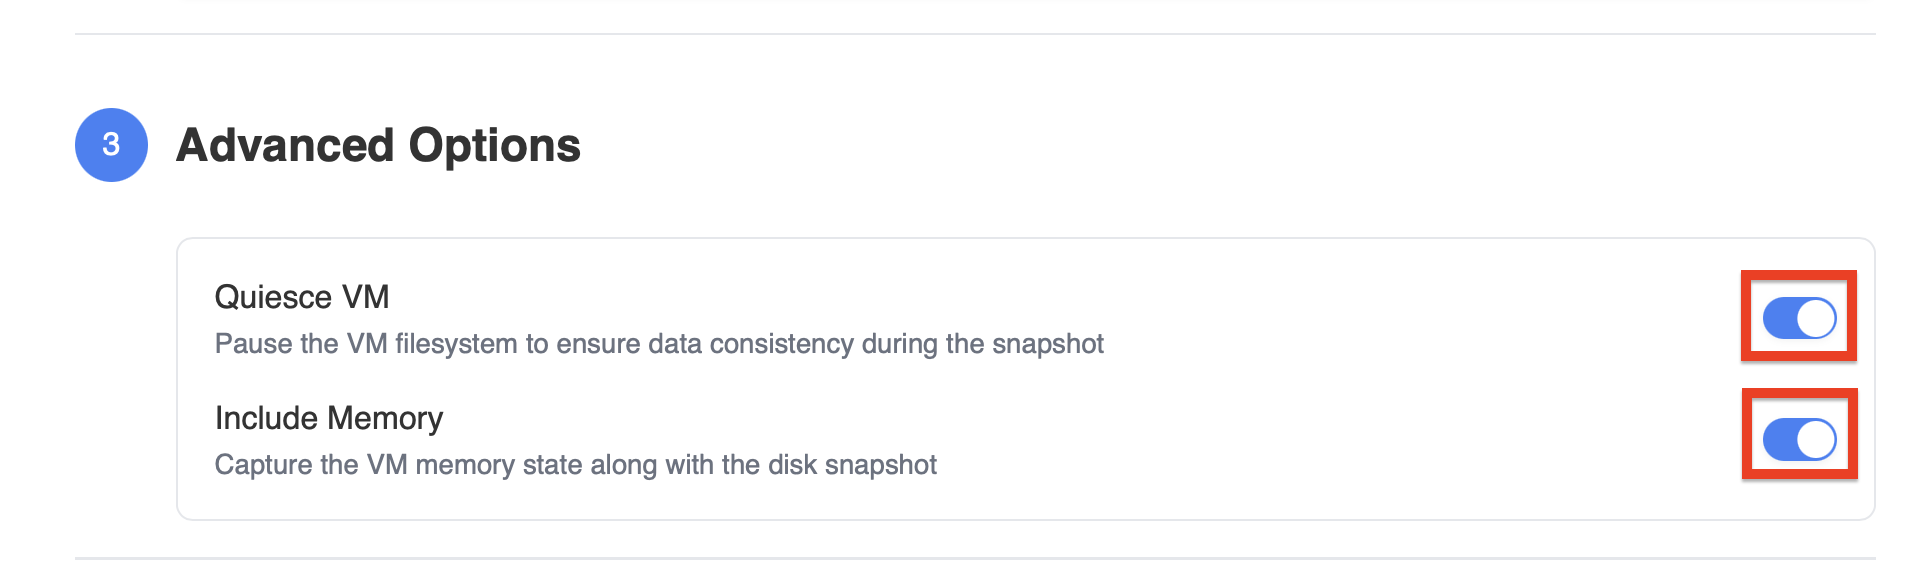 Figure 4 — Advanced Options with toggles for filesystem pause and memory capture.
Step 5 — Select the Virtual Machine
Choose the virtual machine to snapshot.
If no virtual machines are available in the selected project, the interface will show:
No virtual machines available
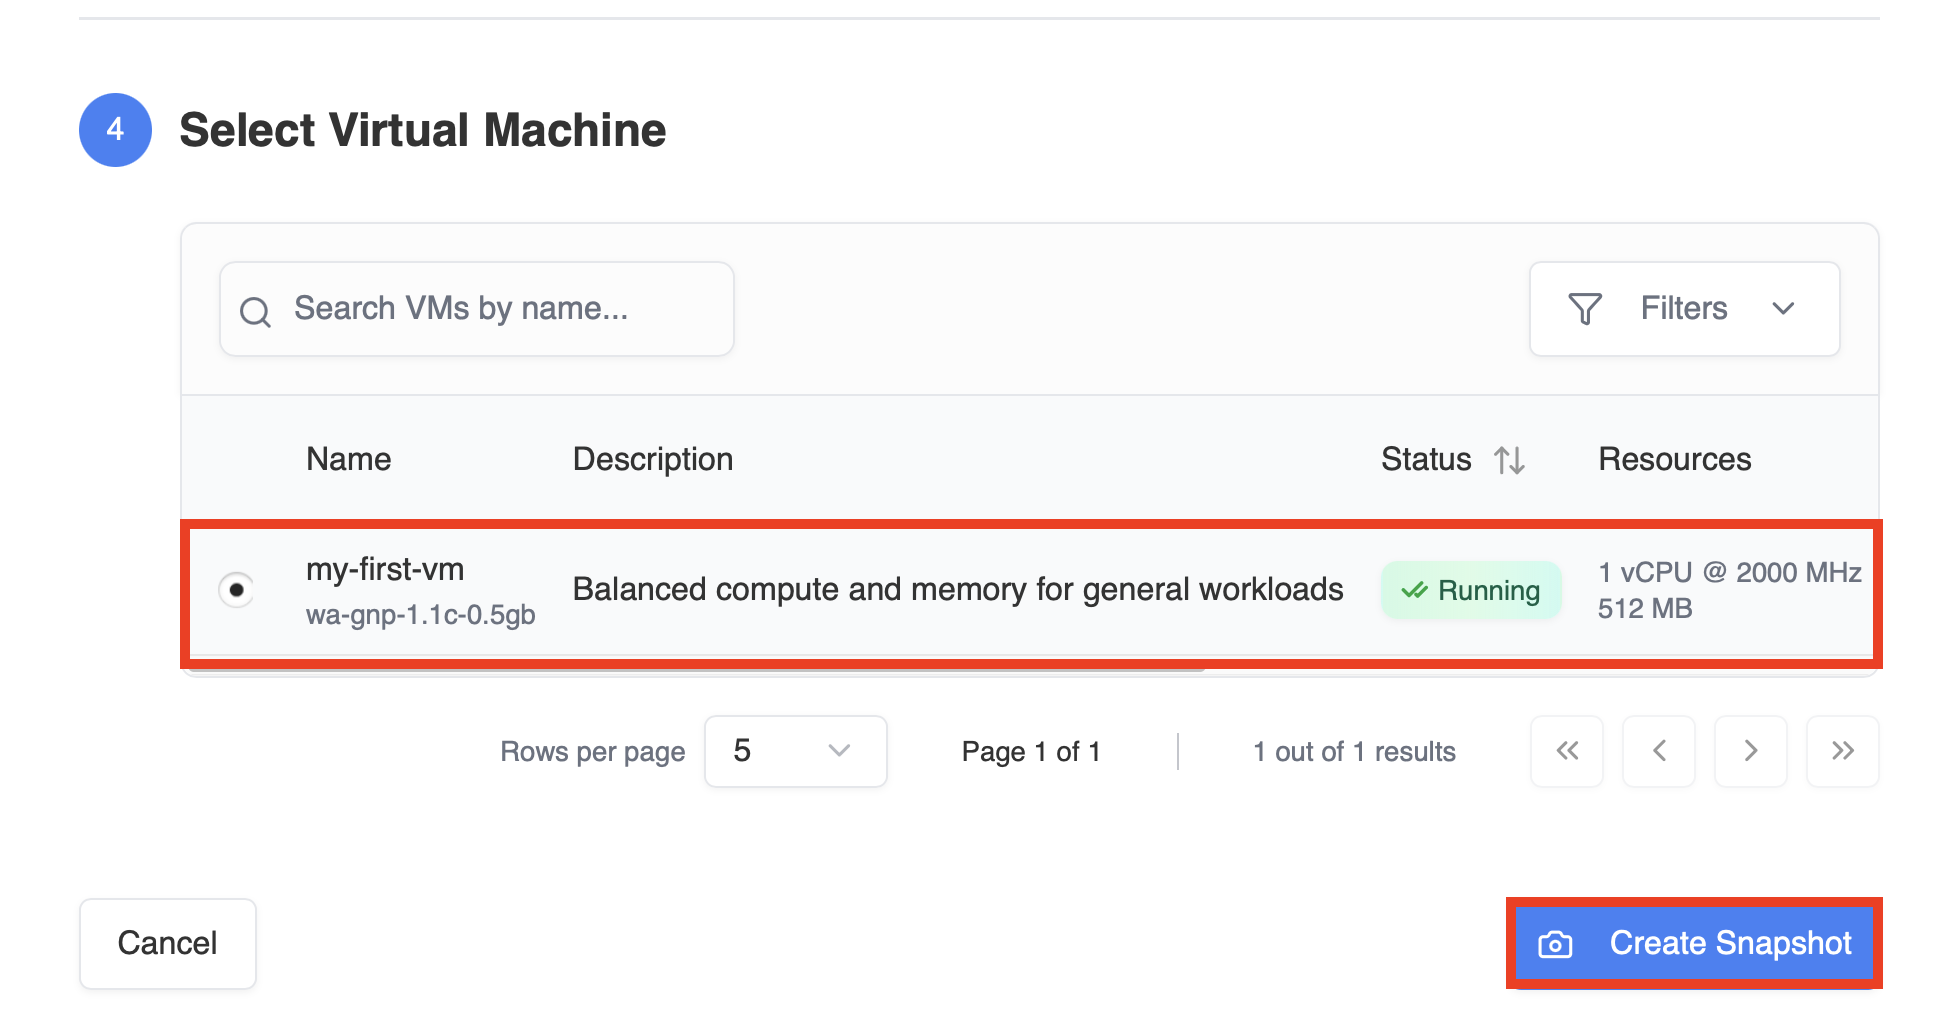 Figure 5 — Virtual machine selection dropdown.
Step 6 — Review and Create Snapshot
Review the snapshot configuration and click Create to start the snapshot process.
After Creation
Once created, the snapshot appears in the Snapshots dashboard.
From here, you can:
- View snapshot details
- Restore a VM from a snapshot
- Delete snapshots when no longer needed
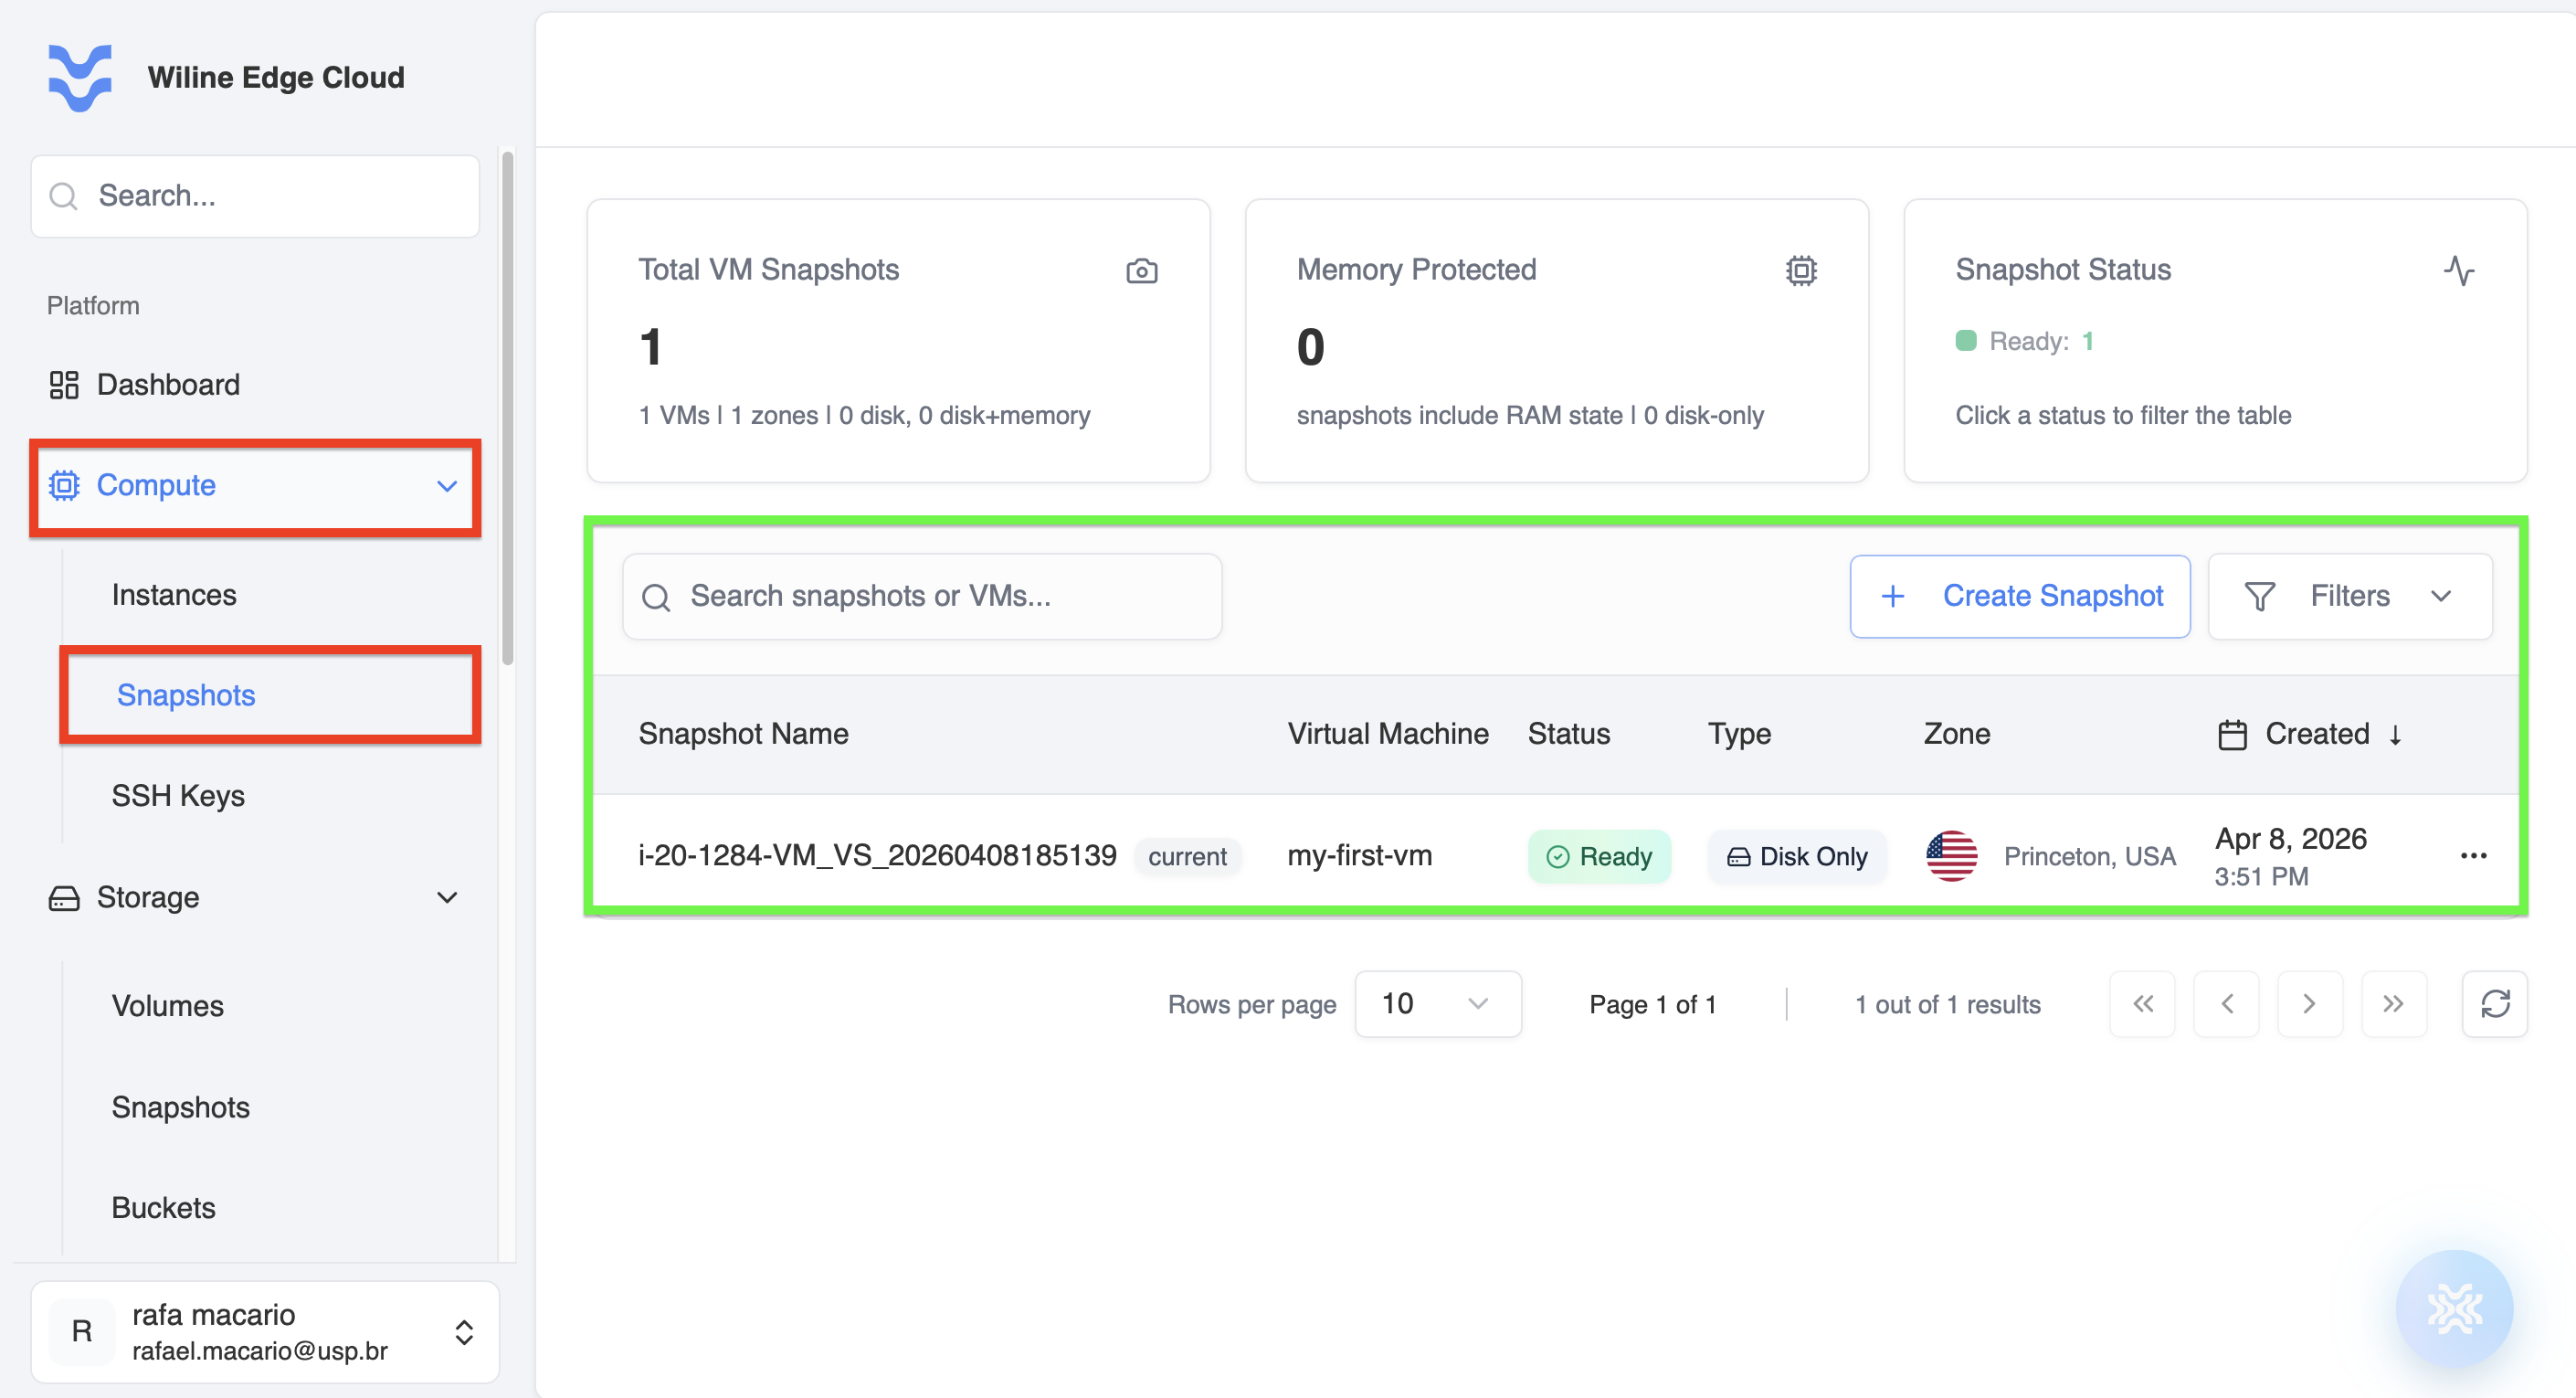 Figure 6 — Snapshots dashboard showing a list of created snapshots.
Accessing Your Snapshots
To access and manage your snapshots:
- Navigate to Compute → Snapshots.
- Use search and filter options to find specific snapshots.
- Select a snapshot to view details, restore, or delete.
Snapshots provide a reliable way to manage VM backups and recover from failures.
Best Practices
- Create snapshots before performing system updates to ensure recovery points.
- Periodically remove old or unused snapshots to manage storage costs.
- Enable filesystem pause for workloads requiring strong consistency.
- Ensure the VM is running and attached when creating snapshots for consistency.
Snapshots are essential for maintaining reliable backups and safe infrastructure changes within WiLine Edge Cloud.