Manage Team Members
The Team Members section allows you to manage users within your organization in WiLine Edge Cloud (WEC).
From this dashboard, you can:
- View all users in your organization
- Add new team members
- Access user details and identifiers
Manage Team Members
After logging in to the WiLine Edge Cloud:
- Navigate to Management → Team Members
You will see a table listing all users in your organization, along with controls to search, filter, and add new members.
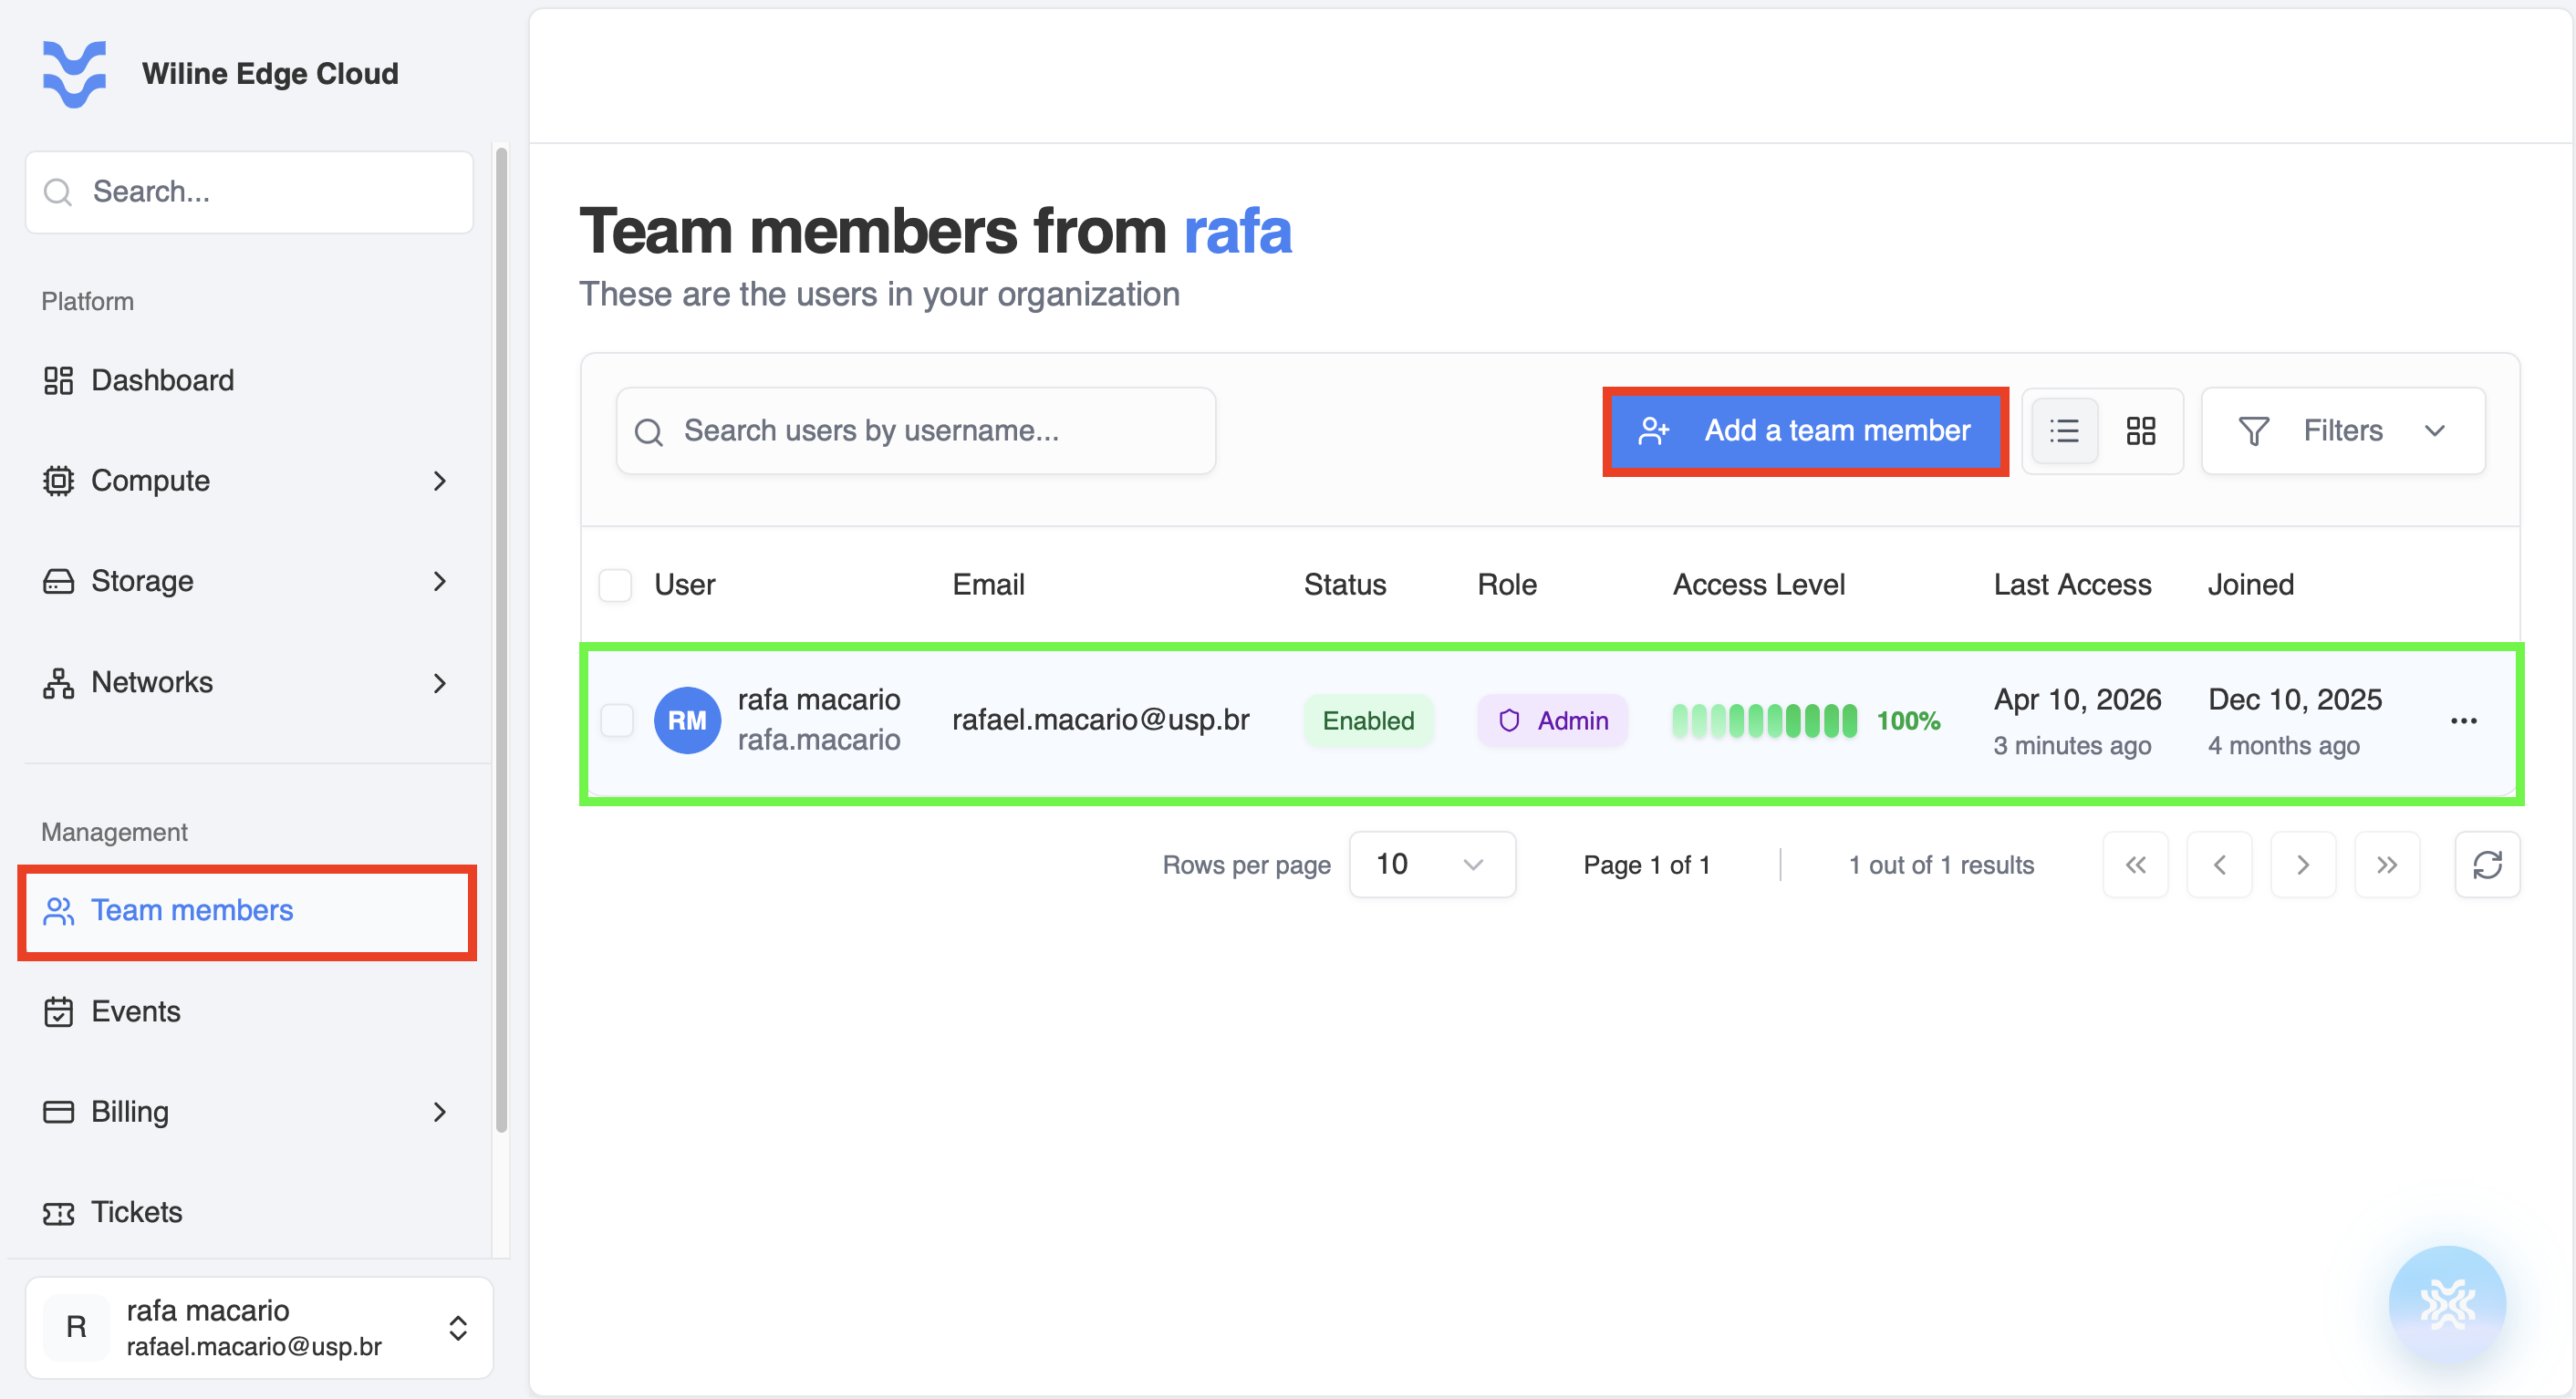 Figure 1: Team Members table with search, filters, and Add Member button.
At the top of the table, you can:
- Use the search bar to find users by name or username
- Apply filters to refine results
- Click Add Member to invite a new user
This allows you to quickly locate and manage users in larger organizations.
Below the header, you’ll find a table listing all team members.
Each row represents a user and includes:
- User — name and avatar initials
- Email — user email address
- Status — account state (e.g. Enabled)
- Role — assigned role (e.g. Admin)
- Access Level — percentage-based access scope
- Last Access — most recent activity timestamp
- Joined — account creation date
Example: Team Member entry
- User:
rafa macario - Email:
rafael.macario@usp.br - Status:
Enabled - Role:
Admin - Access Level:
100% - Last Access:
Apr 10, 2026 (3 minutes ago) - Joined:
Dec 10, 2025 (4 months ago)
The initial Admin user is created by default and cannot be deleted.
Add a Team Member
To add a new user, click the Add a team member button (see Figure 1).
This opens a form where you can:
- Enter user details (first name, last name, email)
- Define the username (auto-generated based on name, but editable)
- Assign roles and permissions
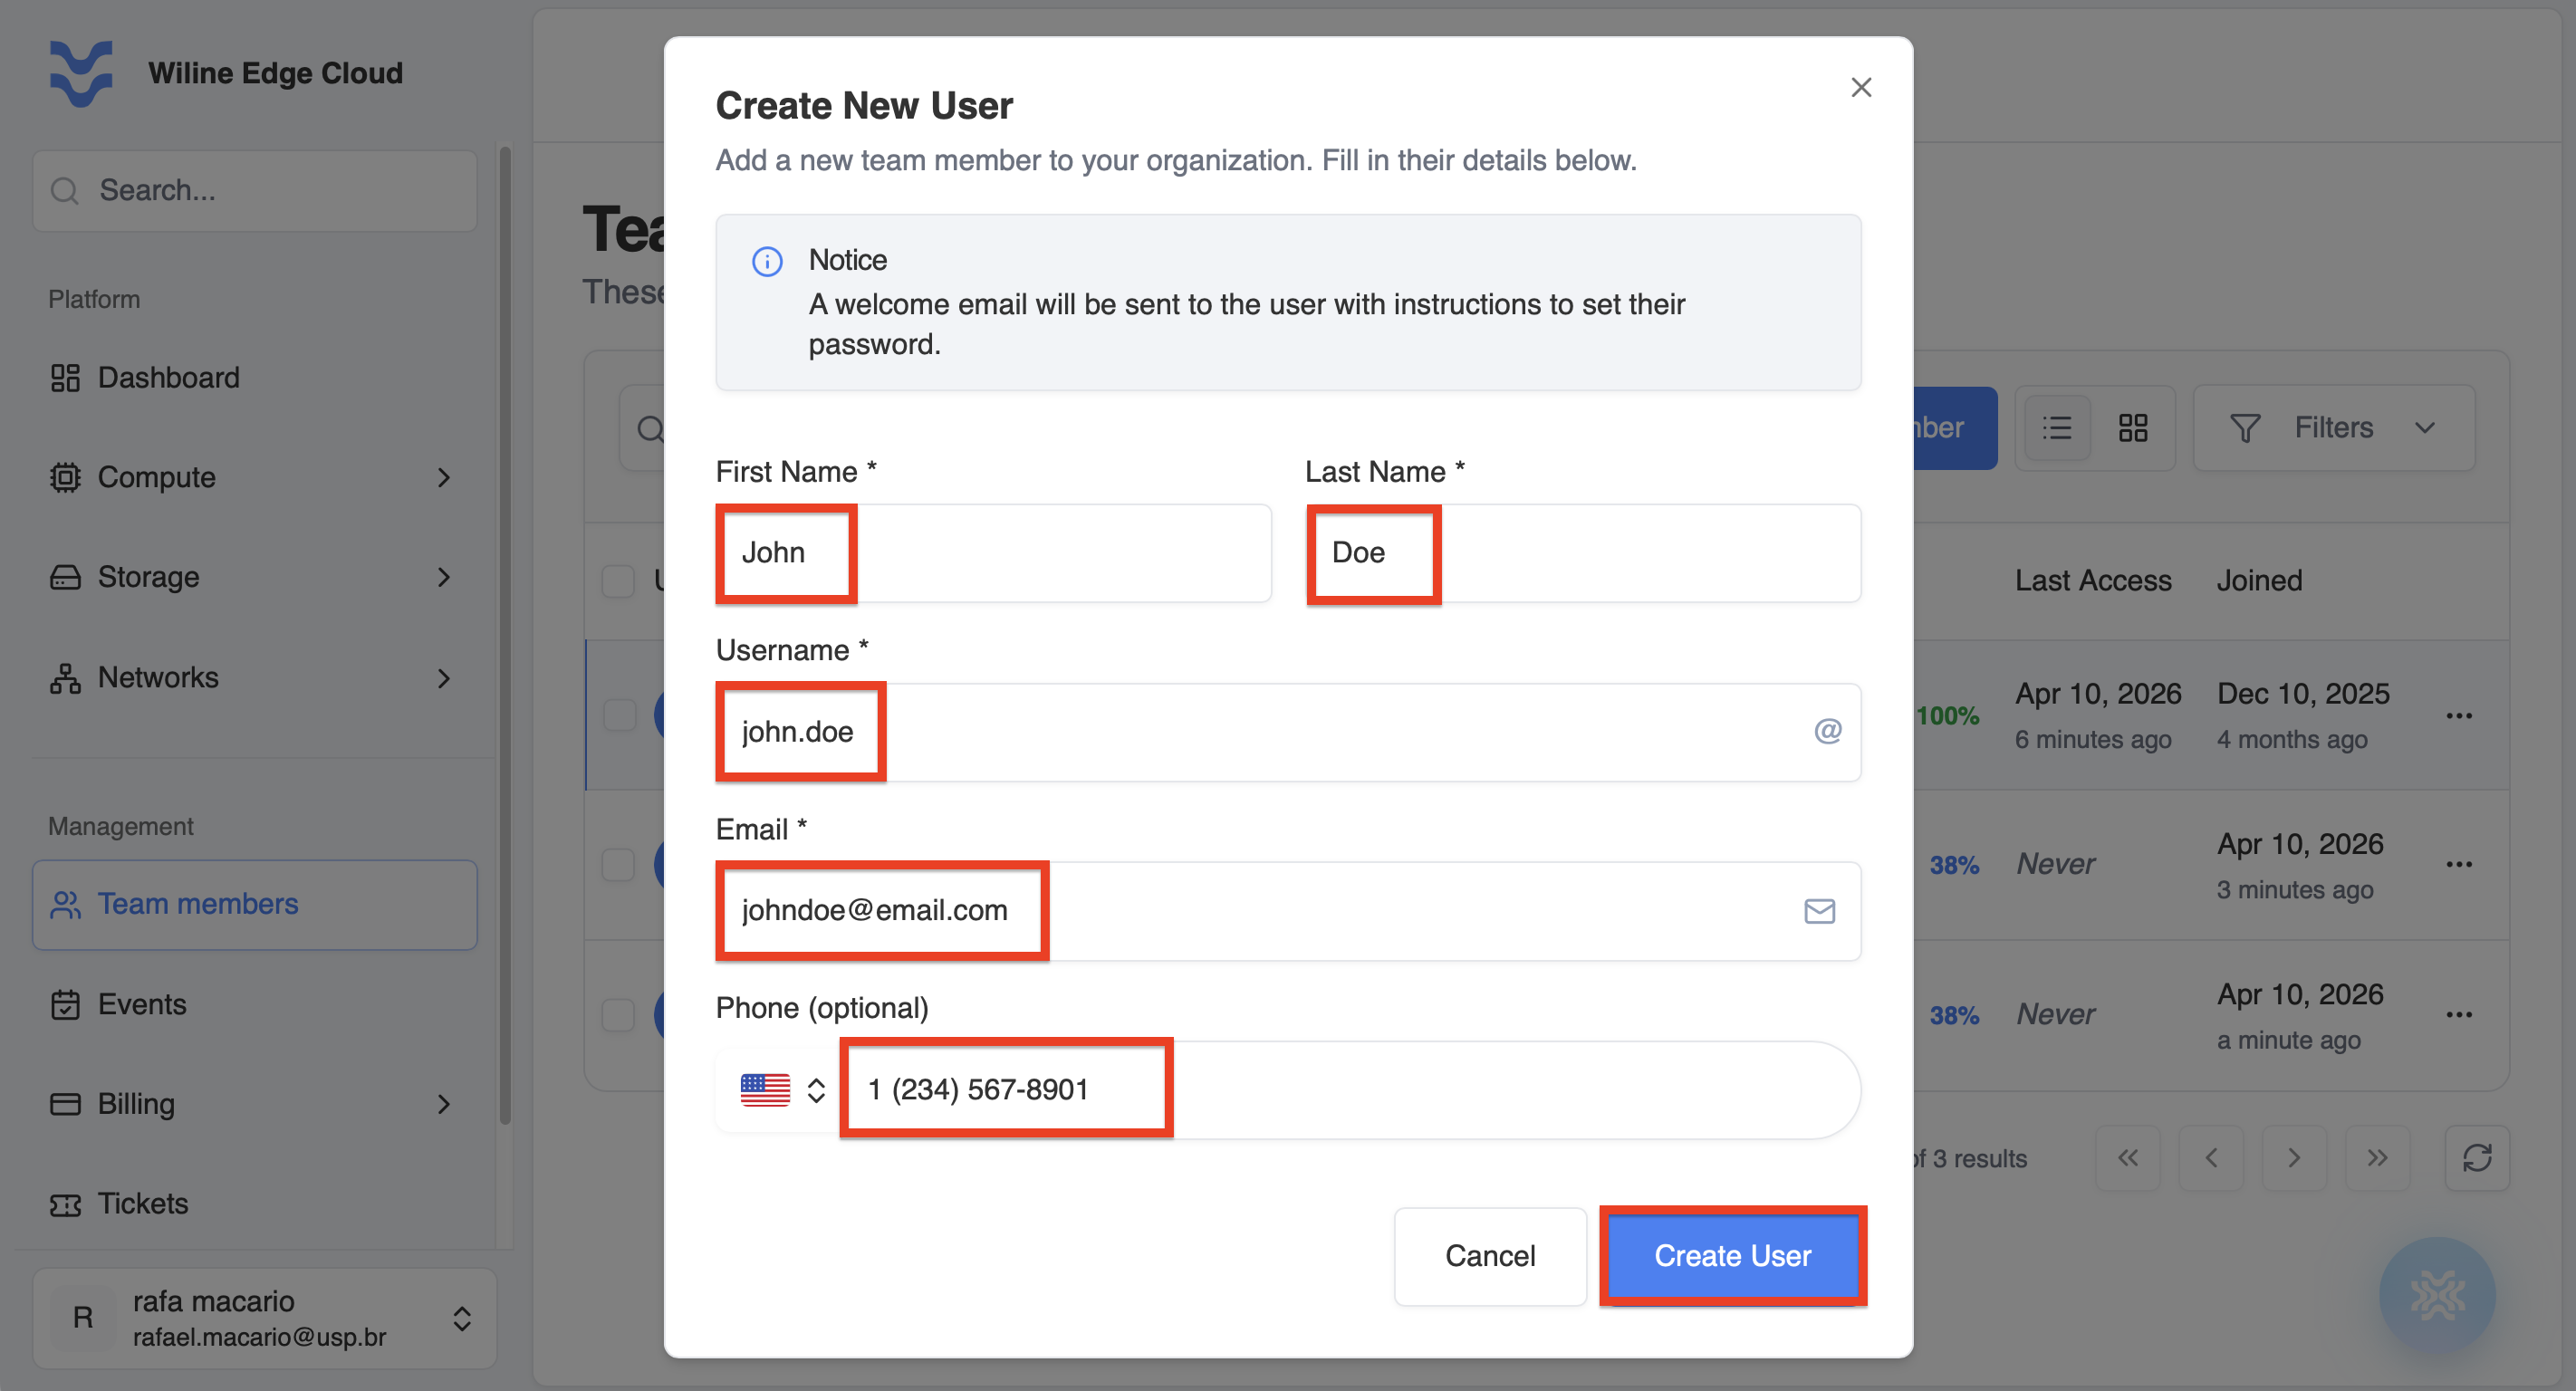 Figure 2: Add Member form for creating a new user.
:::note Username Generation
The username is automatically generated based on the user's first and last name.
- Example:
john.doe - You can modify the username before creating the user
This allows you to follow your organization's naming conventions if needed.
:::
Once the form is submitted:
- The user will receive an email invitation at the provided address
- The account is created and linked to your organization
:::important Email Invitation After adding a team member, an invitation email is sent to the provided address.
- The user must follow the instructions in the email to access the platform
- If the email is not received, check the spam or junk folder
- Ensure the email address was entered correctly
Without completing this step, the user will not be able to log in. :::
Manage Existing Users
To manage an existing user:
- Locate the user in the table
- (Optional) Use the search bar or filters to find the user
- Click the in the Actions column
- Select the desired action (View profile, Copy details, or Remove)
In each row, clicking the icon opens the User Actions menu:
Figure 3: Actions menu for managing a team member.
Use this menu to perform actions on a specific user.
Available actions include:
- View profile — open user details
- Copy user ID — copy unique identifier
- Copy email — copy user email address
- Remove — remove user from the organization
Available actions may vary depending on user permissions and roles.
:::warning Remove User
Removing a user will revoke their access to the organization.
- This action may be restricted for certain roles (e.g., Admin)
- Ensure the user no longer requires access before removing
:::
Key Benefits
Managing team members allows you to:
- Control user access and permissions
- Monitor activity and usage
- Maintain organizational security
- Scale your team efficiently
Next Steps
- Assign roles and permissions based on responsibilities
- Regularly review user access
- Add or update team members as your organization grows